Secure Audit Log
You can review the overview section for the Audit service or jump right in by following these steps to enable it:
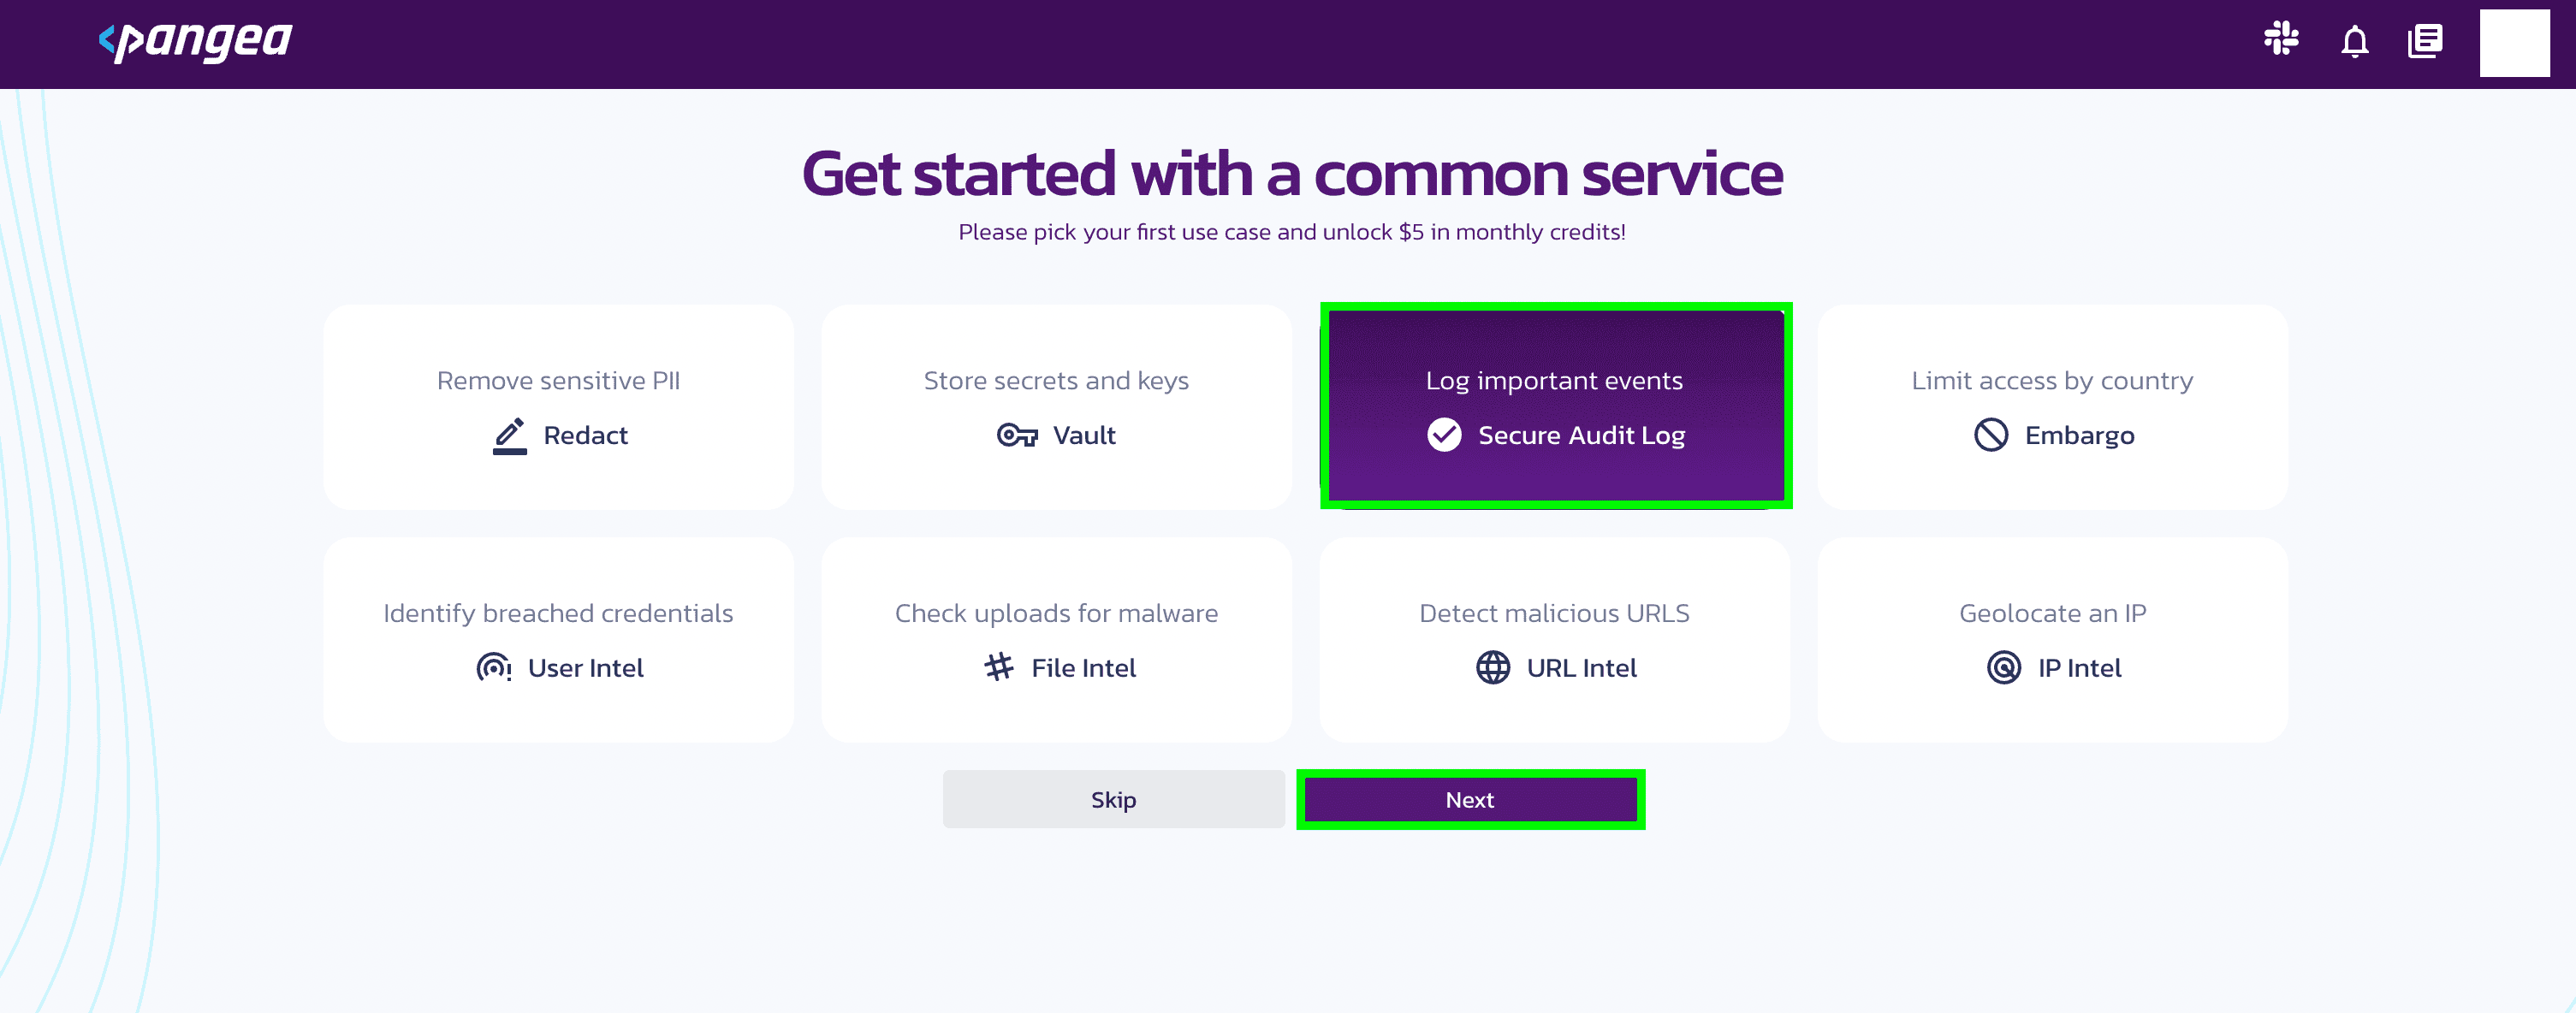
Access the Secure Audit Log
Use one of the following options to access the Secure Audit log service.
-
Use the Pangea Console :
- Open the Pangea Console .
- Look for the Secure Audit Log option.
- Click on it to make the selection.
-
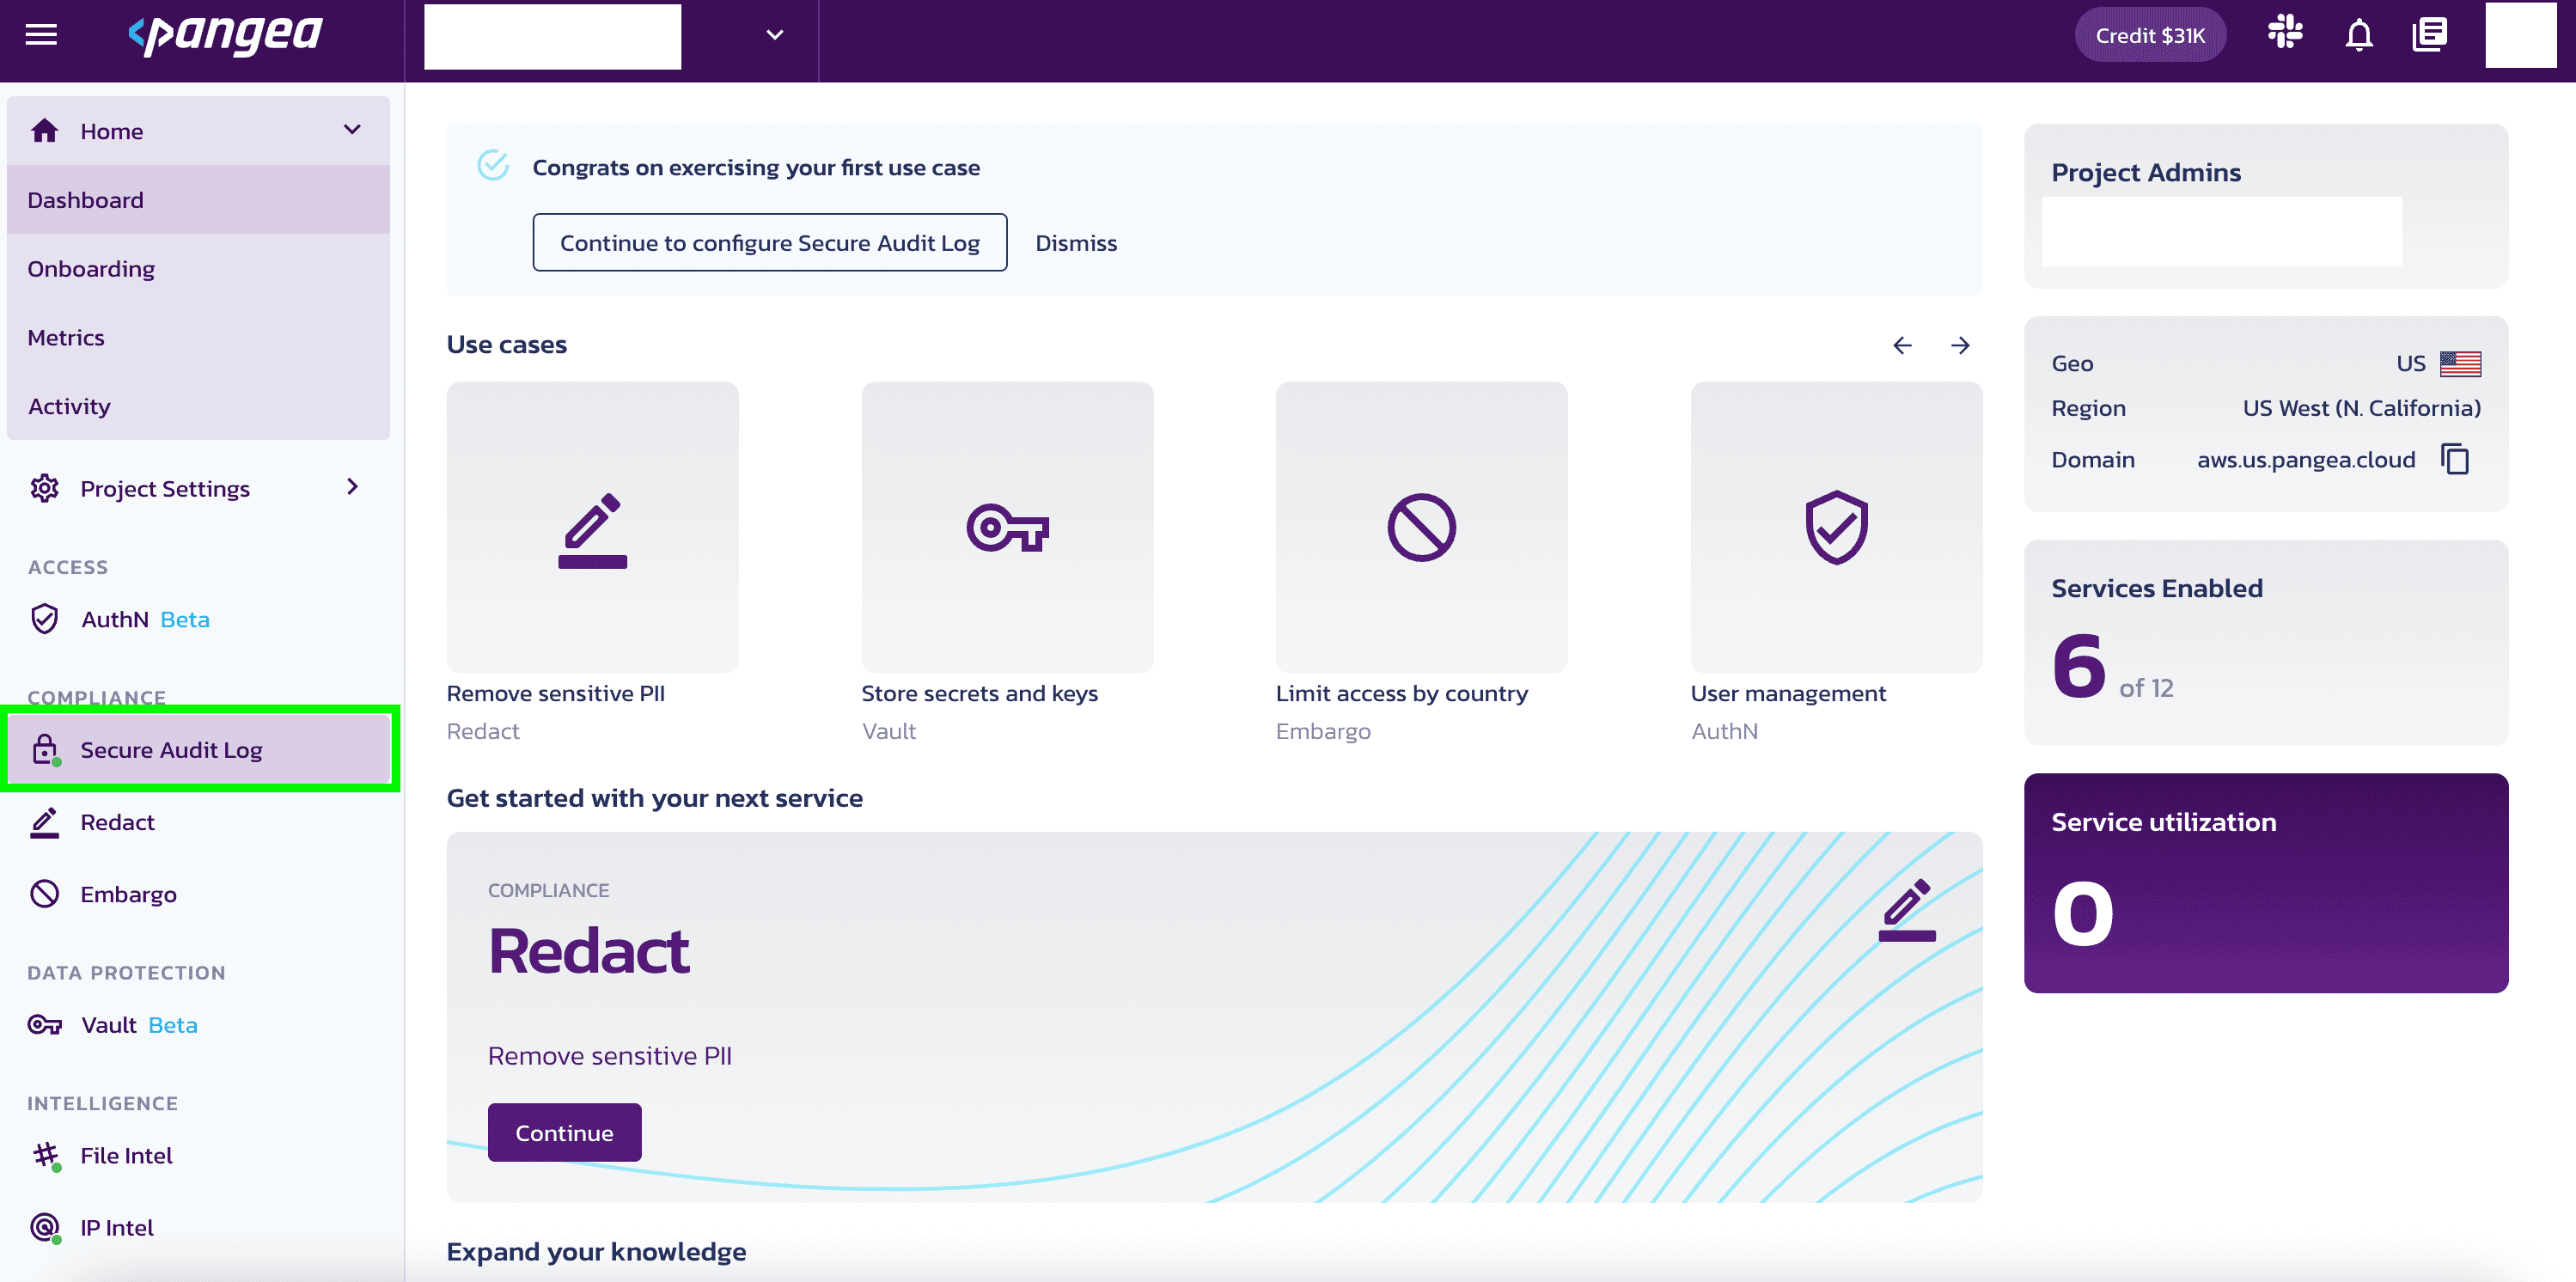
Use the left-hand panel
- Locate the left-hand panel in the Pangea Console .
- Look for the Secure Audit Log option.
- Click on it to make the selection.
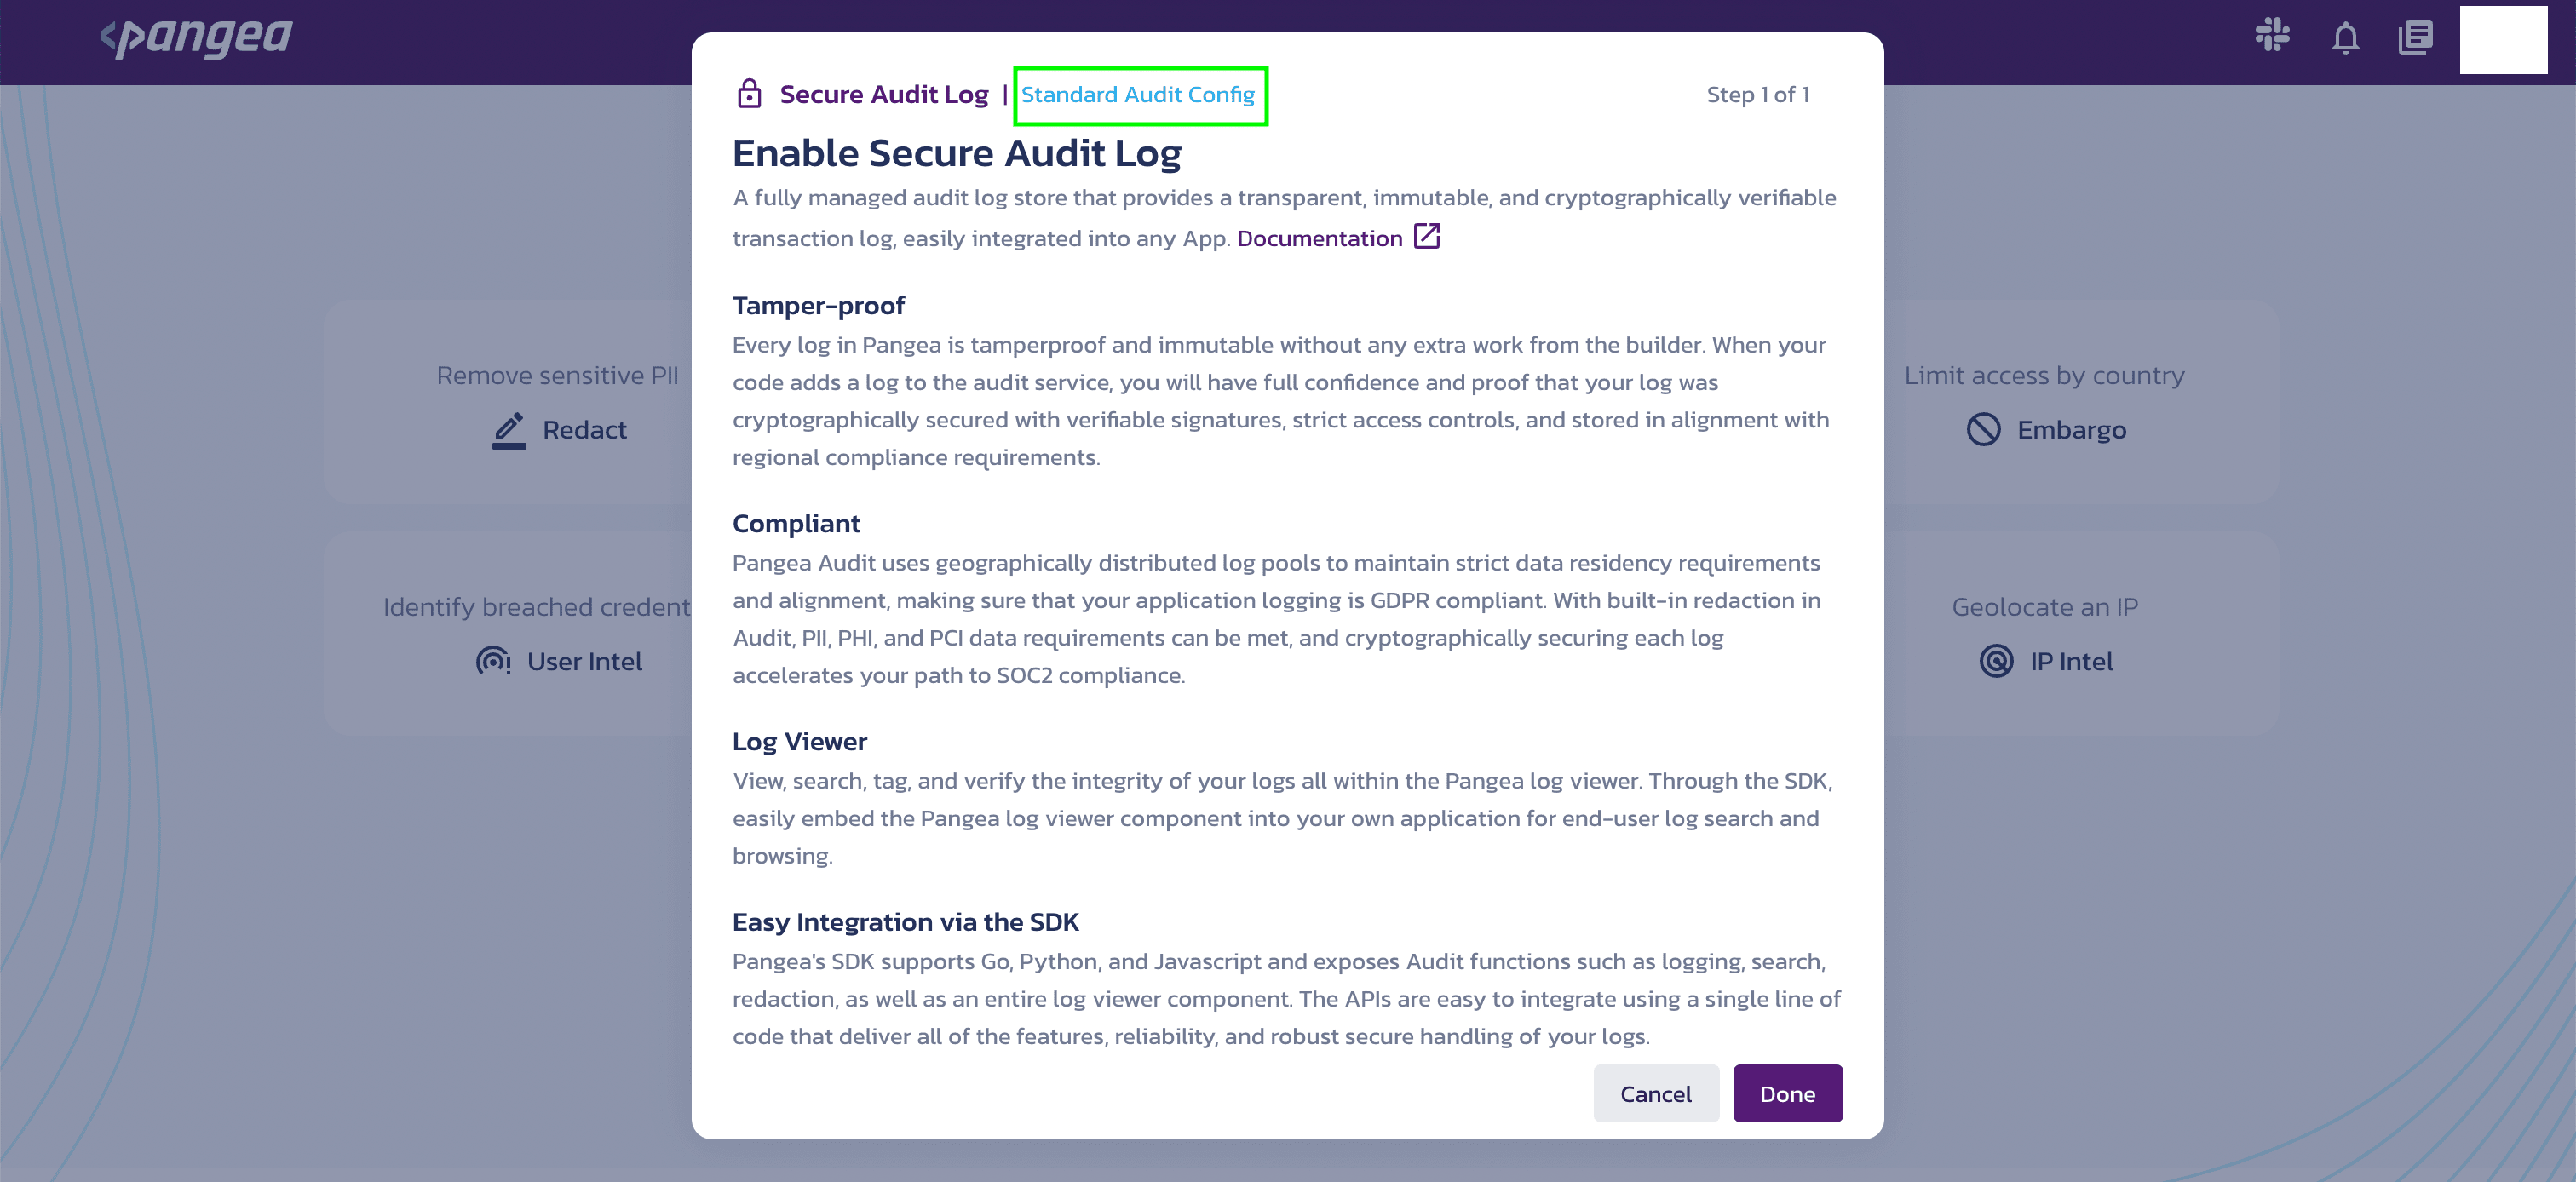
Enable the Service
Review the benefits of this service and select Done to continue.
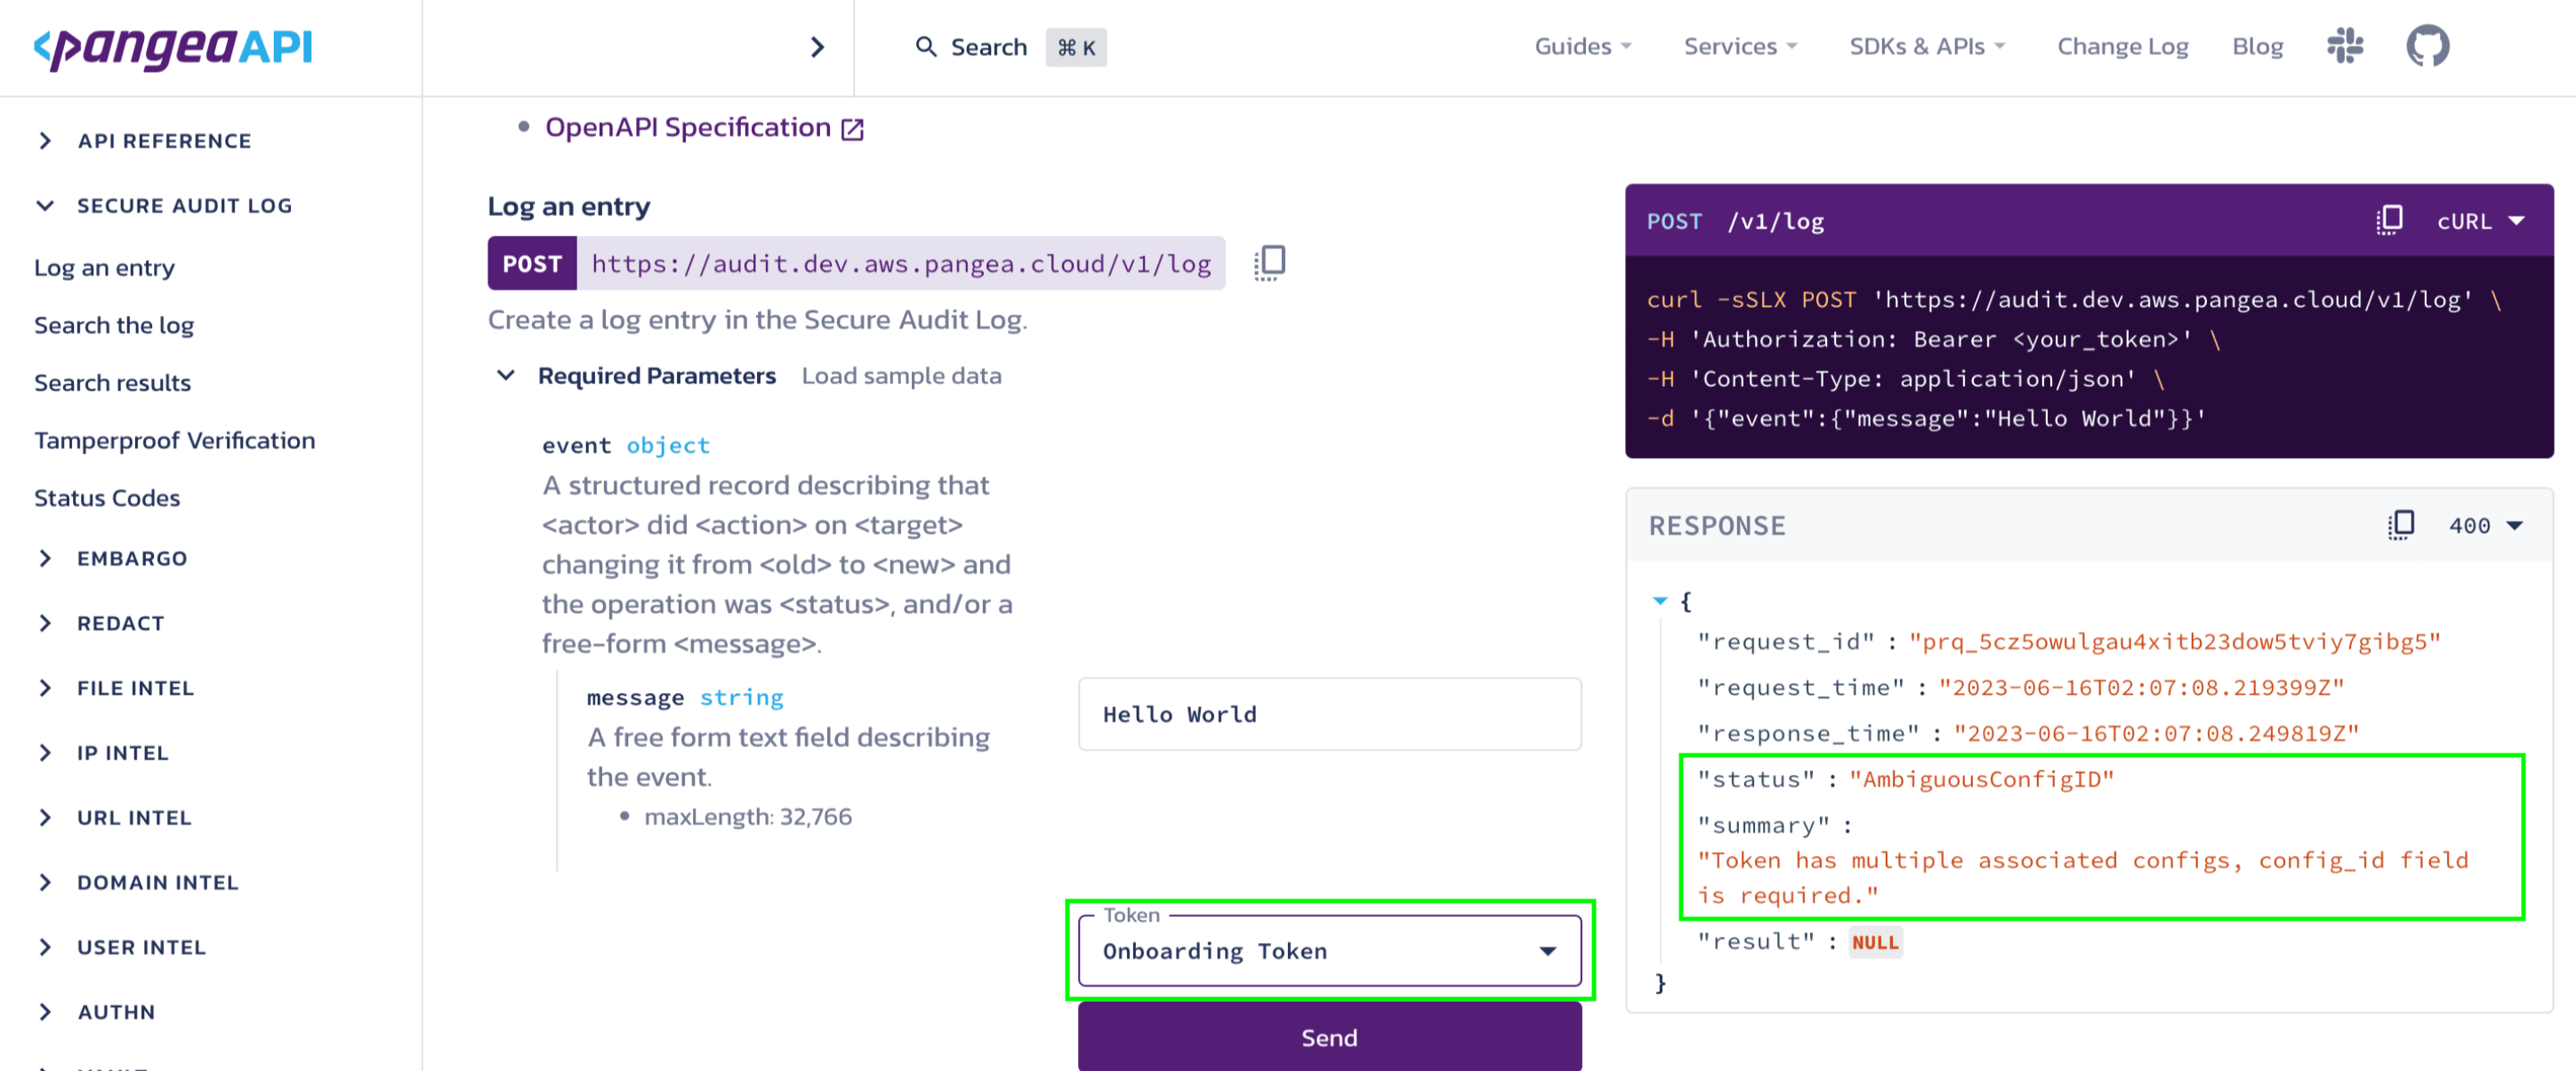
Execute your first API
Try out your first API by clicking Send.
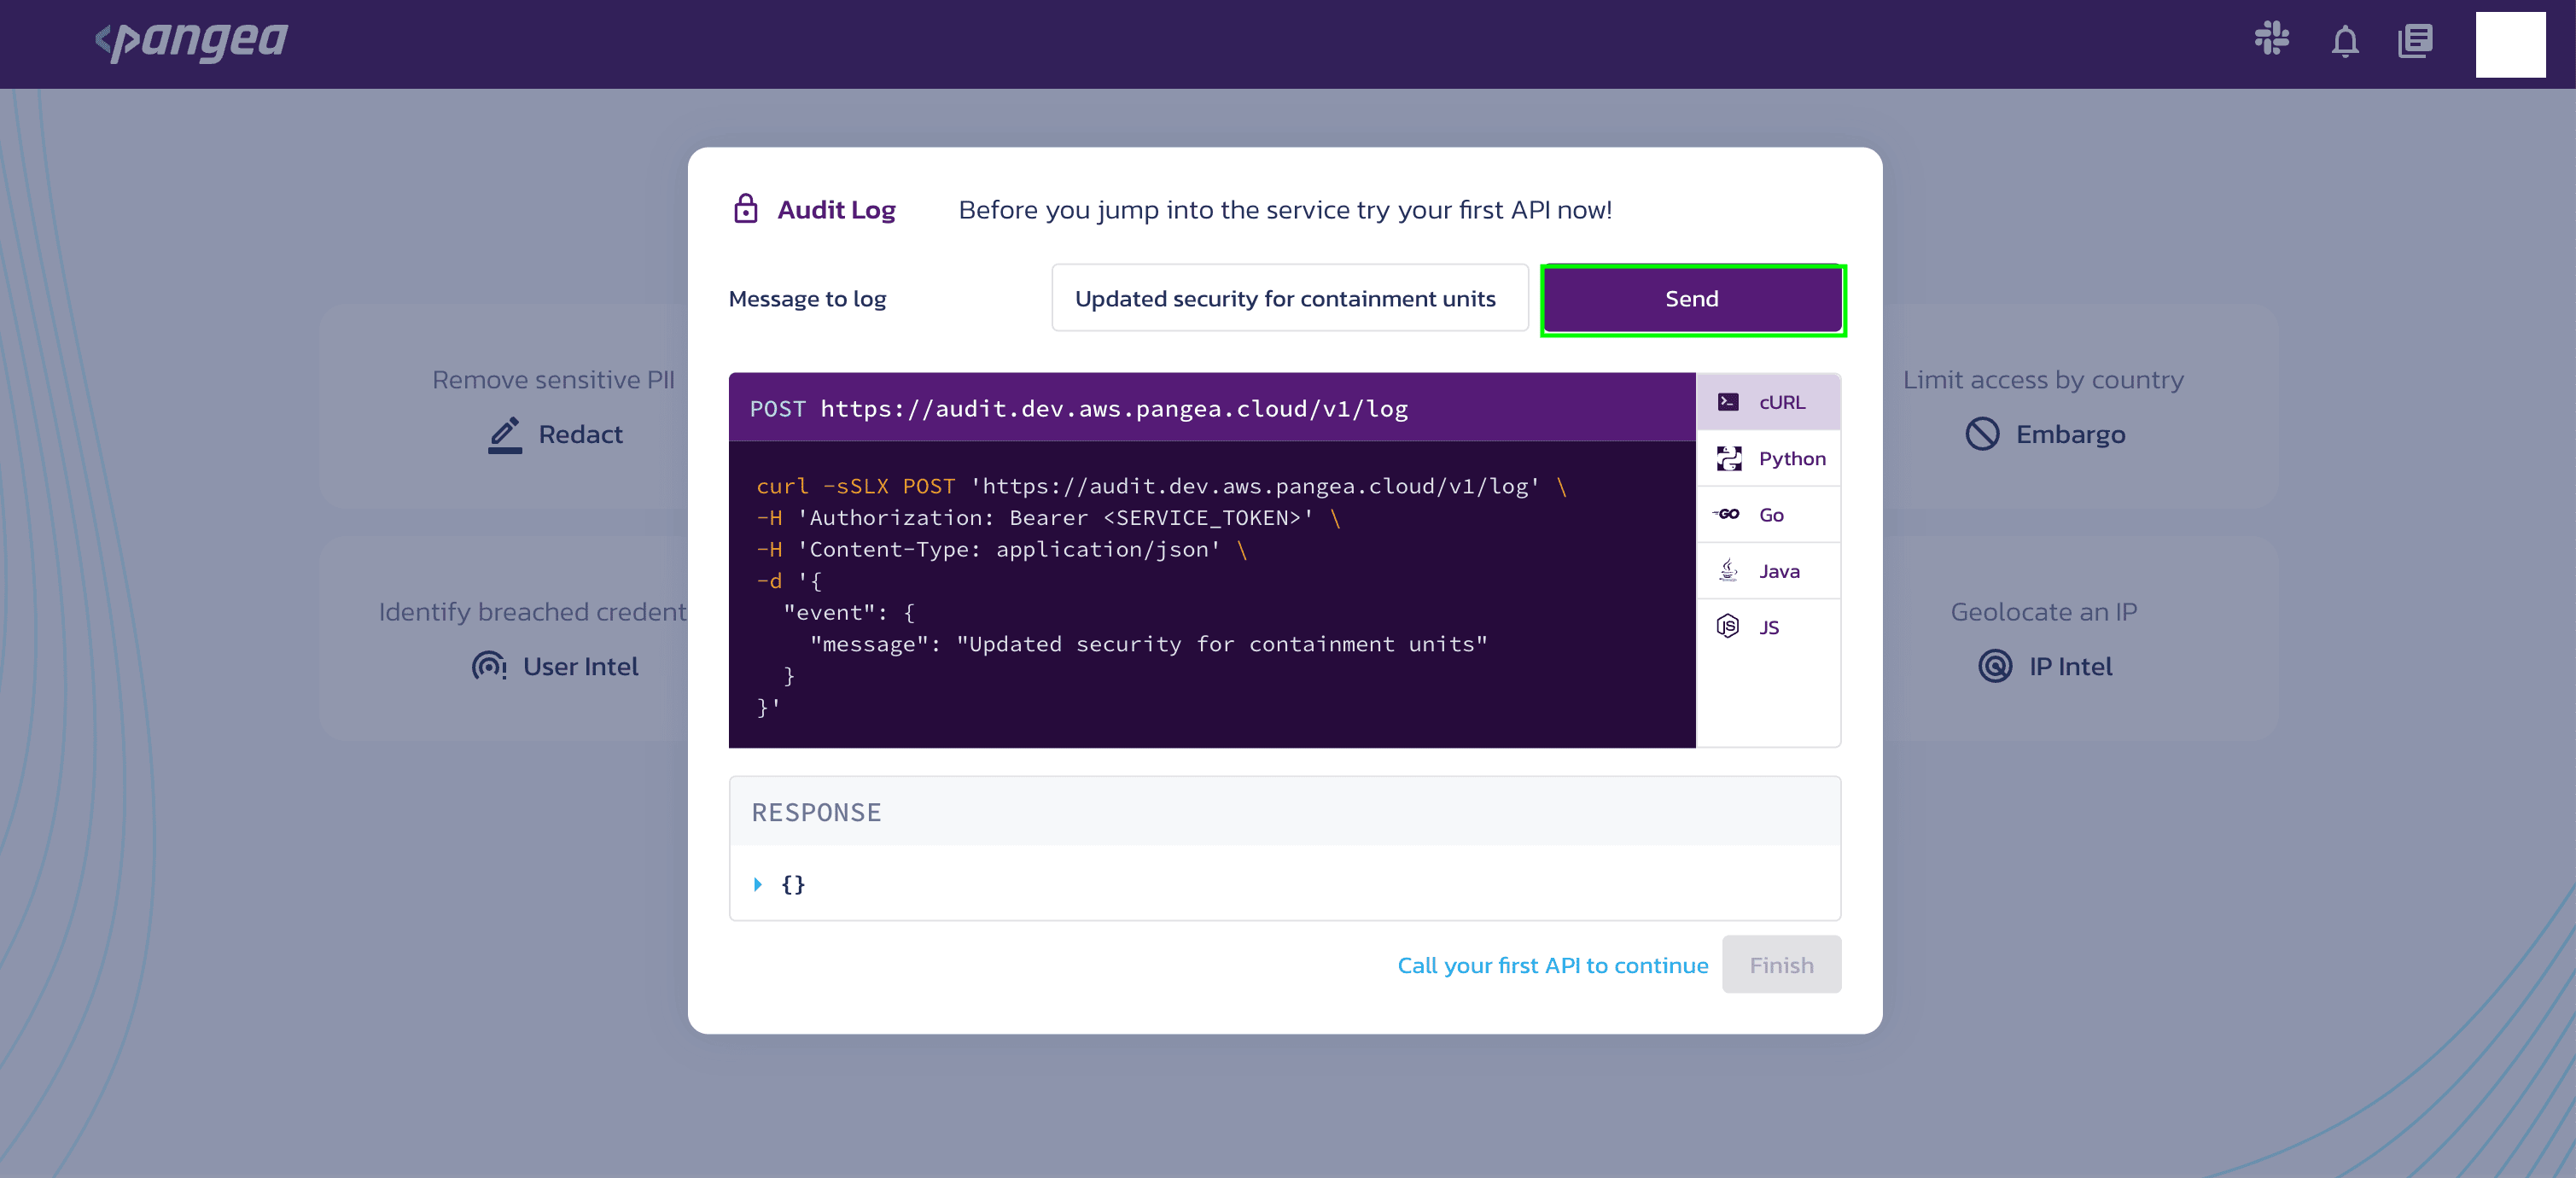
During this process, you can select the programming language of your choice to test your first API and then click finish.
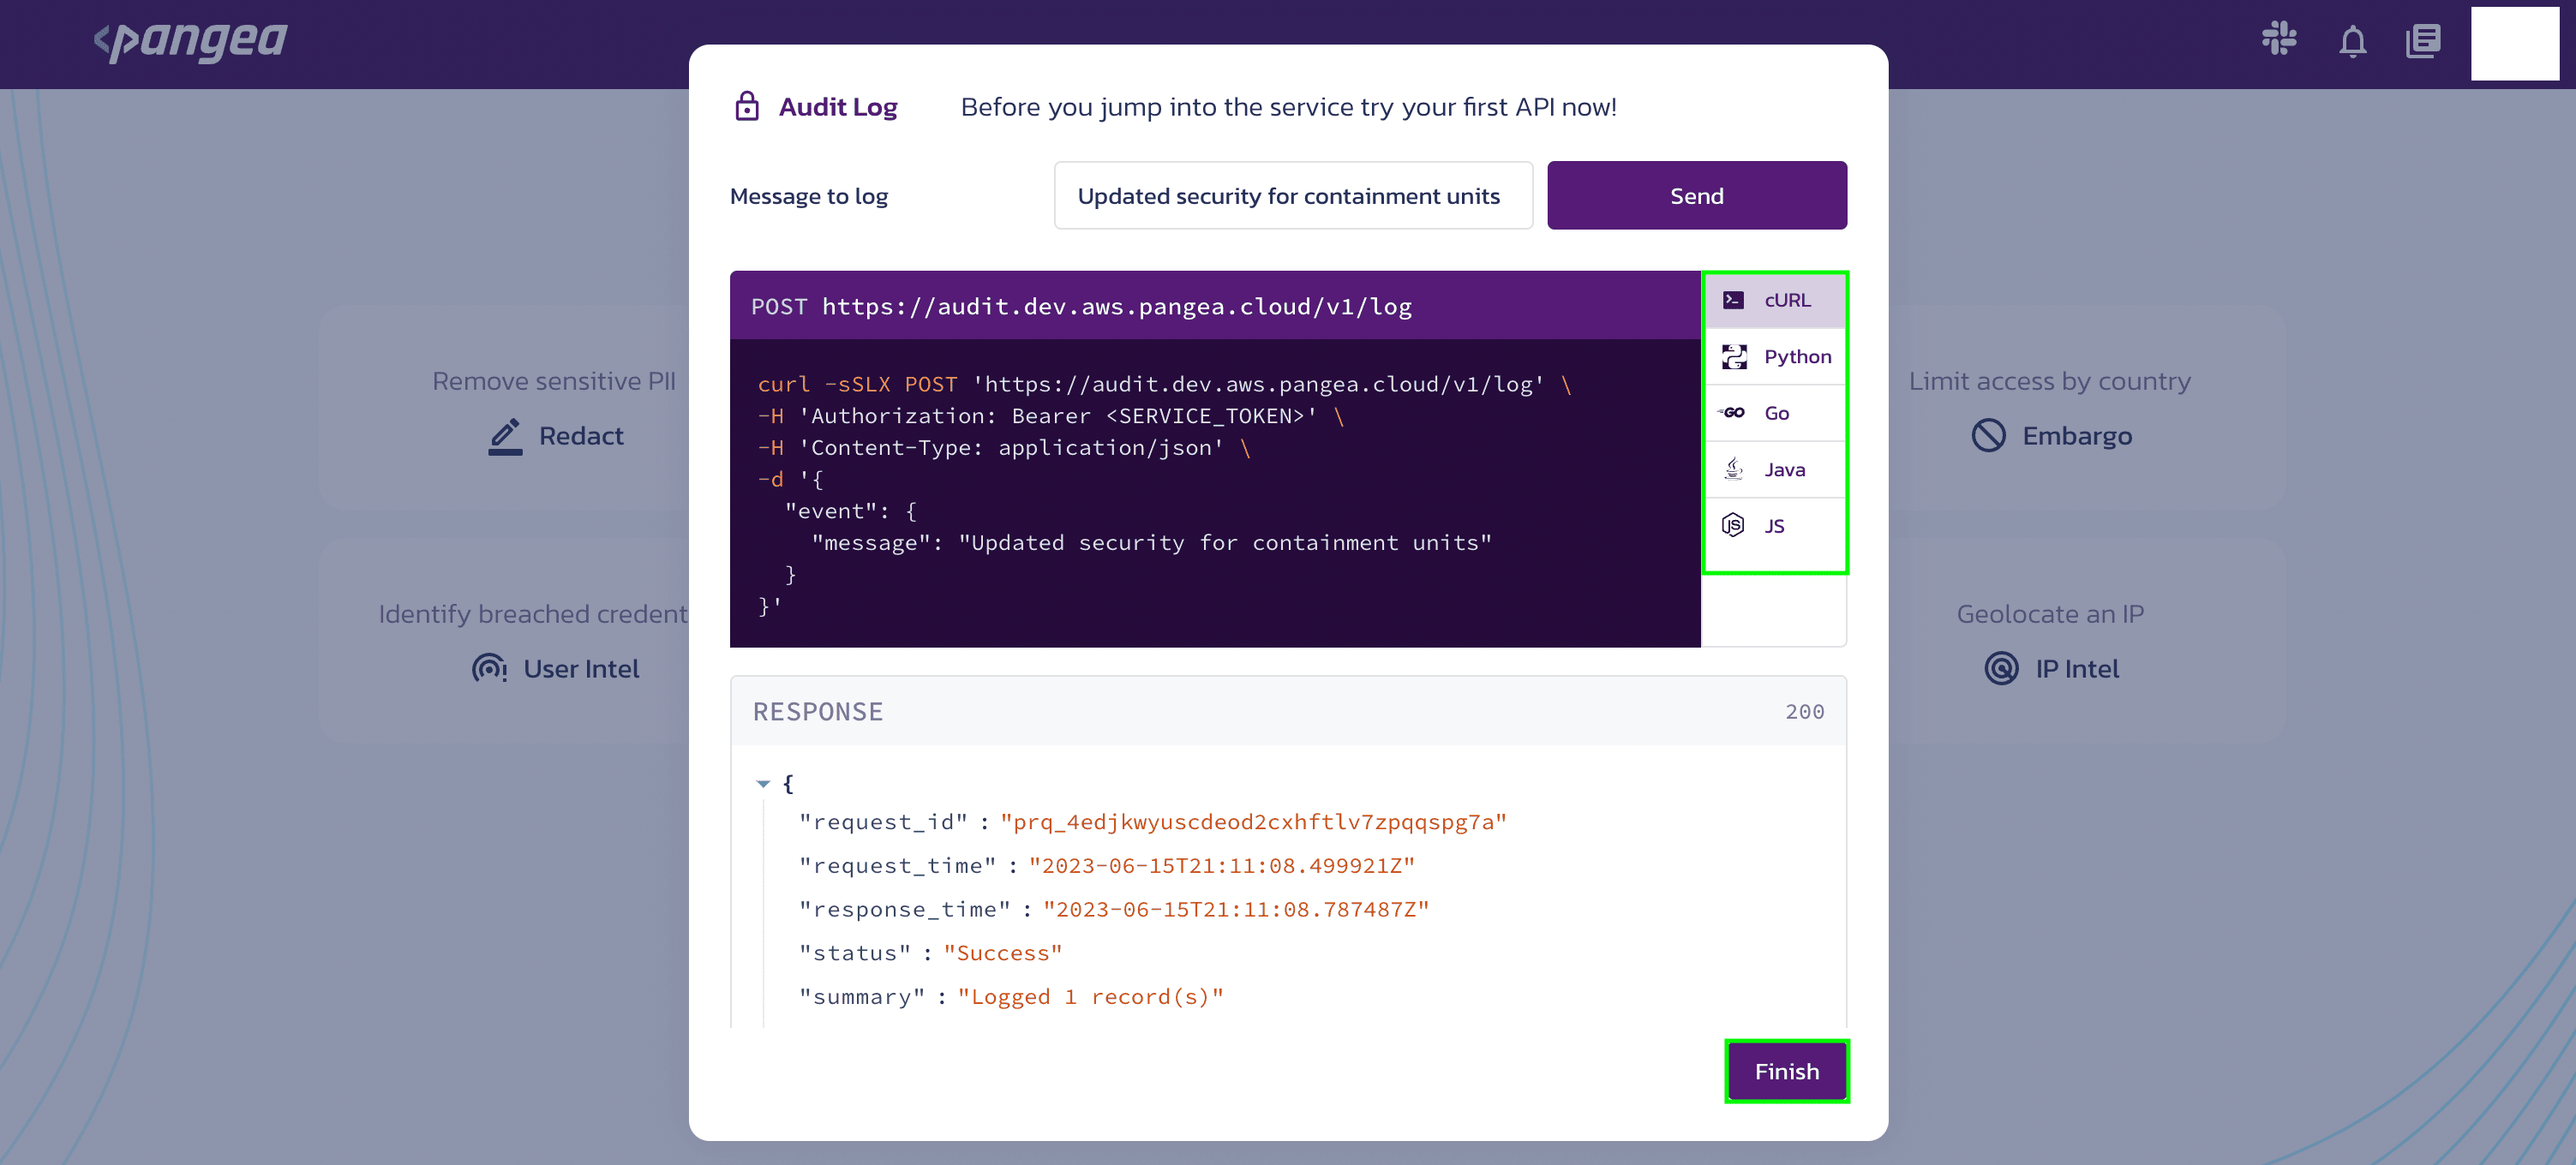
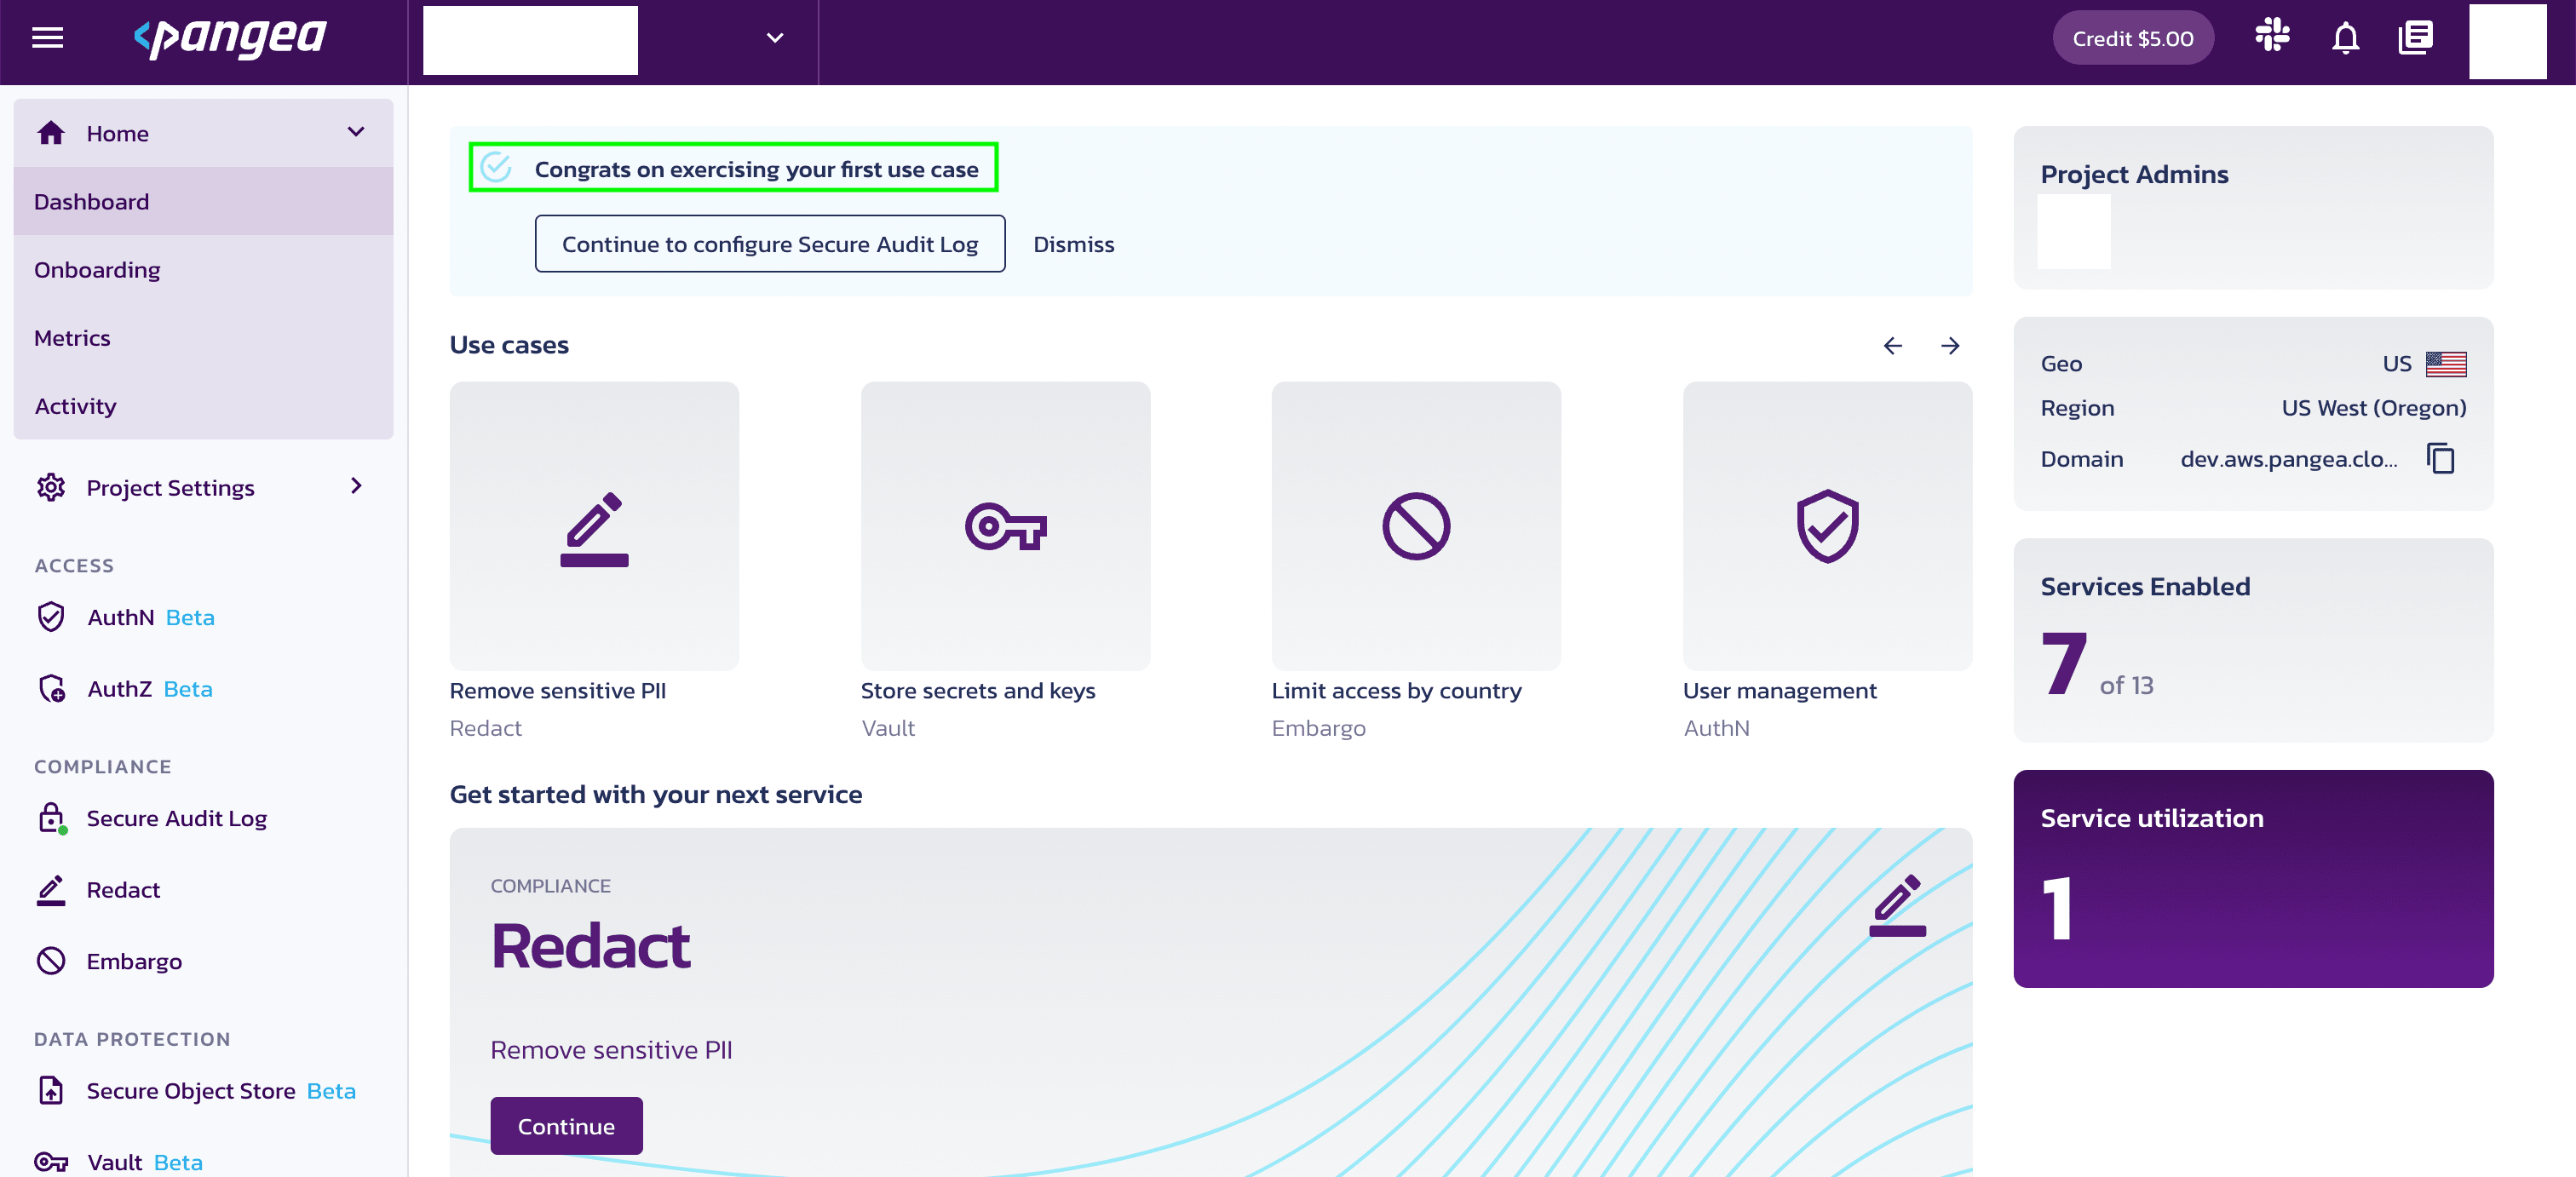
Now, you have successfully executed your first API.
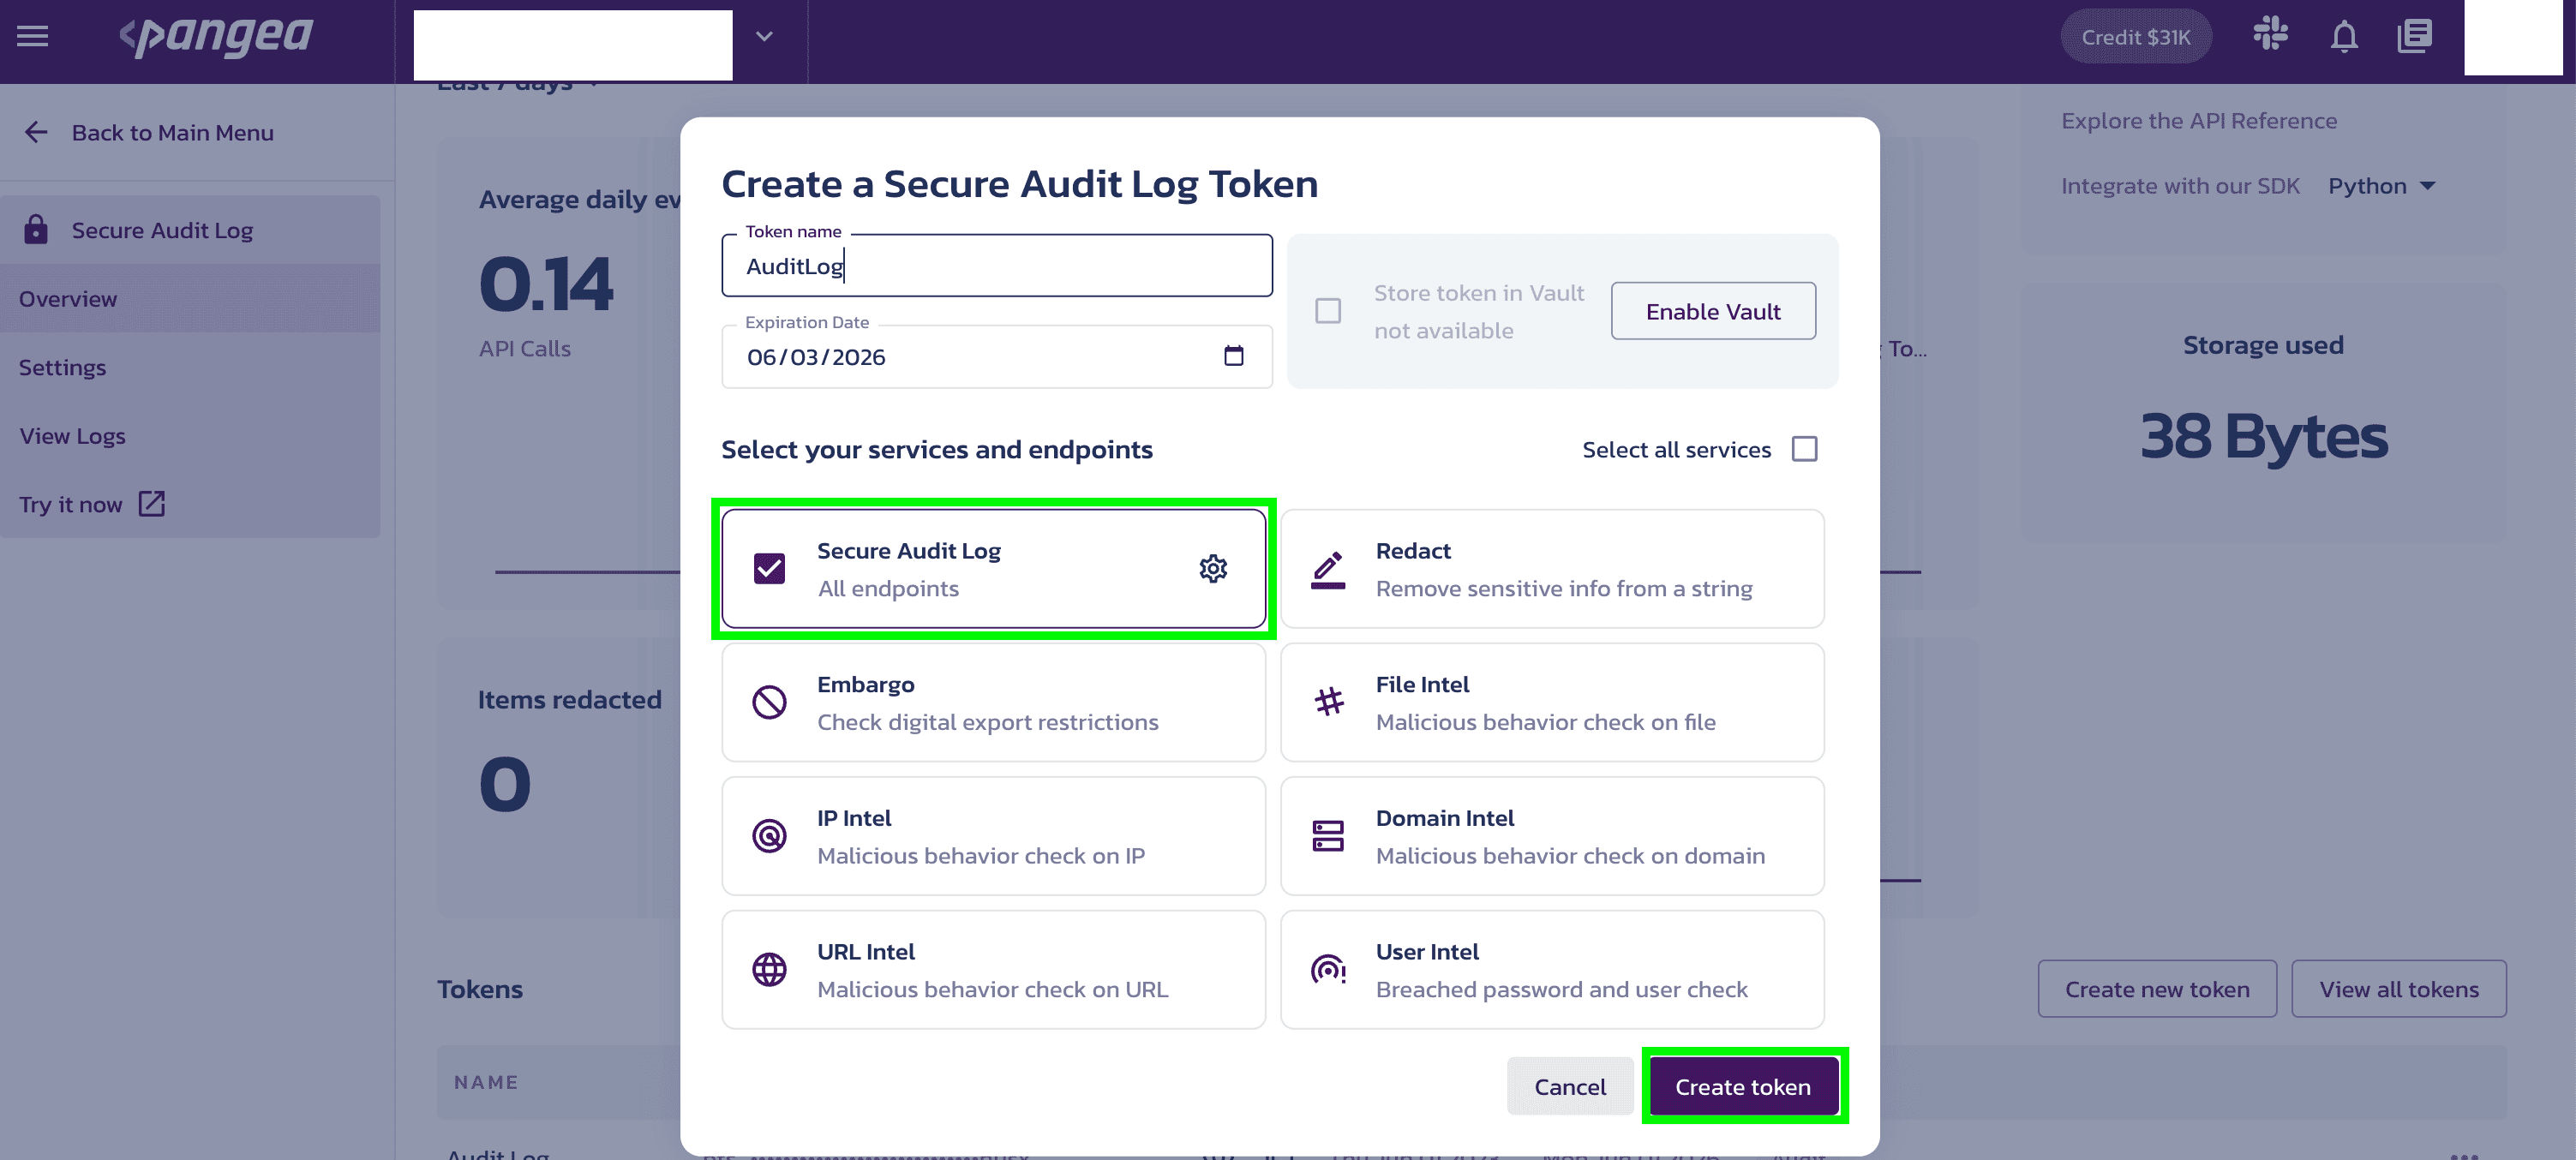
Create an access Token
On the Pangea Console , when enabling a service you can create a new token or extend an existing token using one of the following options:
- Click Project Settings >> Tokens >> Create.
OR
- Click Secure Audit Log >> Token
- Create a new token: Greater partitioning of access to the services
- Extend an existing token: Extending a token with “like” services will make chaining those services easier
Now, select a token name, expiration date, and token scope, or use the default values by selecting Done.
For more information about this service, see the Secure Audit Log documentation in the dialog.
Tokens are used as bearer tokens to authenticate access to Pangea services. Tokens are provisioned per project and can be given scopes that provide access to each Pangea service individually. Pangea recommends limiting token scopes to only those required by the application using the tokens.
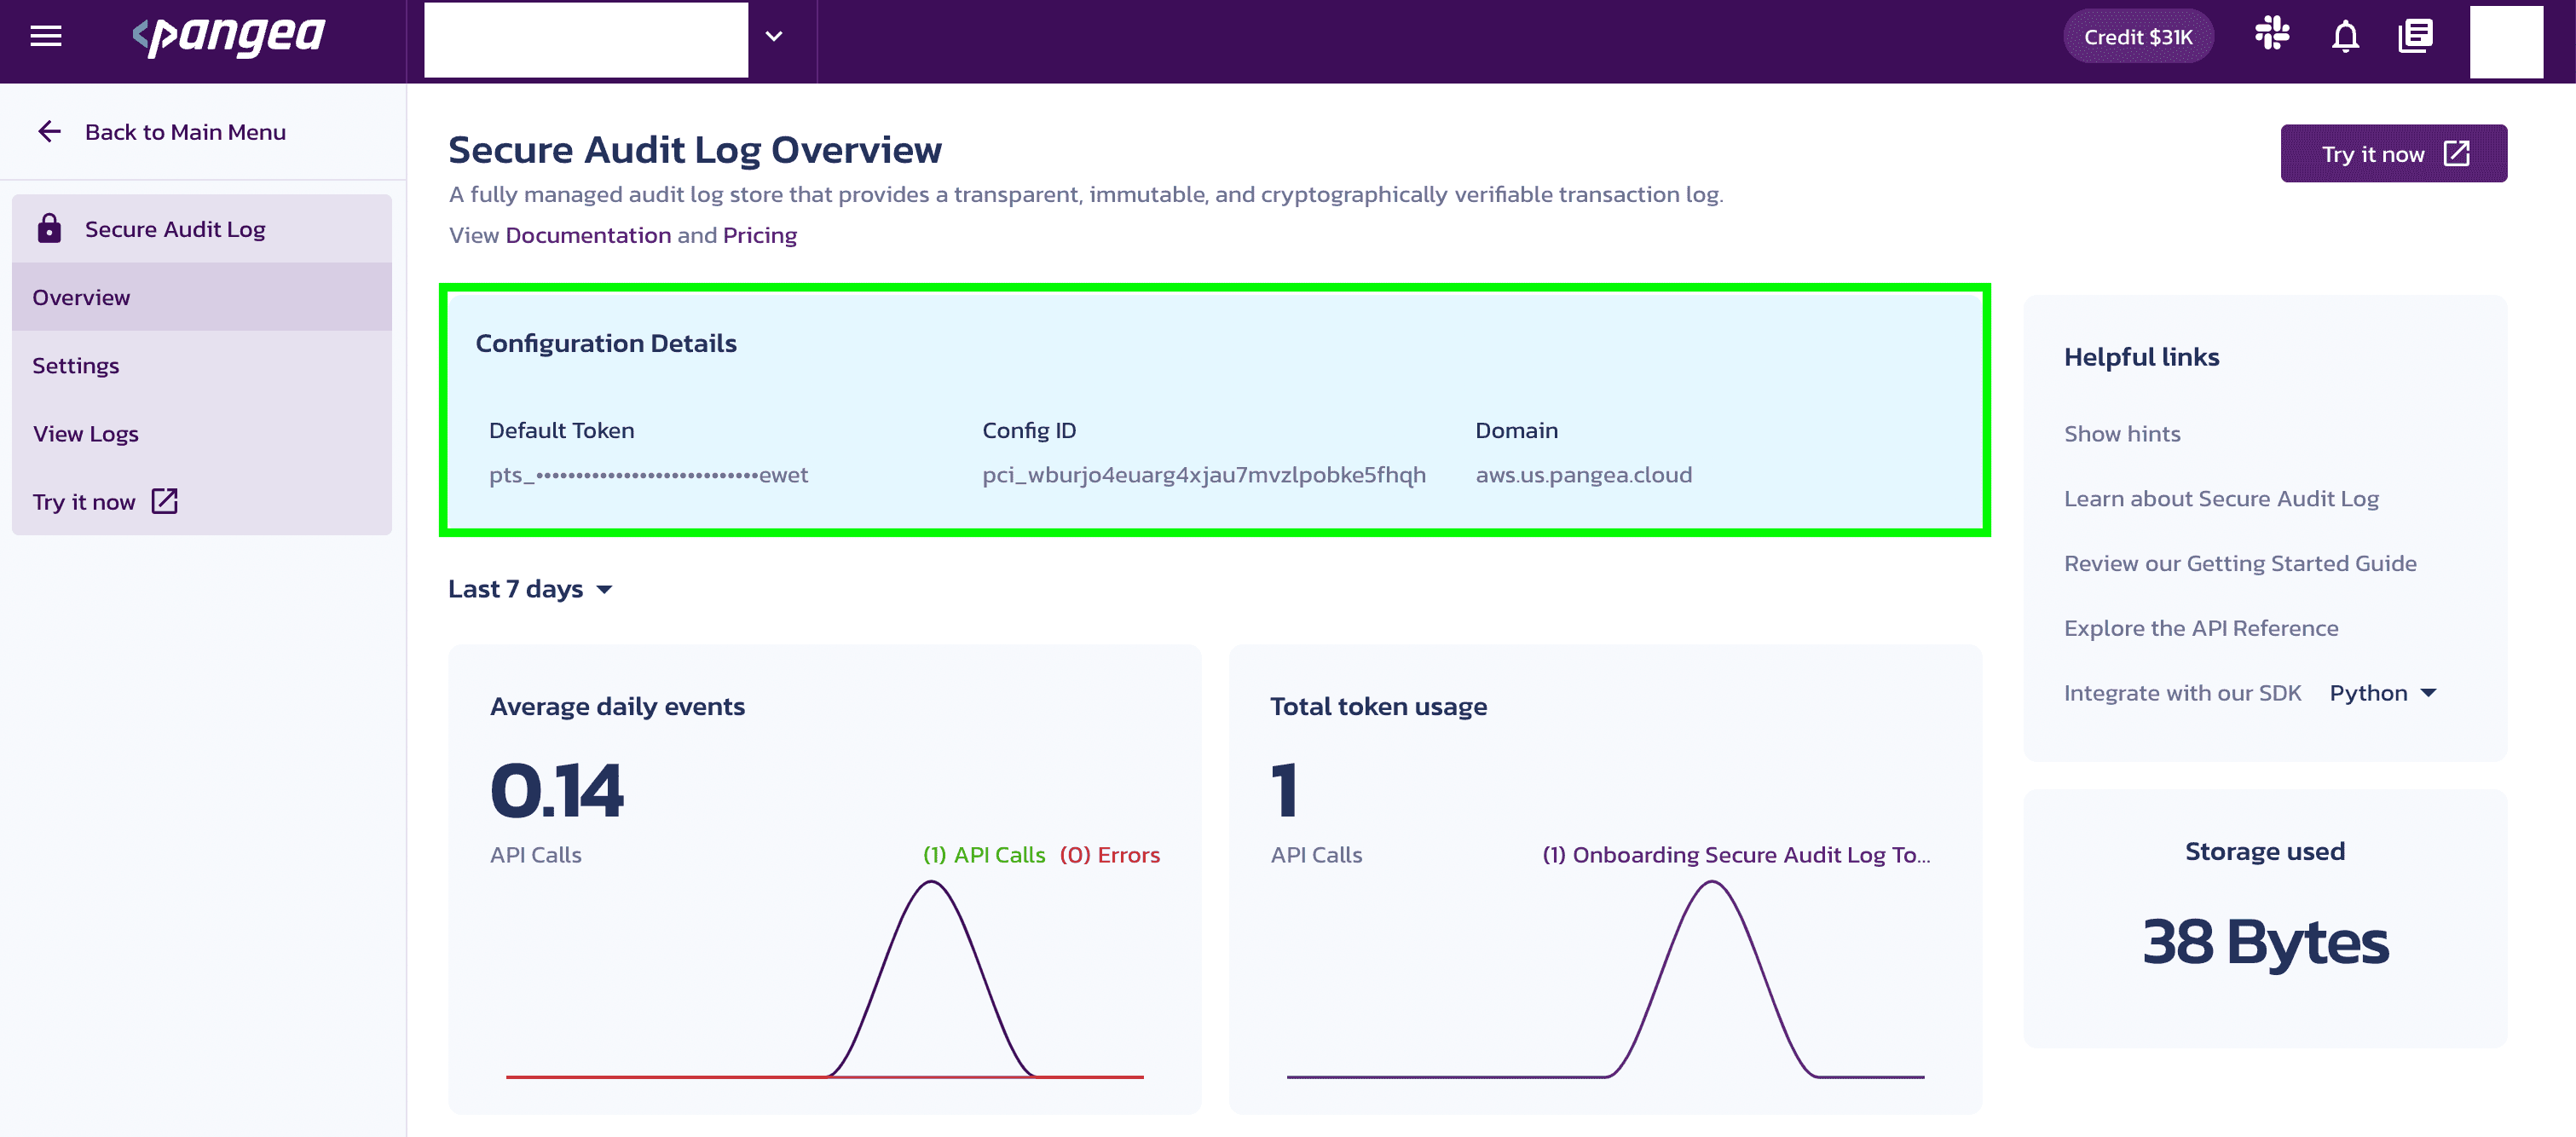
Copy the Domain and Token
Make a note of the service Domain, and access Token. You will use each of these values to interact with the service in the next step.
You can quickly copy each value to your system's clipboard using the ![]() shortcuts.
shortcuts.
Use the Multiple Configuration Settings
The multiple configuration feature in Secure Audit Log allows users to create and manage multiple configurations within a single project, offering enhanced customization and control over logging and auditing settings. With the multiple configuration feature, you can tailor the behavior of the Secure Audit Log service to different requirements and scenarios. This includes customizing log retention periods, log formats, access controls, and other pertinent settings. By accommodating multiple configurations in a single project, you can efficiently manage and switch between different logging configurations without the need to create additional projects. Therefore, the multiple configuration feature for the Secure Audit Log service provides you with flexibility, ease of use, and centralized control over logging configurations. It enables customization and management of different settings within a single project, empowering you to meet various logging and auditing requirements with efficiency and ease.
To set the multiple configurations:
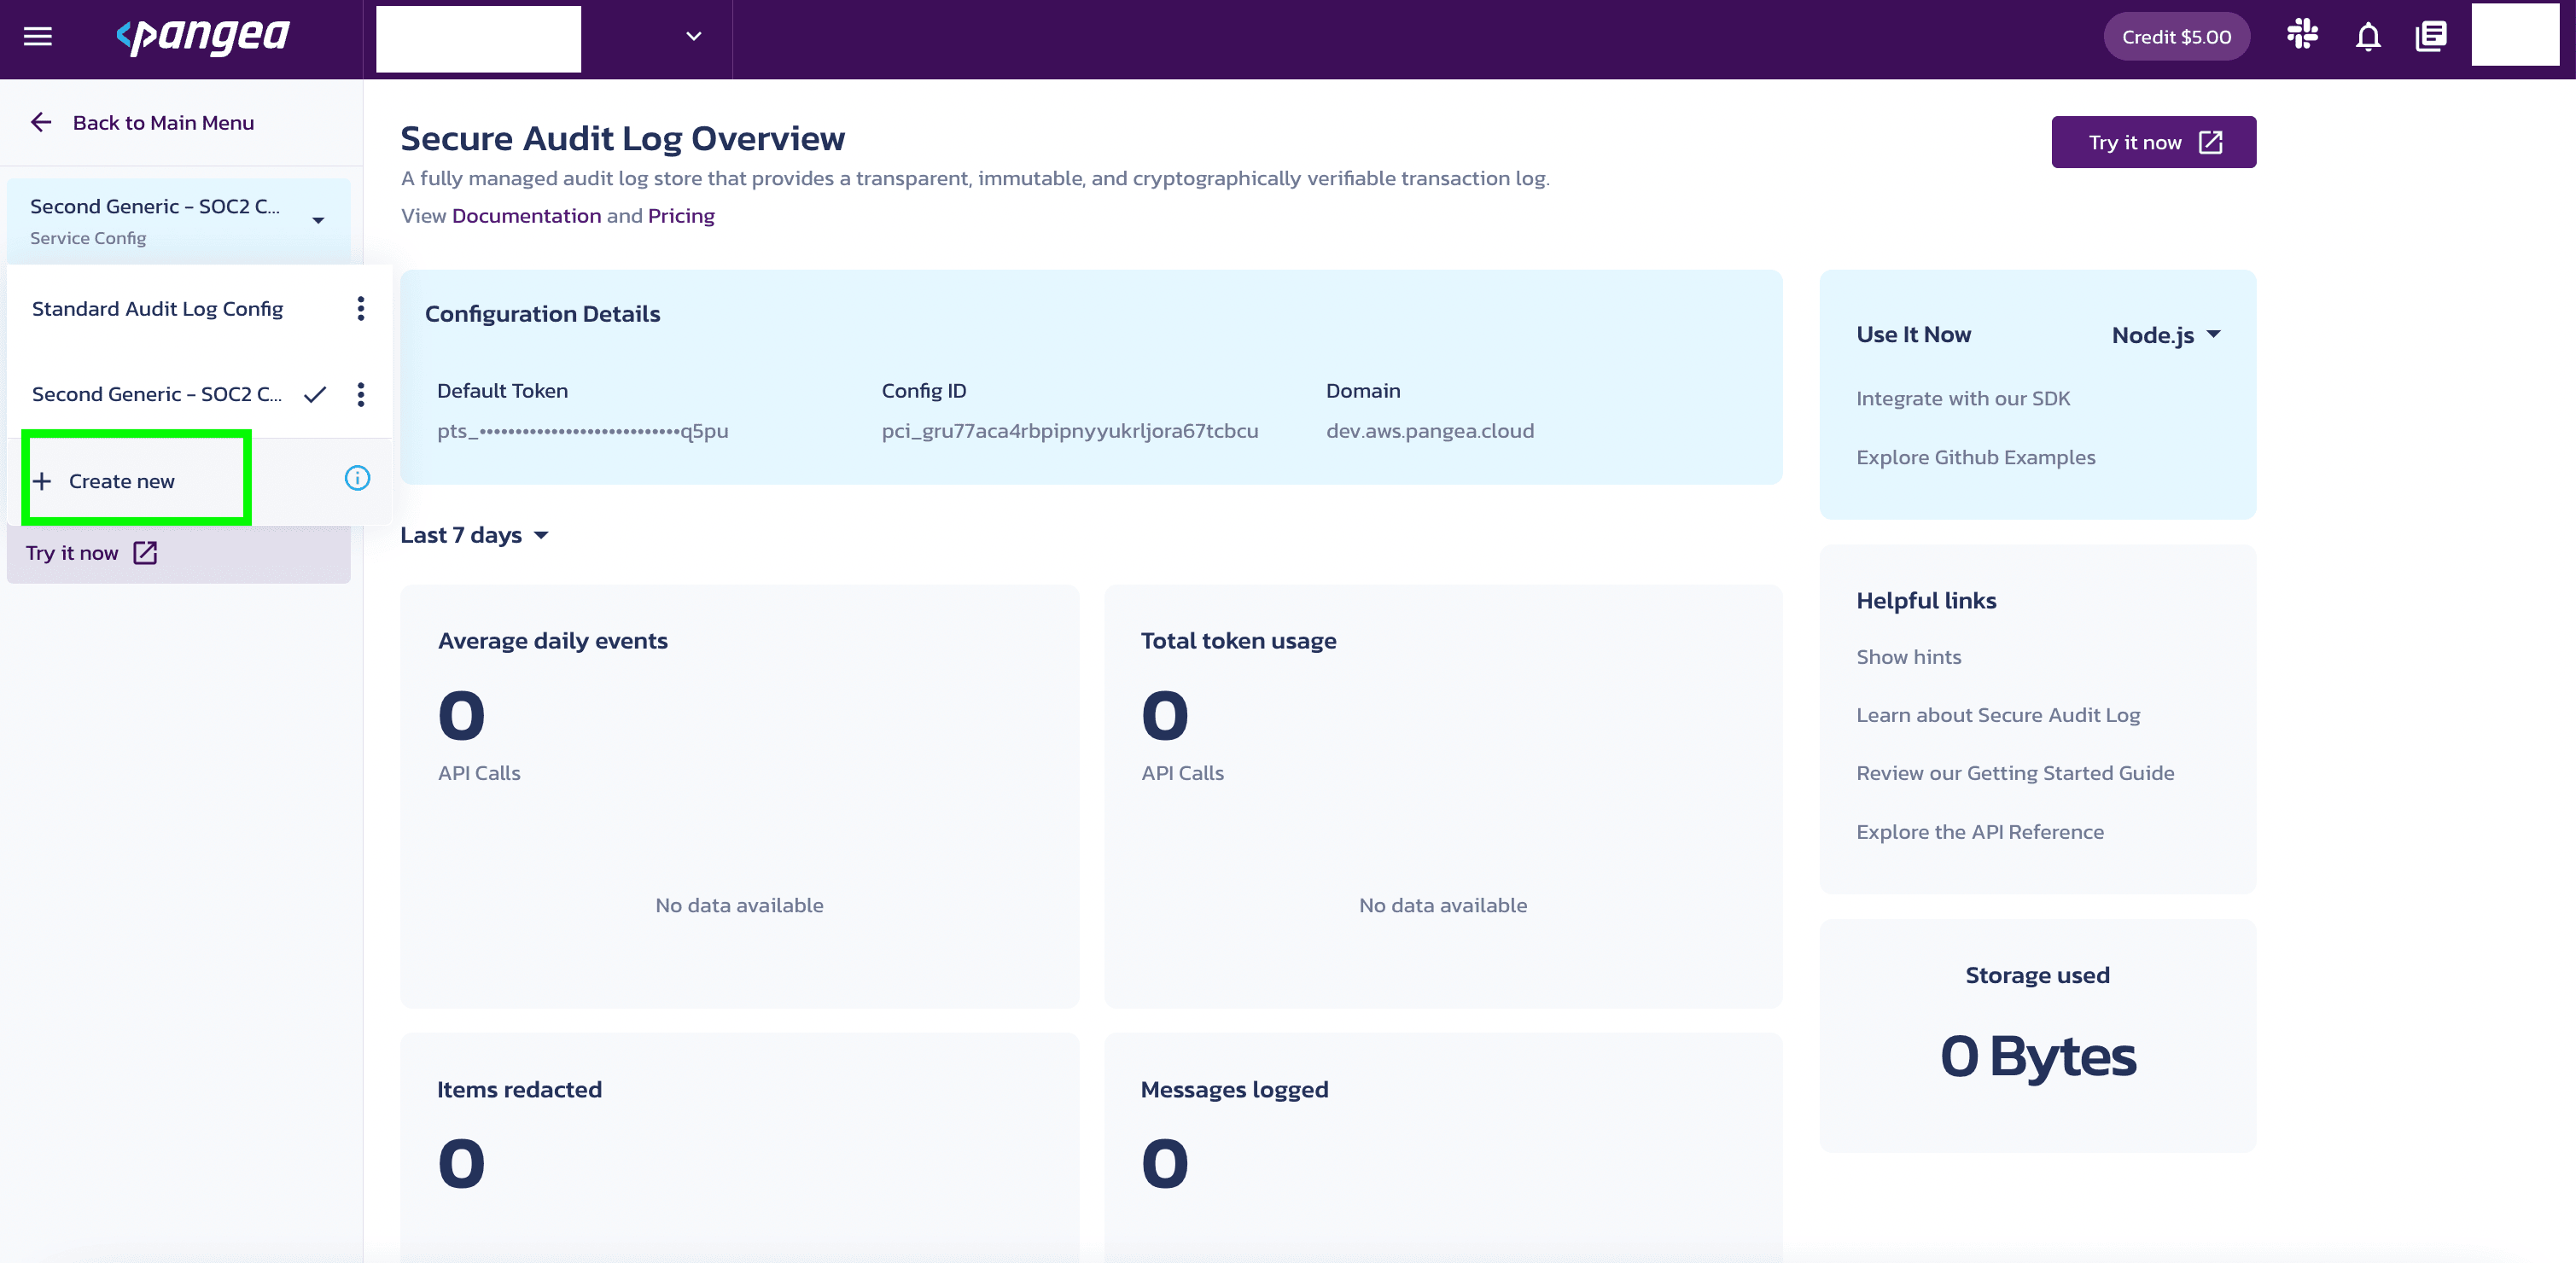
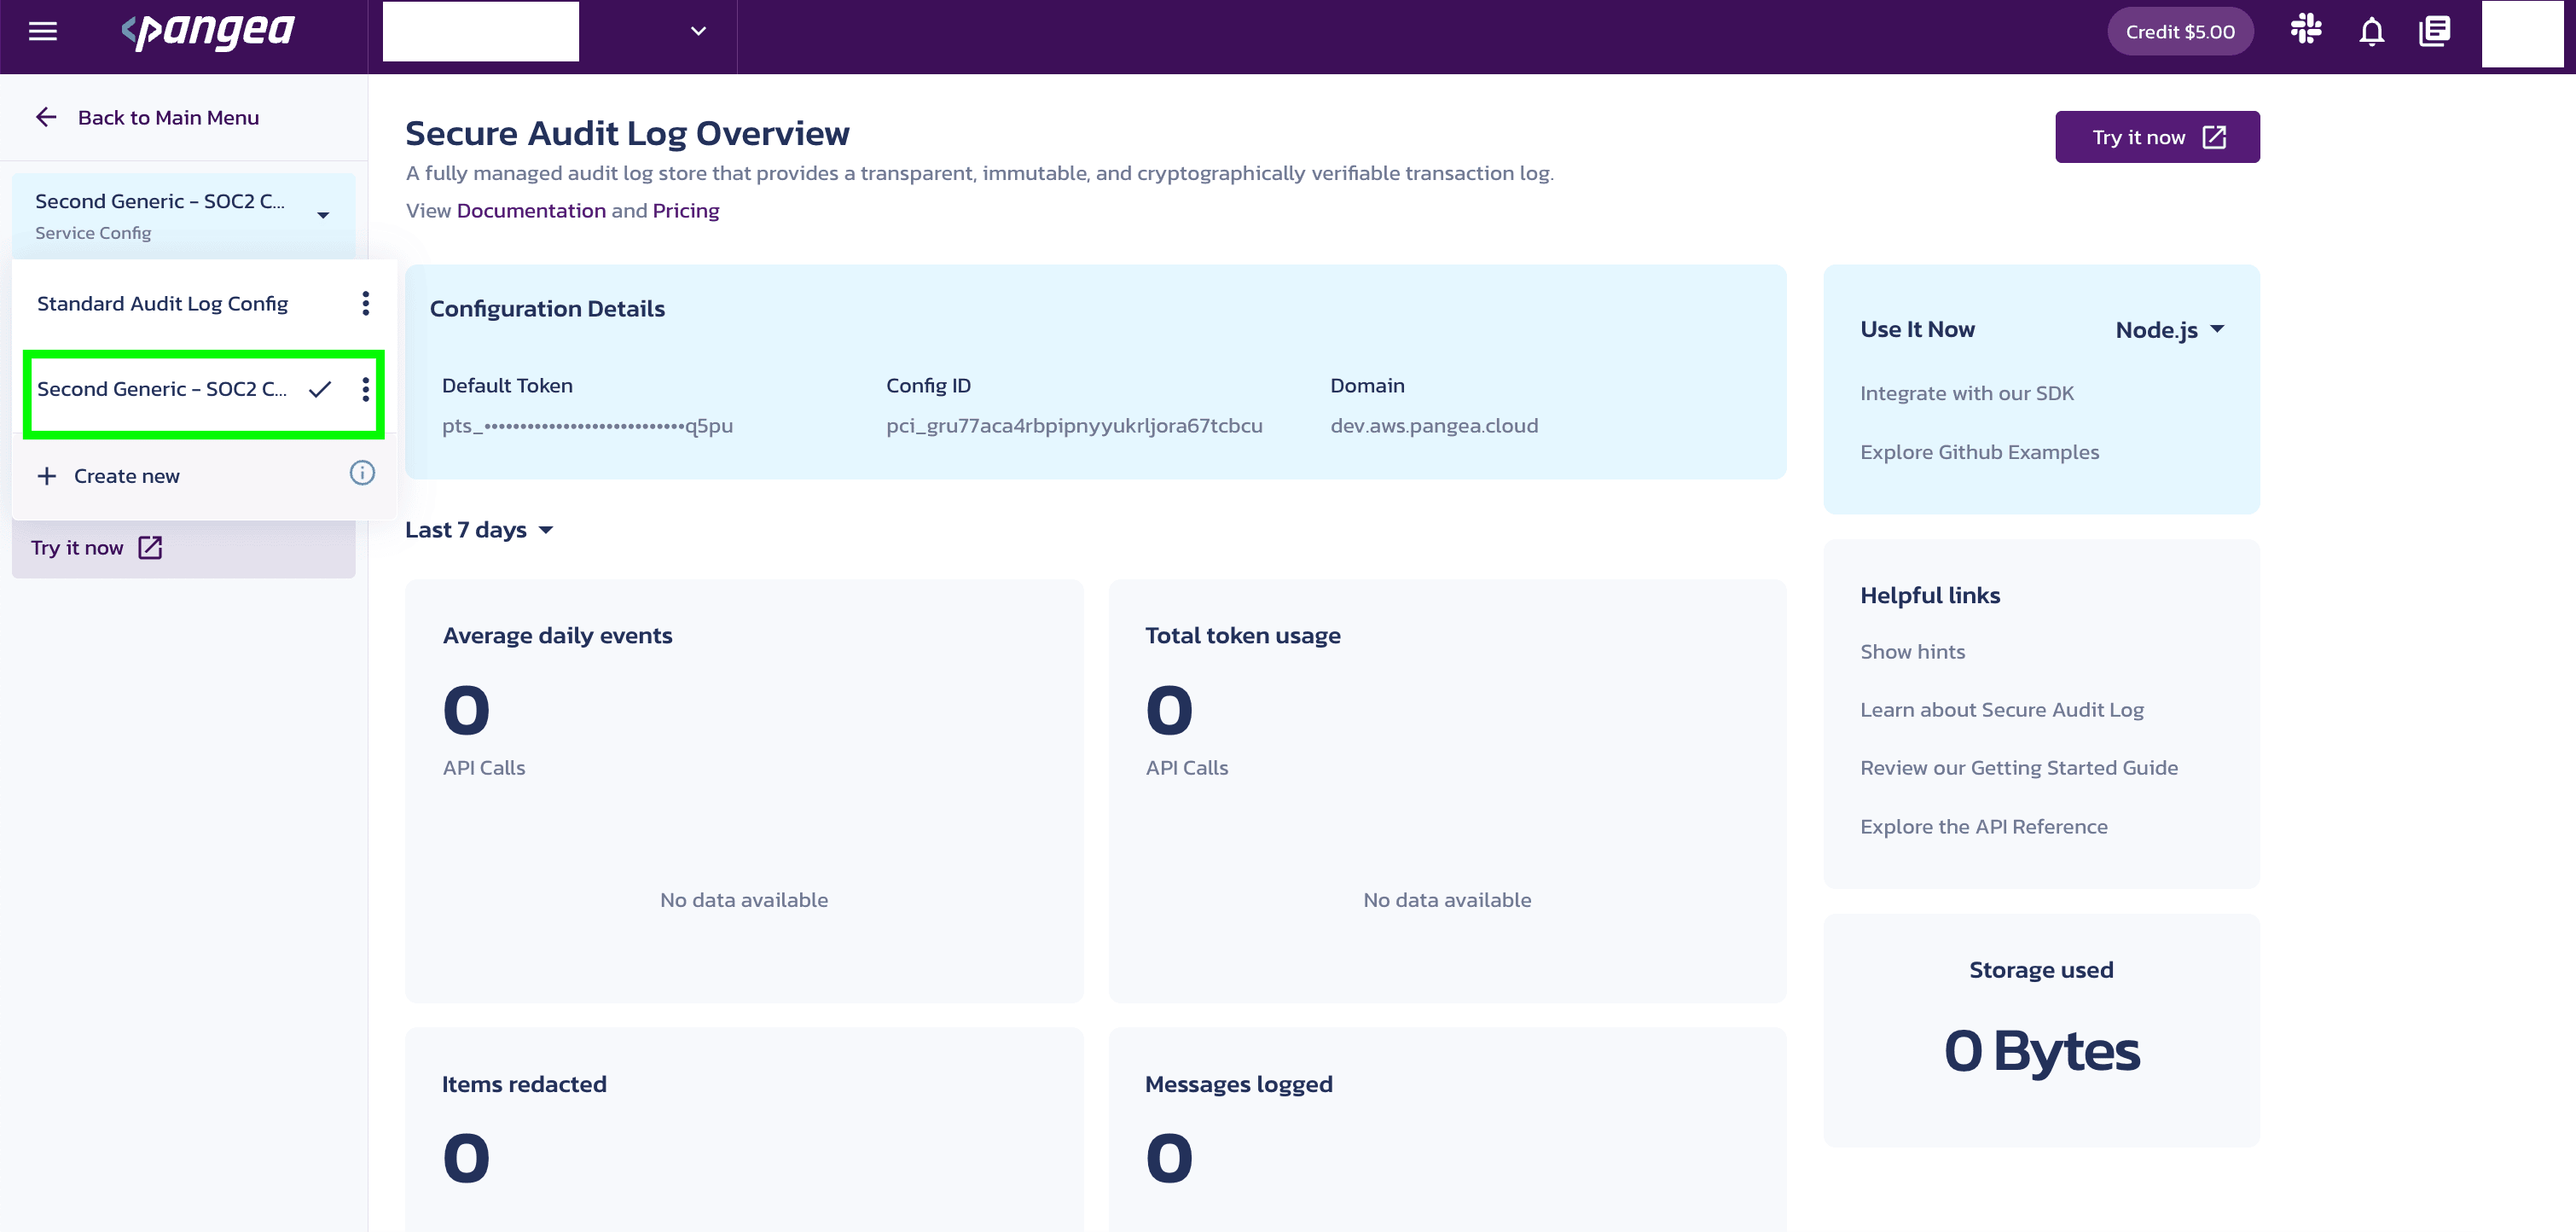
Navigate to the Pangea Console >> Secure Audit Log service to see the multiple configuration settings feature located below the Back to Main Menu button.
- Click the dropdown list icon located next to Standard Audit Config.
- Click the + Create new button to create a new configuration setting. Now, you can create multiple configurations within a project to help manage different use cases.
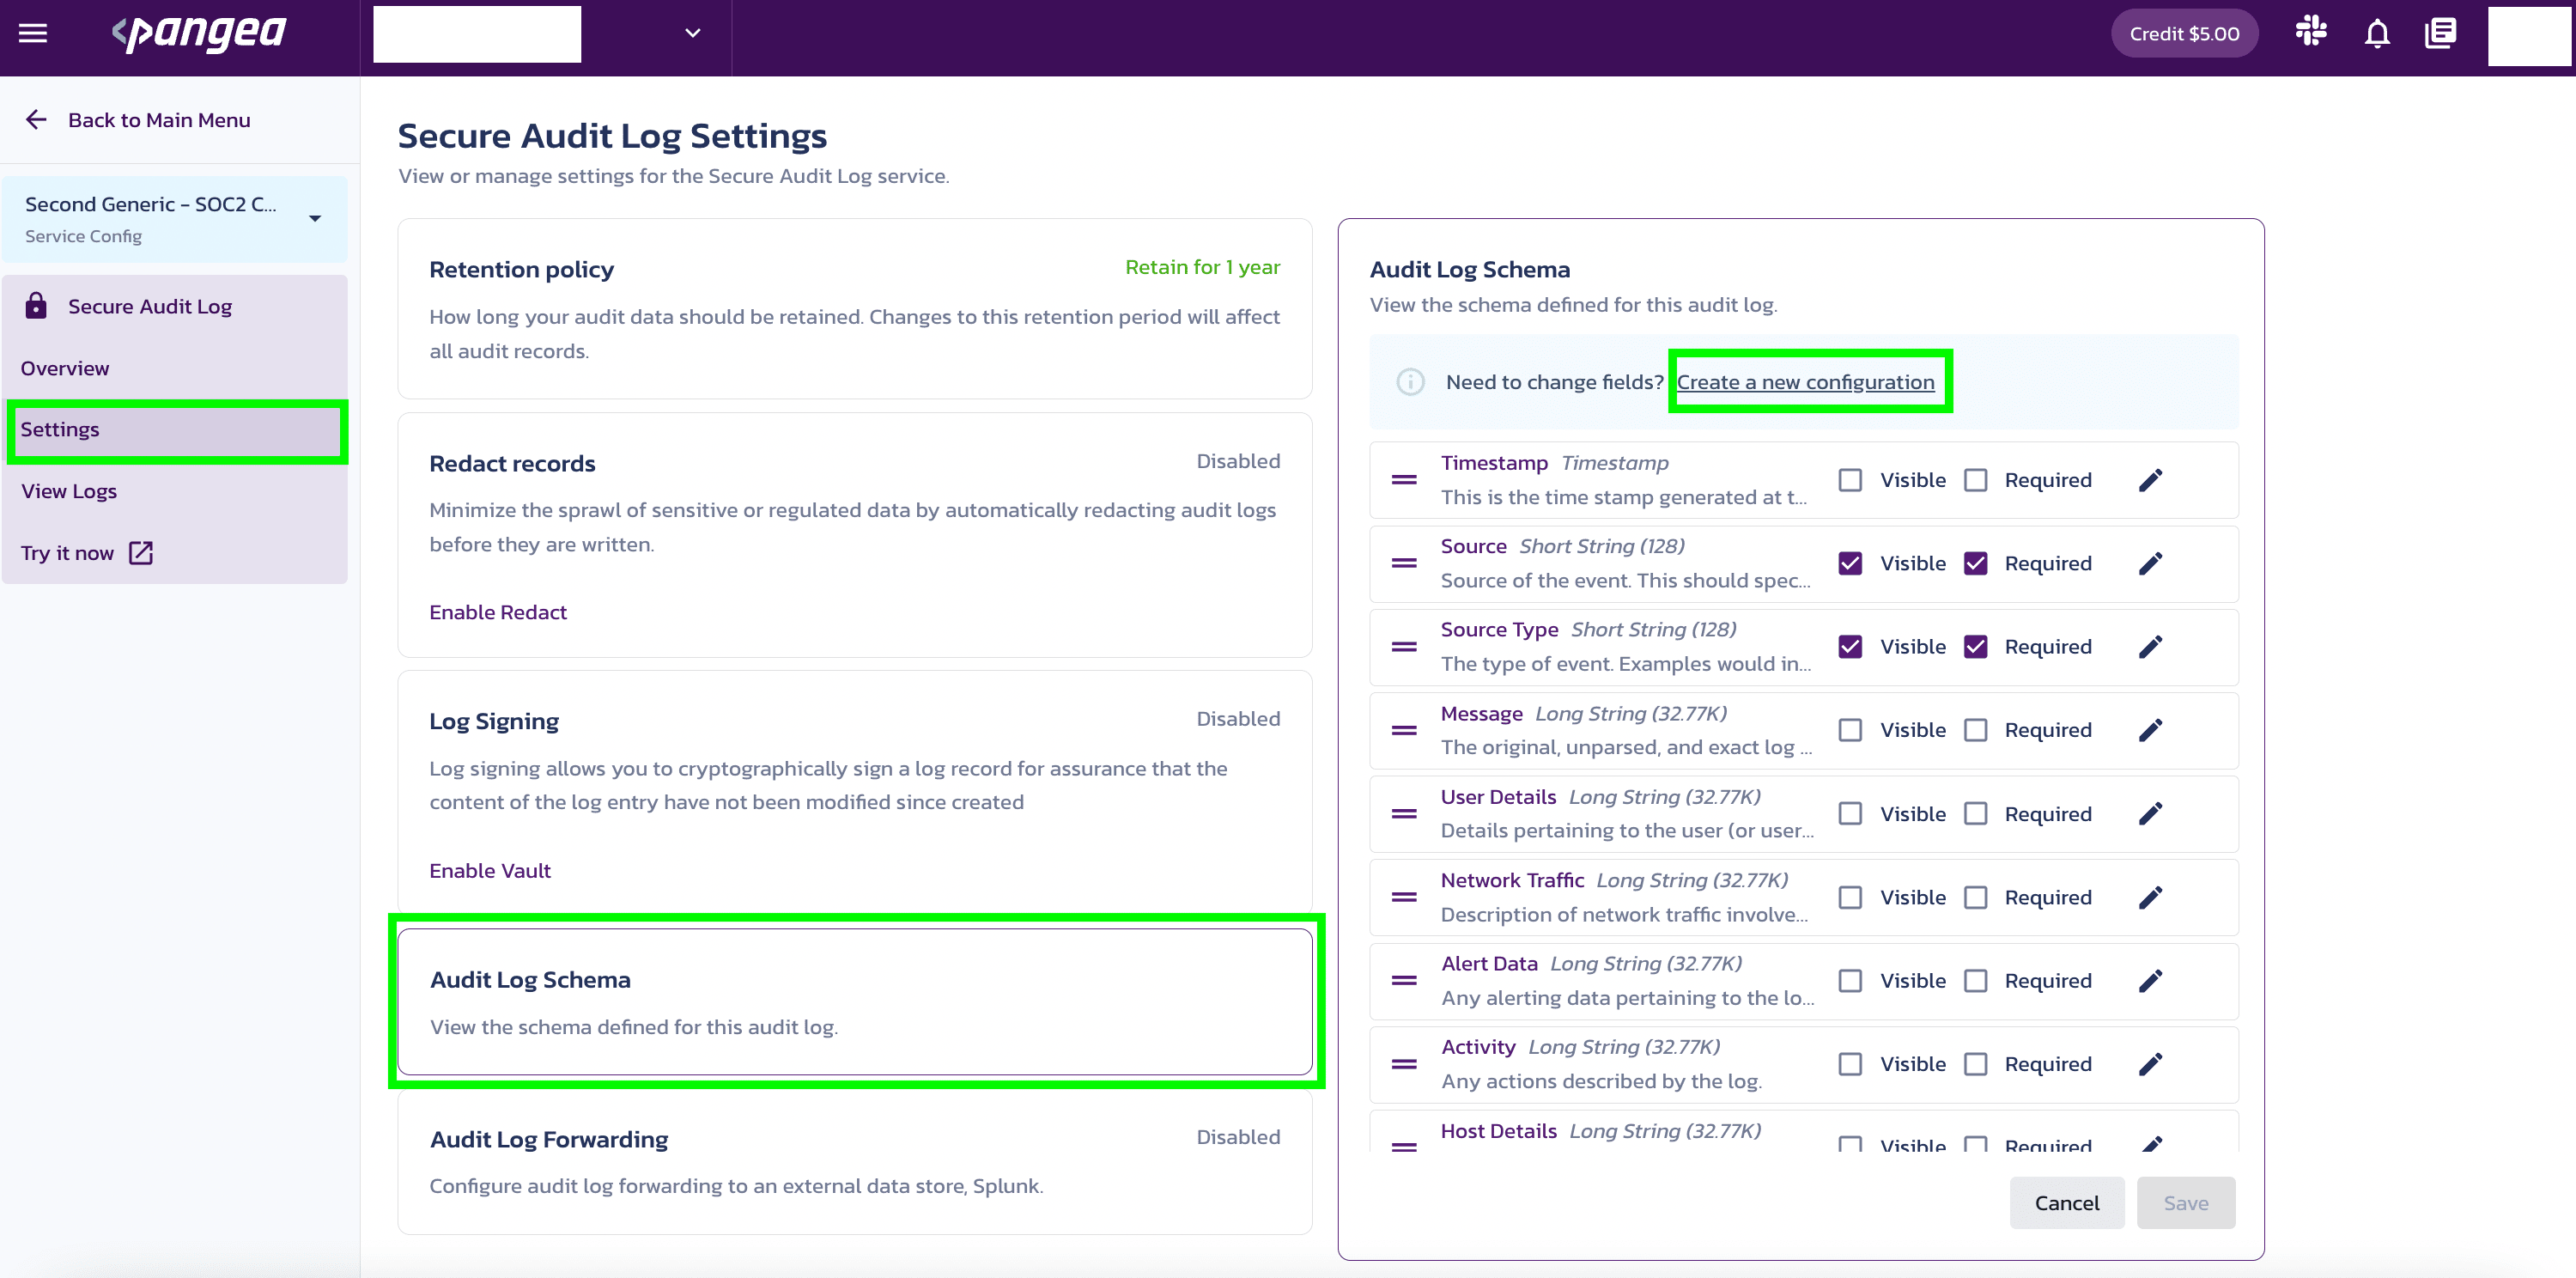
You can also click Settings >> Audit Log Schema >> Create a new configuration to create a new configuration setting.
Each configuration setting is completely independent and operates in isolation from other settings. There is no data sharing or crossover between different configurations.
Now, choose a schema template from the dropdown menu within the Schema Template section, input a configuration name in the Config Name textbox, and then click on Next.
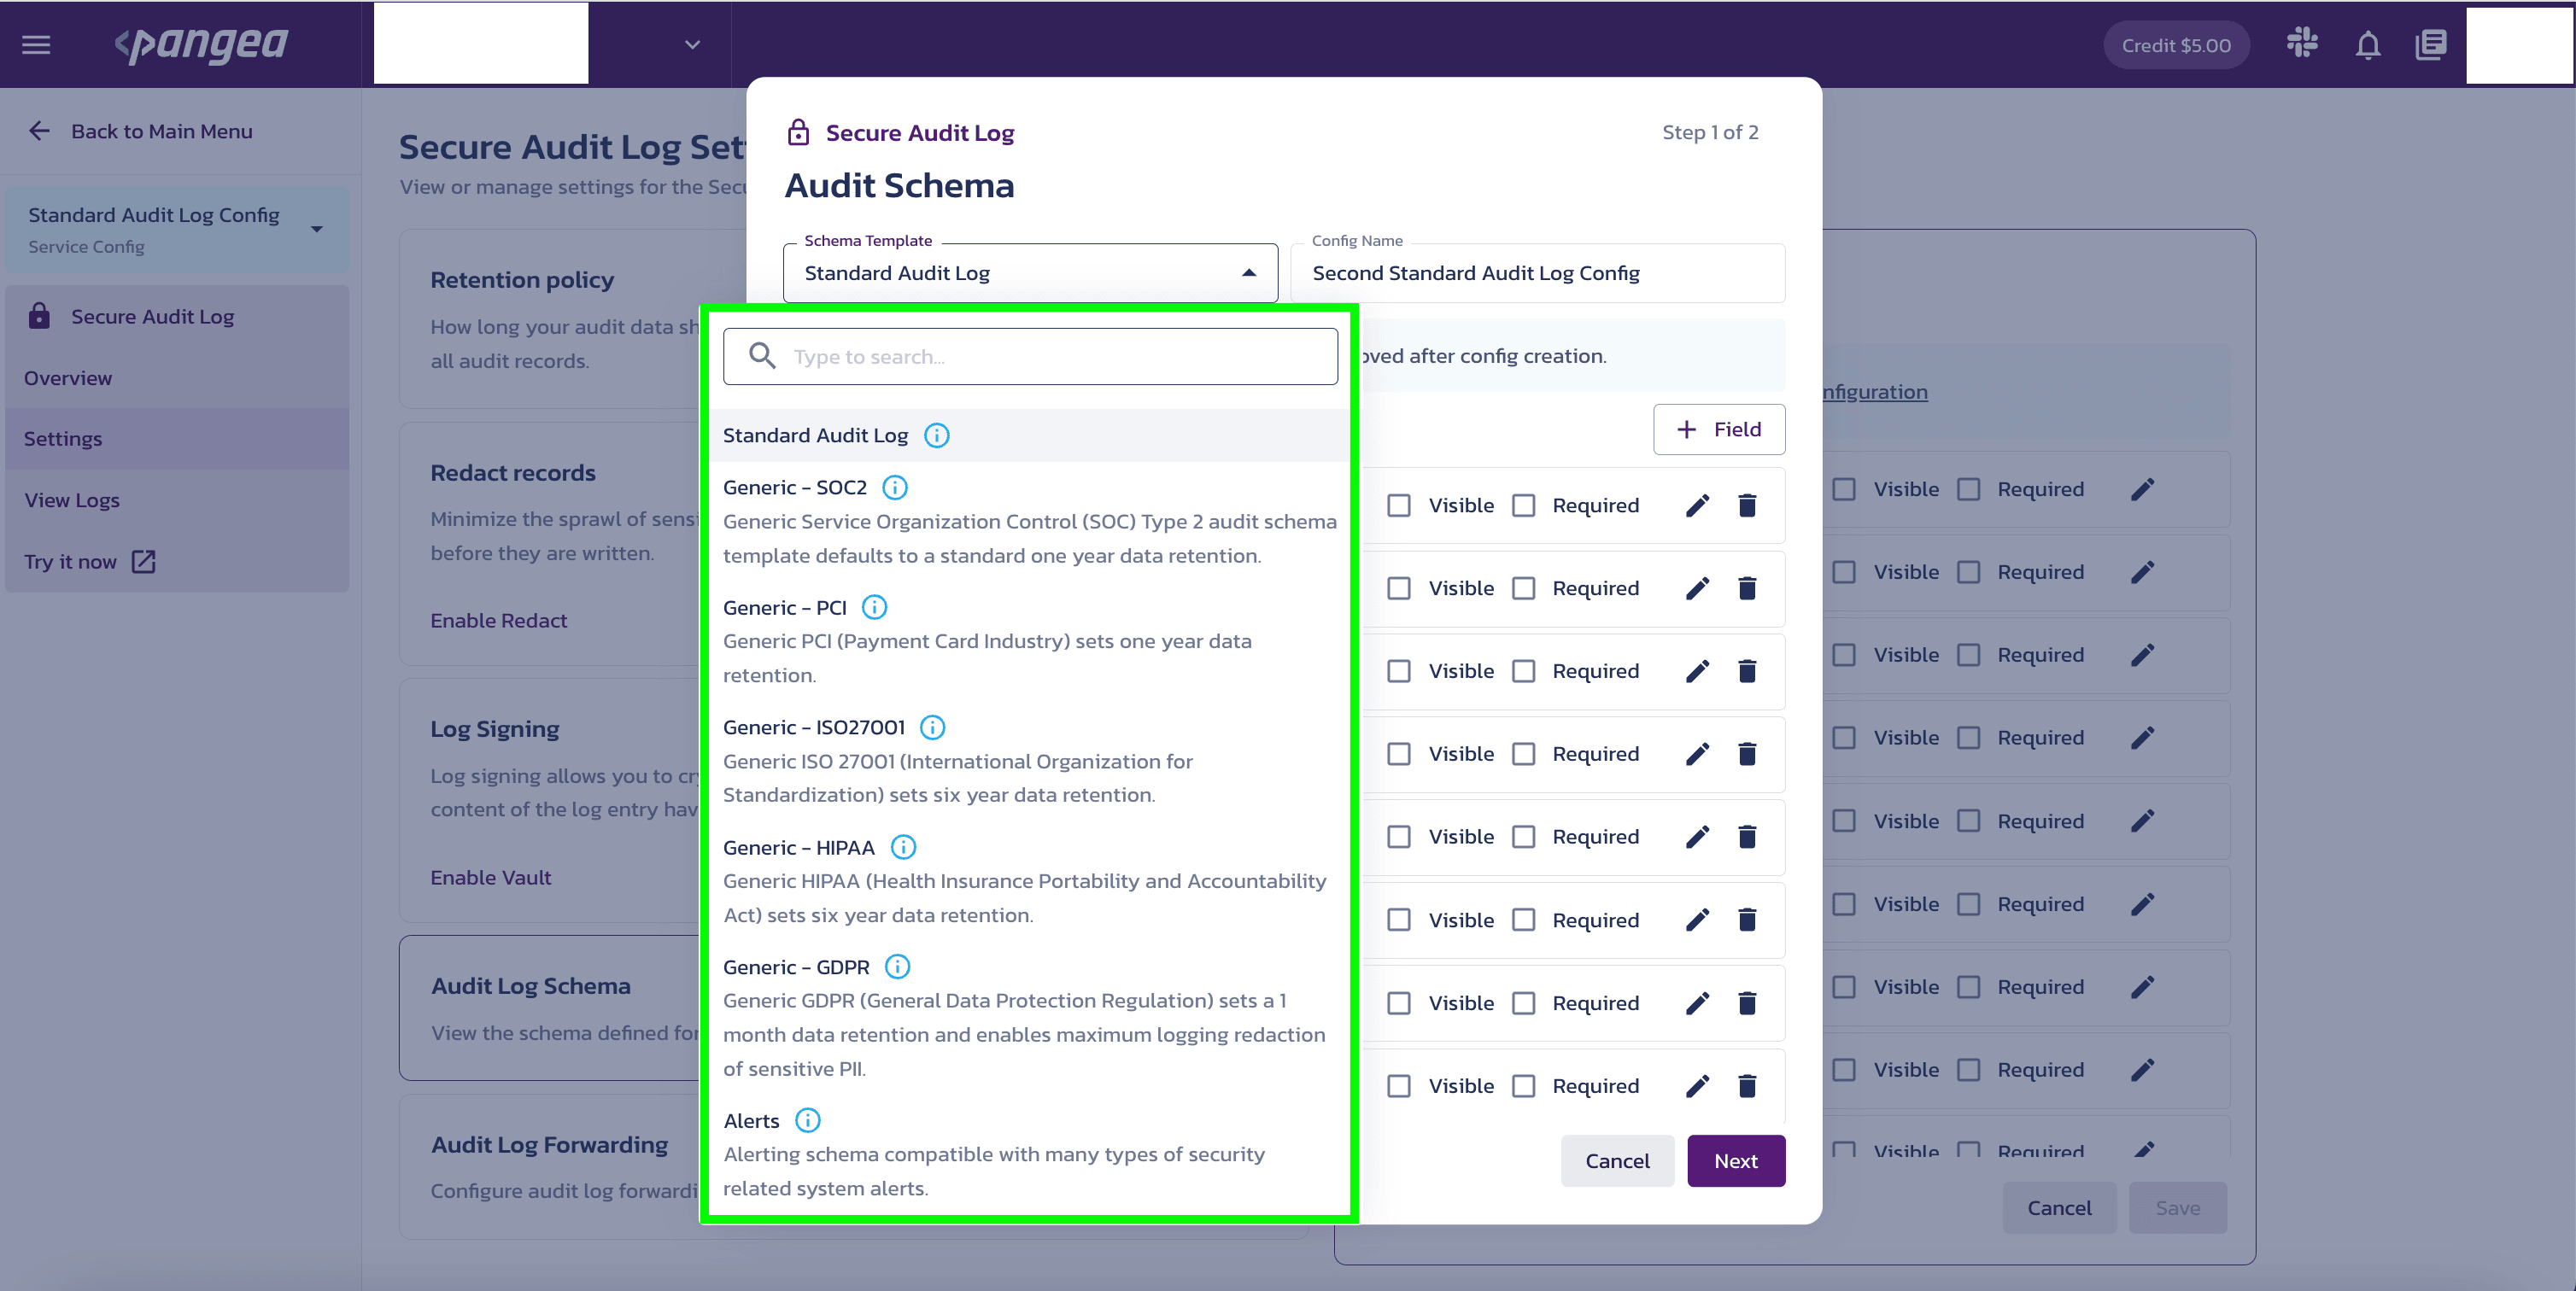
A new window opens up for you to customize the fields, if necessary. Now, click Next to go to the token creation window.
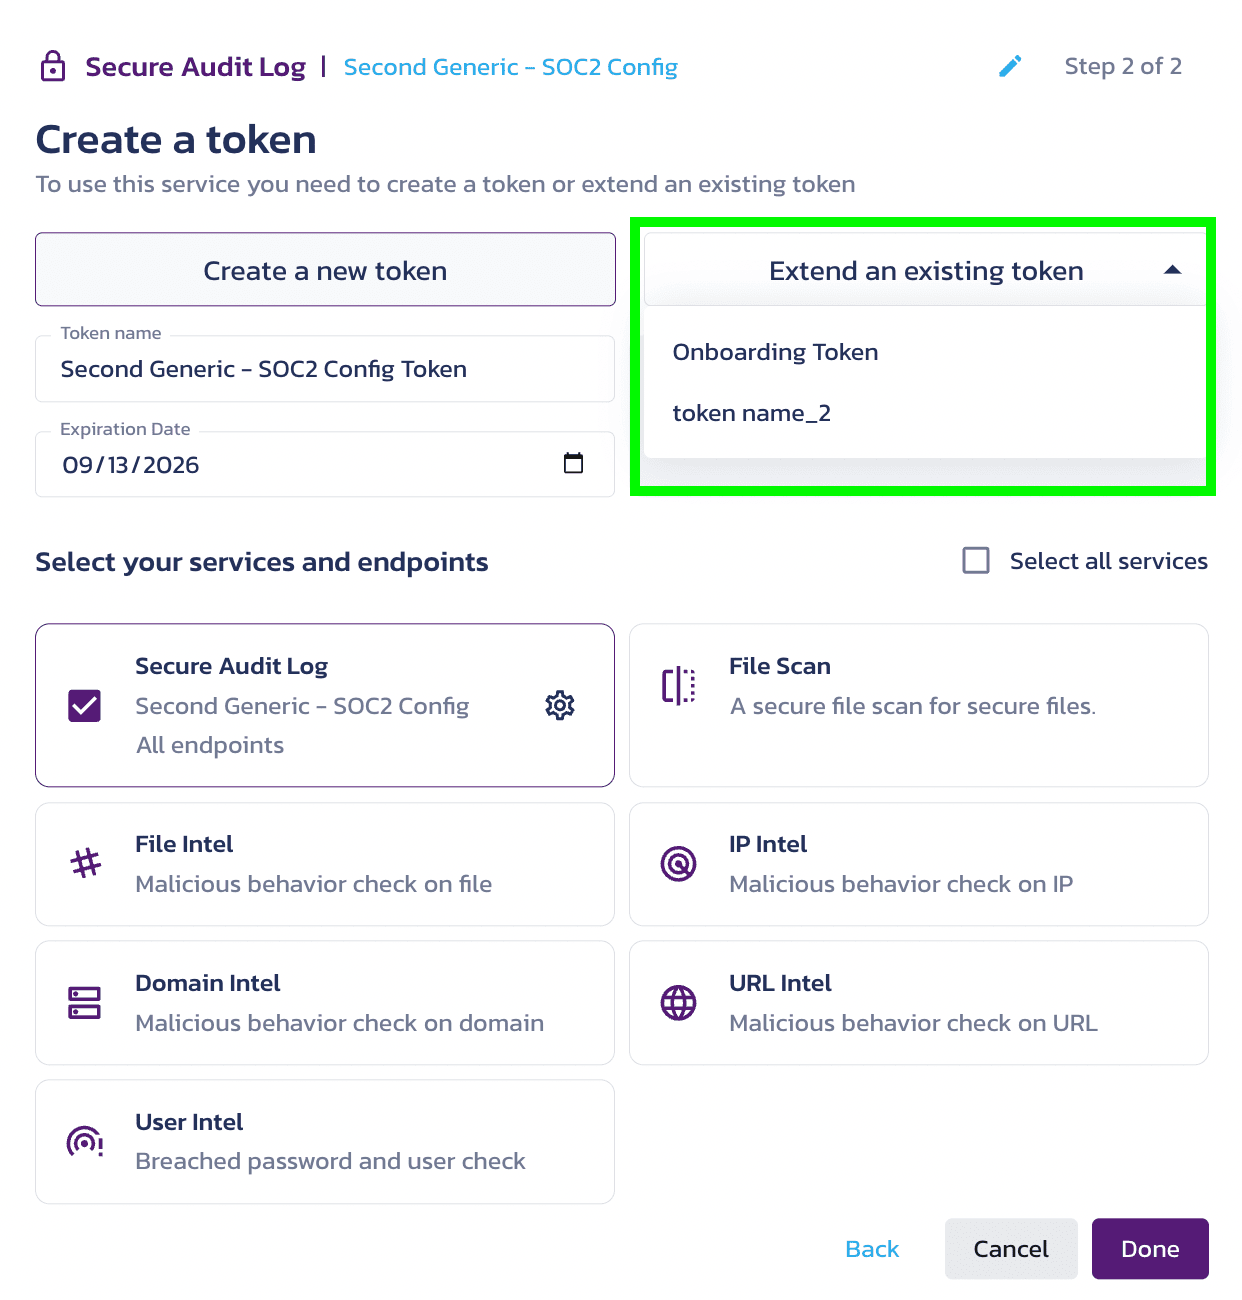
Once you have created at least one token, the choice between Create a new token or Extend an existing token becomes visible.
In the token creation window, select Create a new token or Extend an existing token to work with the Onboarding Token example. Finally, click Next.
To associate configuration settings with existing tokens, the tokens can be expanded to include the desired configuration. This enables a token to be linked with multiple configurations.
The new configuration setting is displayed in the left nav of the service page.
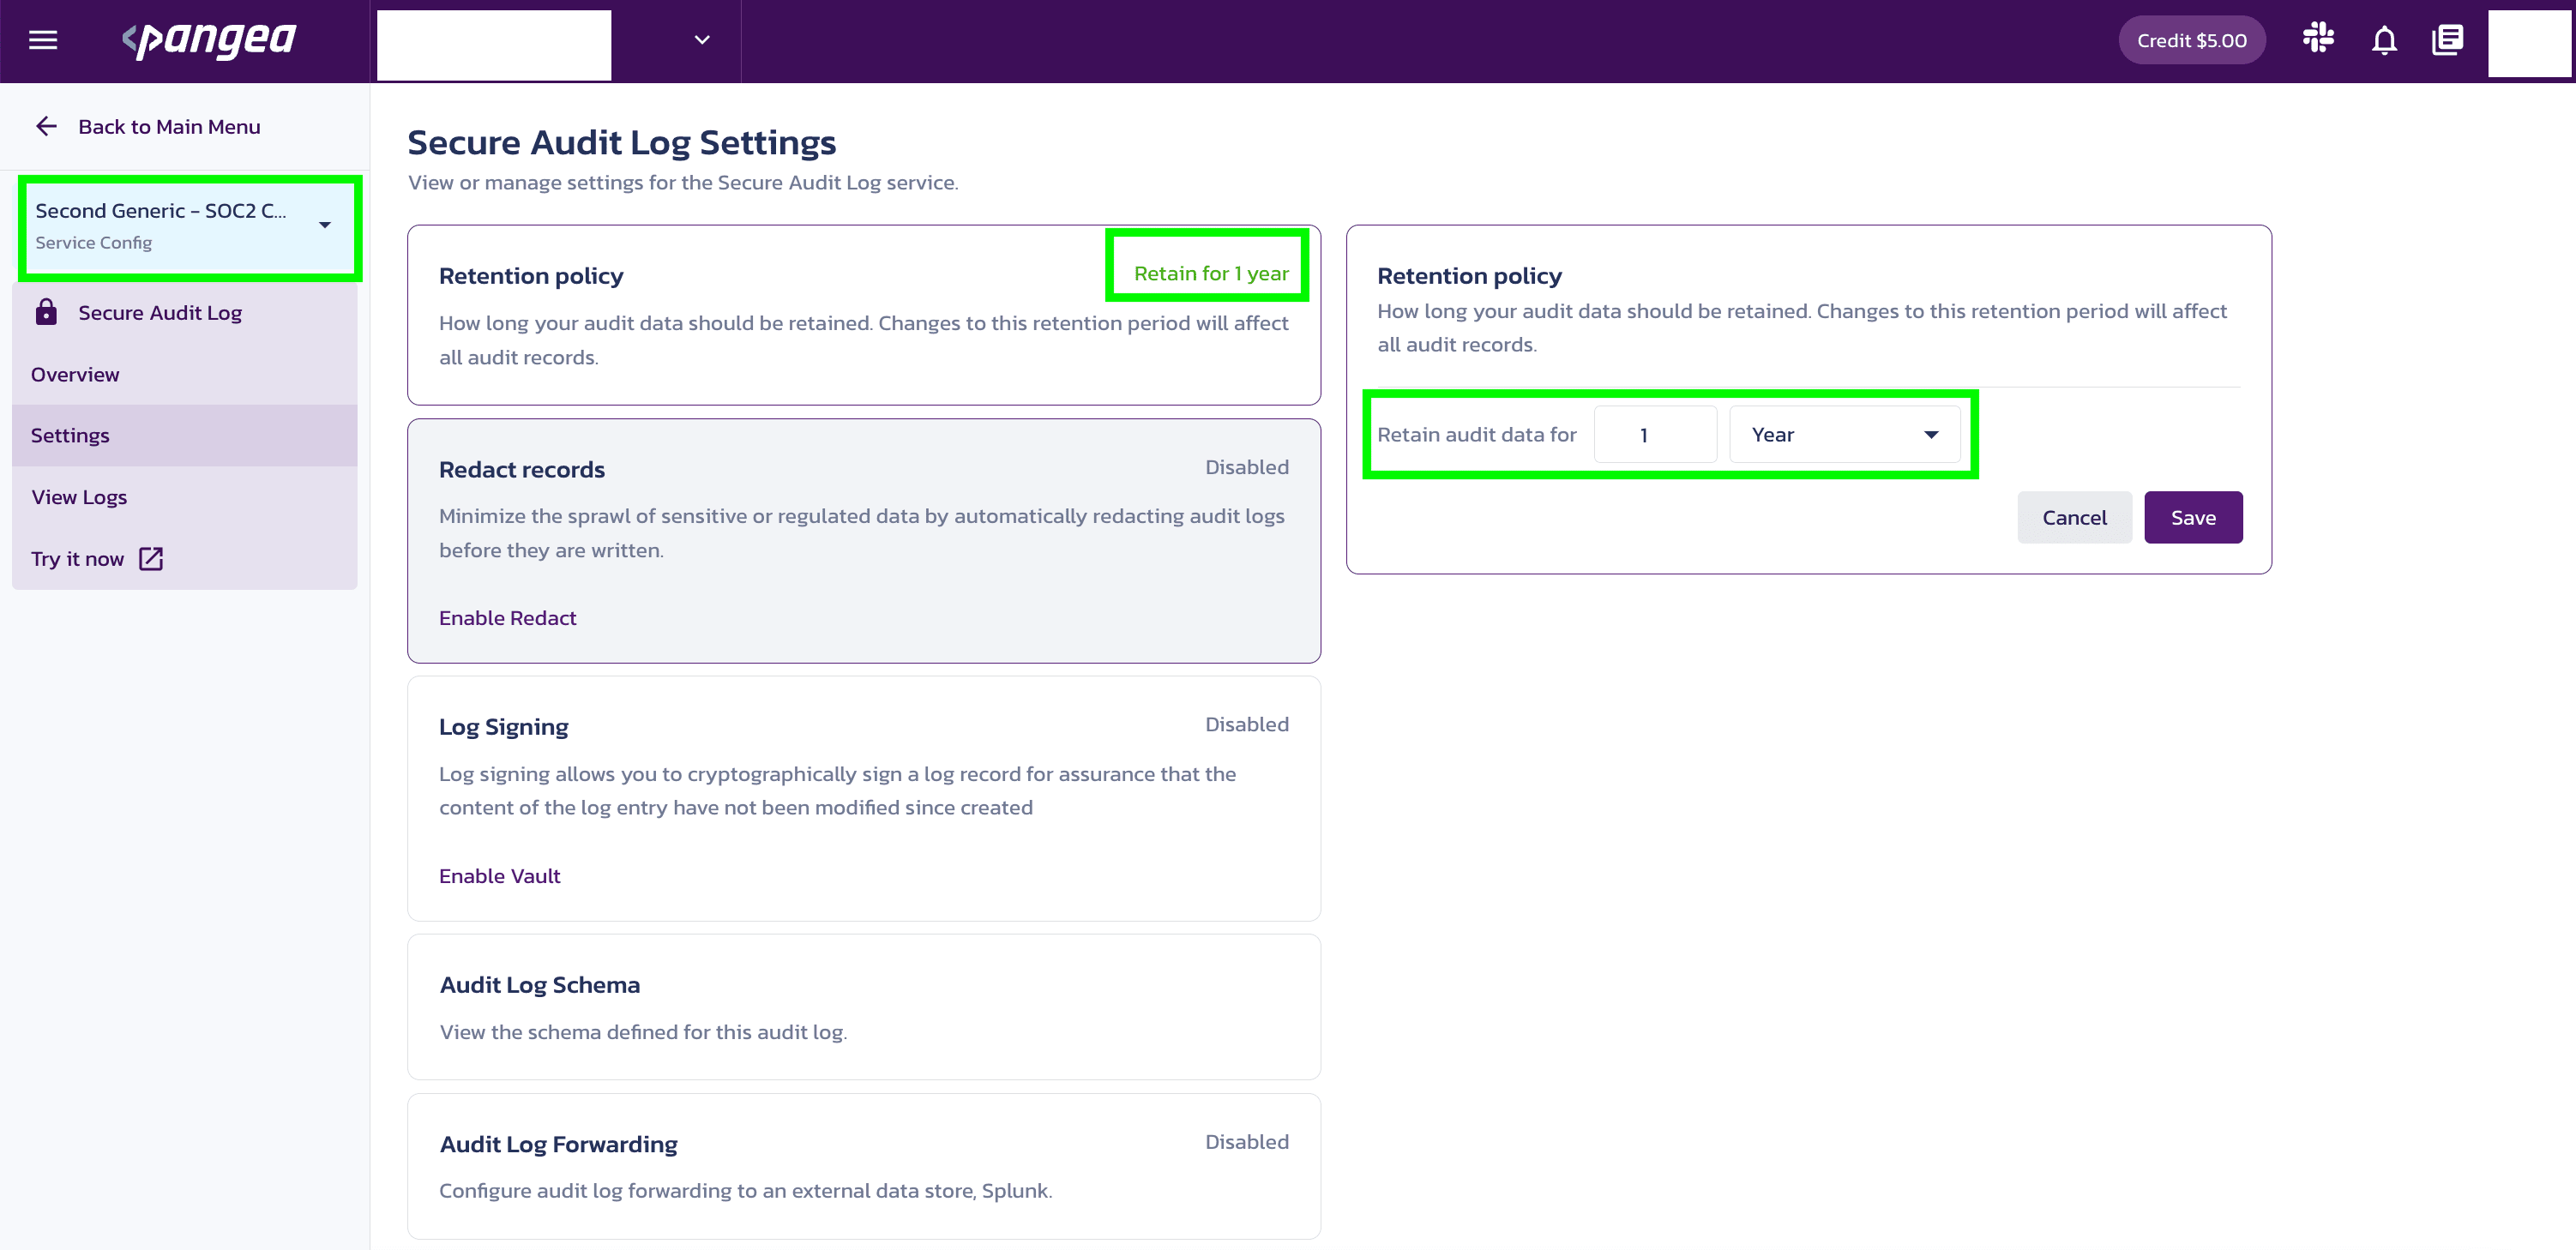
Now, select the new configuration settings to view the new configuration ID.
You will need to use this configuration ID when you click the Explore the API button in the left nav of the service page.
You can also change the retention policy for each configuration setting by manually adjusting the Retain audit data for field.
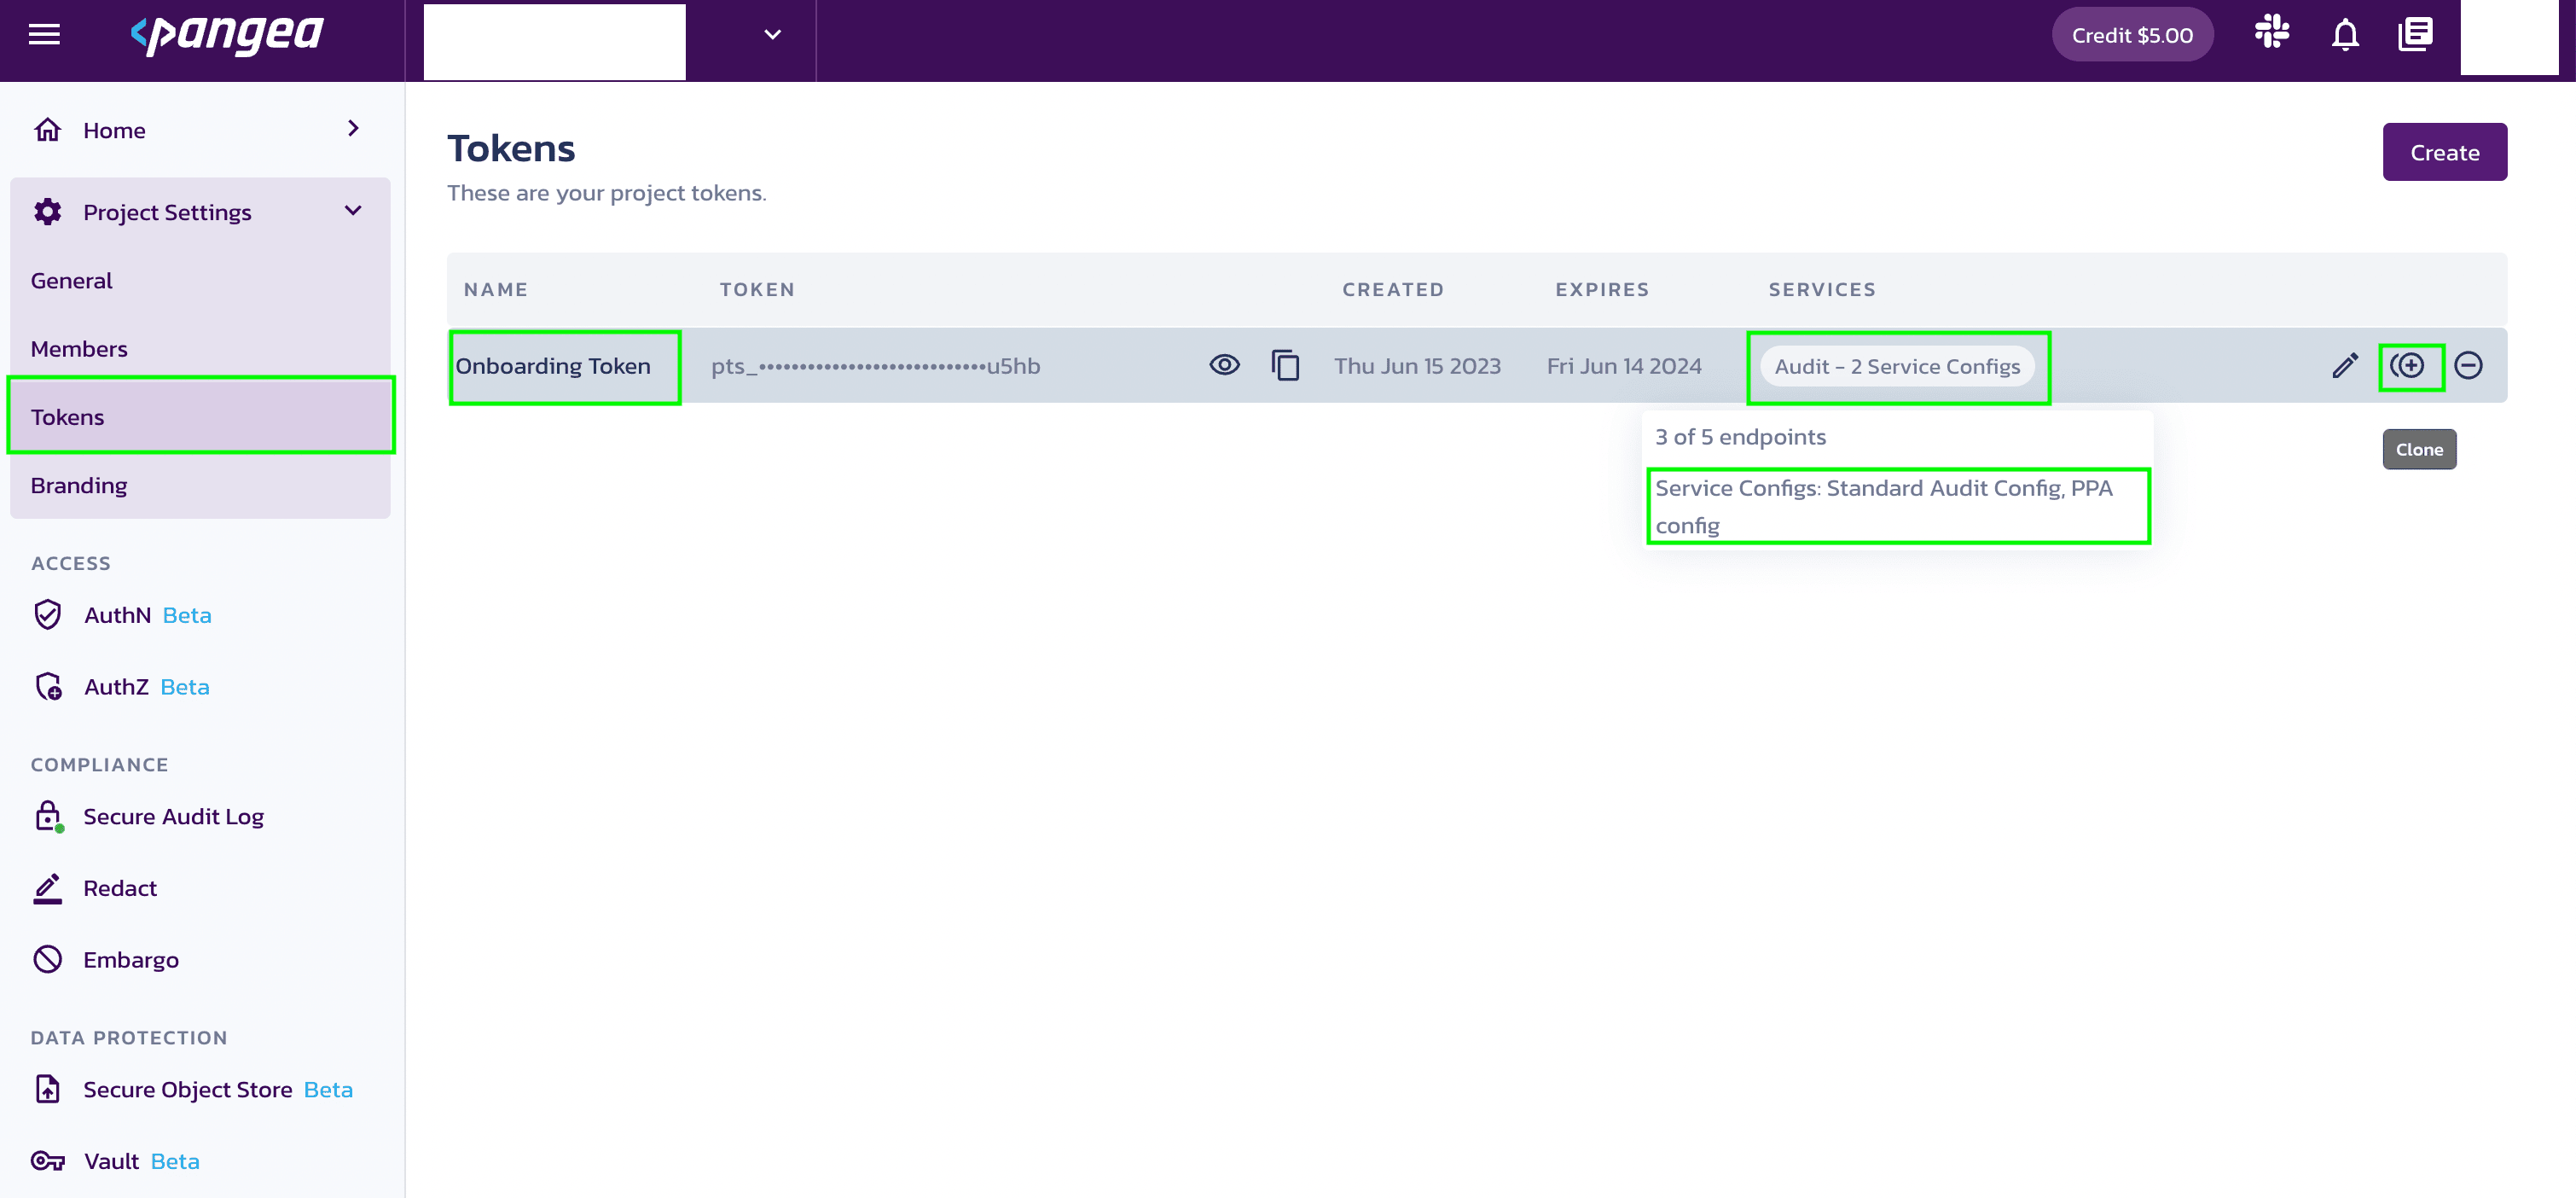
Tokens can now have access to more than one configuration. To see the number of configurations set for the Secure Audit Log, navigate to Project Settings >> Tokens.
- The Tokens page will display the rows of tokens.
- The TOKEN column provides arrow keys to move up or down the token rows.
- The eye icon enables or disables the token information.
- The copy icon copies the token to the clipboard.
- The SERVICES column displays the multiple configuration settings for the Secure Audit Log service.
You can edit, clone, or remove the tokens by clicking the corresponding icons located in each row.
When making an API call, it is crucial to include the config_id parameter to specify the desired configuration. Omitting this parameter will result in an error. In such cases, if an API call lacks the necessary config_id parameter, it will trigger an AmbiguousConfigID error, indicating that the configuration identifier is required for the operation to proceed successfully.