Add Login Using Hosted Pages
Learn how to add a login to your app using hosted pages
How to use this guide
This guide assumes the following:
- You already have a React app that exists
- You’re using this guide to add AuthN capabilities to your app
- You’re using the Sample React App on GitHub (created by Pangea) to help contextualize what you’re seeing in this guide
In the Pangea Console
The first steps you need to take occur within the
Pangea Console .Enable the service and create a token
Before you can start using AuthN, you need to enable it. When you enable the AuthN service, you will also create a default token that you can use with AuthN APIs.
If you haven't enabled AuthN when you created your Pangea project, do so by following these steps:
- Click AuthN on the left-hand navigation sidebar in the Pangea User Console . A dialog with details about the service will appear. Click Next.
- In the Create a token dialog you can accept defaults and click Next. You also have the following options:
- (Recommended) Save the AuthN token in Vault, which will give an option to retrieve the token using Vault APIs. If Vault is not enabled, click Enable Vault, and a modal displays describing Vault features. Click Done to close the modal and return to the AuthN modal.
- Provide a token name to make it easier to recognize in your Pangea project token list.
- Specify an expiration date.
- Grant access to other services with the AuthN token, if you plan to use these services and AuthN at the same time.
- Create a new token or extend an existing one for use with AuthN.
- In the Getting started dialog, accept the defaults or make your selection of authentication methods to use in your Log in / Sign up Flow. Click Done.
- In the next dialog, you can create a user by sending an example request to the AuthN APIs. Click Send to try it out.
- Click Finish to complete the wizard. This should take you to the AuthN Overview page.
Set a redirect
A redirect refers to a technique where you are redirected from one web page or application to another as part of the authentication process. This is often used when you attempt to access a protected resource on a website or application that requires authentication. The website or application will redirect you to a separate authentication service, such as an identity provider, where you can enter your credentials (for example, username and password) to prove your identity. Once you have successfully authenticated, the authentication service will redirect you back to the original website or application with an authorization token or session cookie that grants access to the requested resource. Redirects can help to ensure that authentication is performed securely and can help to simplify the authentication process for you by allowing them to use your existing credentials to access multiple services.
To set a redirect:
- In the Pangea User Console , click General on the left-hand navigation menu.
- Click Redirect Settings.
- Click + Redirect. A dialog will appear asking you to enter a redirect URL.
- Type the URL and click Save.
Configure your app for communication with Pangea
For your application to communicate with the Pangea service, you must set the following variables in your "env" file.
- token - Created when you first enable the AuthN service
- domain - Generated when you create a project and indicates where your project is hosted
- redirect URL - To enable AuthN and use the service, you must set your application’s domain as an allowed redirect. If you're developing locally, you can add localhost (ex http://localhost:3000) as a redirect.
The values are available in the Pangea Console . To access the variables:
- Go to the Pangea Console
- Click AuthN in the left-hand navigation
- The AuthN Overview page will appear. The domain and redirect URL should be visible on the right side of the screen. The token is available toward the bottom of the screen.
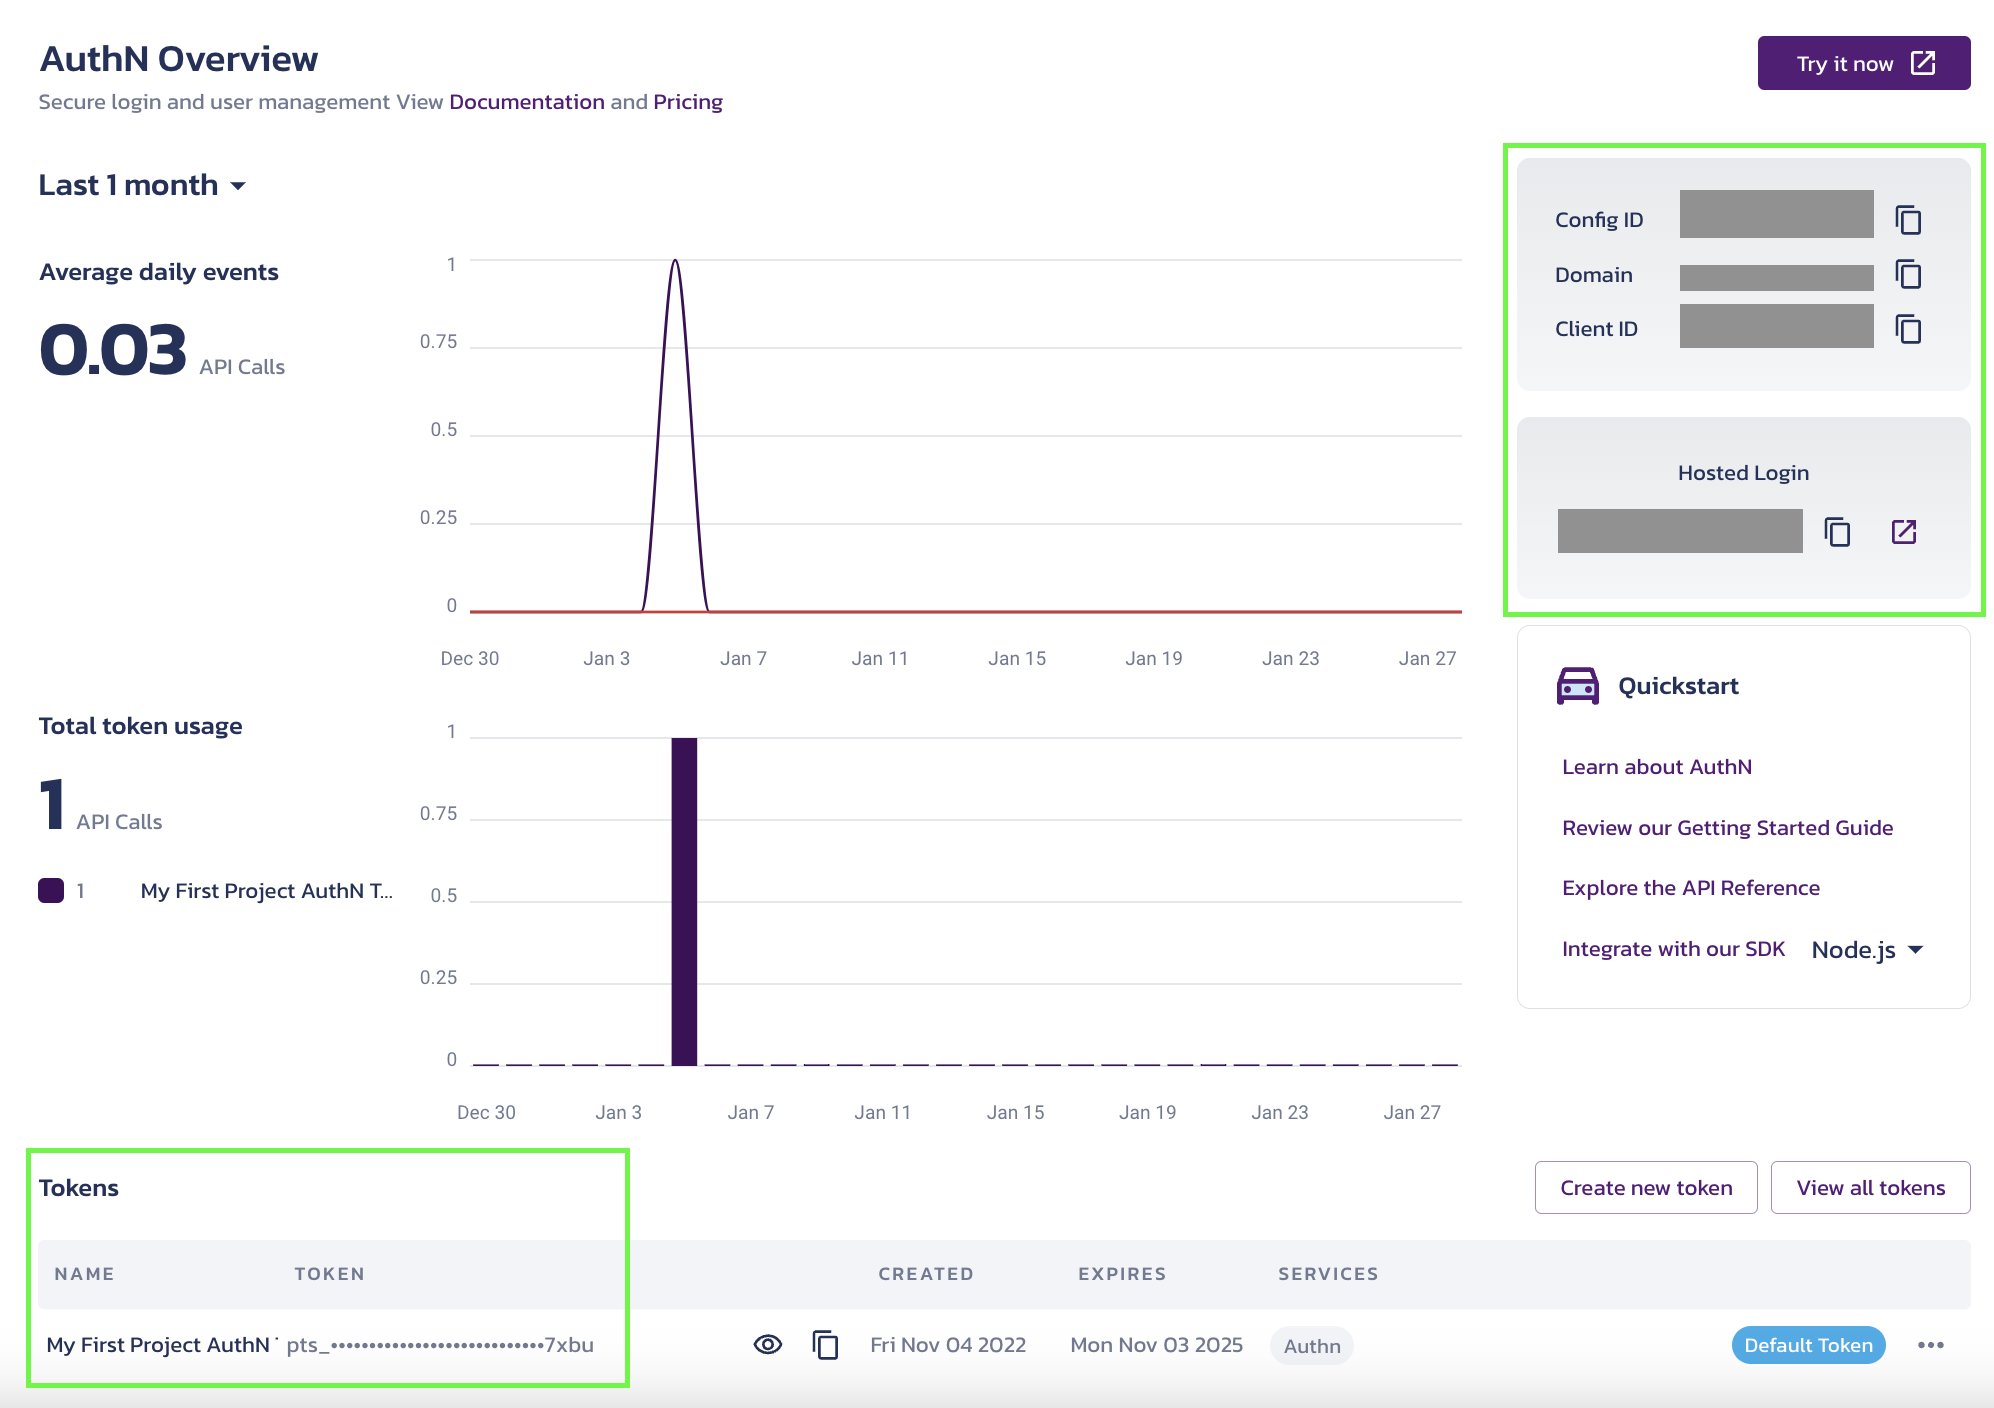
- Copy the required variables, and move over to your codebase.
In your codebase
The following steps take place in your codebase and involve you in creating files.
Add variables to env file
After you generate the variables in the Pangea Console , take the values and create an env file in your application codebase. Here are the required variables again:
- token
- domain
- redirect url
Your "env" file might look something like this:
REACT_APP_CLIENT_TOKEN={token}
REACT_APP_LOGIN_URL="{redirect url}"
REACT_APP_PROVIDER_API="{domain}"
If you’re not using a “Create React App” script, your variables might not have the REACT_APP prefixes seen above.
Example from sample app
If you’re following along using the
Sample React App , you can find the “.env.template” file at the root level in the sample app.The example "env" file looks something like this:
REACT_APP_CLIENT_TOKEN={PANGEA_TOKEN}
REACT_APP_LOGIN_URL="{AUTHN_LOGIN_URL}"
REACT_APP_PROVIDER_API="{AUTHN_API_URL}"
Add AuthProvider wrapper
Next, wrap your application in the authentication provider offered by Pangea. This wrapper tells your application whether you’re logged in or not, and handles redirecting to and from the Pangea-hosted pages.
Your code should look something like this:
import { AuthProvider, AppState } from "@pangeacyber/react-auth";
Example from sample app
To see the line of code above in context:
- Go to the sample app
- Open the src folder
- Open the App.tsx file. You can see the AuthProvider is imported on Line 3.
In your app
This is what’s happening when the user interacts with you app.
Check a user’s login status
You want your application to check if your user is authenticated (logged in) or (unauthenticated) logged out.
The code below shows how you might handle this logic:
import { MouseEvent } from "react";
import { Link } from "react-router-dom";
import { useAuth } from "@pangeacyber/react-auth";

const Header = () => {
  const { authenticated, login, logout } = useAuth();

  const handleLogout = (e: MouseEvent) => {
    e.preventDefault();
    logout(false);
  };

  return (
    <div className="header">
      <img src="/pangea-logo.svg" alt="Pangea Logo" />
      {authenticated && (
        <div className="nav">
          <Link to="/">Home</Link>
          <Link to="/profile">Profile</Link>
        </div>
      )}

      {authenticated ? (
        <button onClick={handleLogout}>Logout</button>
      ) : (
        <button onClick={login}>Login</button>
      )}
    </div>
  );
};

export default Header;
Example from sample app
To see the code sample above in context:
- Go to the sample app
- Open the src folder
- Open the Header folder
- Open the index.tsx file. The file includes the whole code sample above.
User is authenticated
If a user is authenticated, then they will see details like the following:
import { getSessionData } from "@pangeacyber/react-auth";

const Profile = () => {
  const sessionData = getSessionData();

  return (
    <div className="profile">
      <h1>Profile</h1>
      <div>Identity: {sessionData.identity}</div>
      <div>First Name: {sessionData.profile?.first_name}</div>
      <div>Last Name: {sessionData.profile?.last_name}</div>
      <div>Email: {sessionData.email}</div>
    </div>
  );
};
The code sample above shows that an authenticated user will have access to profile information like:
- Identity
- First Name
- Last Name
Example from sample app
To see the code sample above in context:
- Go to the sample app
- Open the src folder
- Open the Profile folder
- Open the index.tsx file. Lines 3 to 15 show the code sample above.
User is not authenticated
If someone tries to log into your application but is not authenticated, they will be sent back to the redirect URL (the one you originally configured in your "env" file).
If a user is unauthenticated, you might use the logic below:
useEffect(() => {
  if (!loading && !error && !authenticated) {
    navigate("/", { replace: true });
  }
}, [navigate, error, authenticated, loading]);
Example from sample app
To see the code sample above in context:
- Go to the sample app
- Open the src folder
- Open the AuthContext folder
- Open the index.tsx file. Lines 17 to 21 show the code sample above.
Was this article helpful?