4. Install the Critical Document Auditing Extension
Overview
Similar to the previous section, in this section, you'll leverage the Pangea Secure Audit Log service and add automatic event auditing of Firestore Document updates. The Secure Audit Logging extension configured the previous section logs events provided by your application code, other Pangea Extensions, and Firebase. The Critical Document Auditing Extension will record each create, update, and delete event for all documents in the Collection path provided when installed.
Prerequisites
- A free Firebase account with the Pay as you go billing plan enabled.
- A free Pangea account.
- Completed part 1. Configure a Starter Application of this multi-part tutorial OR a Firebase project with the Cloud Firestore service enabled.
- A Pangea Domain and Access Token with access rights to the Secure Audit Log service. To learn how to create an account and configure each service, visit the Getting Started guide.
Install and configure the Extension
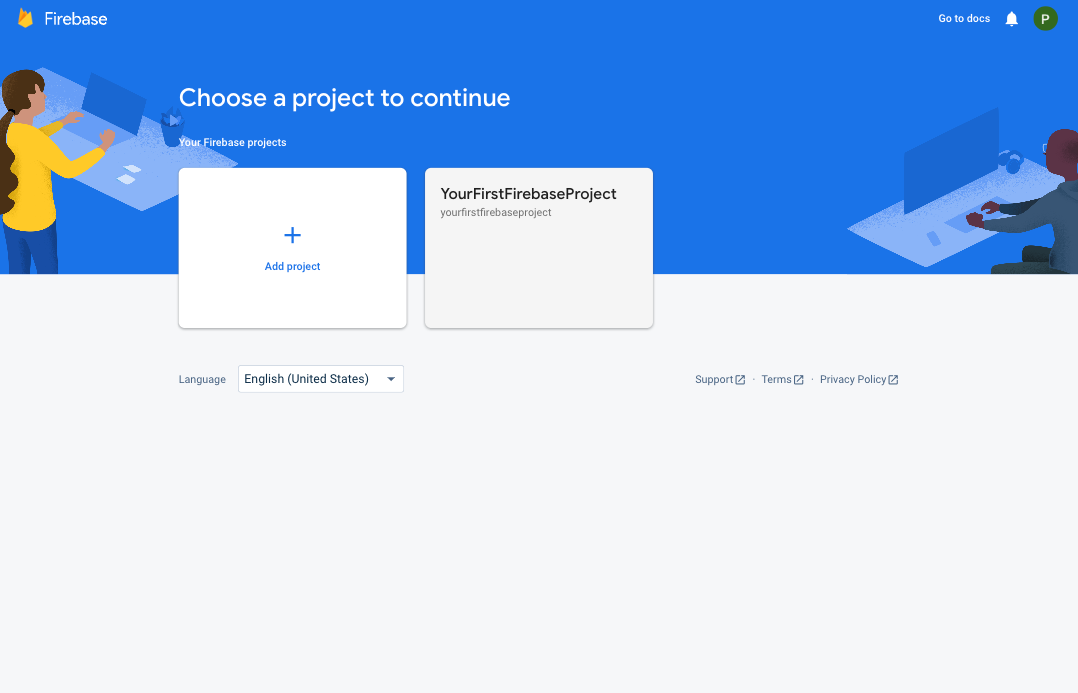
Step 1: Click the Critical Document Auditing install link, and select the Firebase project you'd like to deploy the extension to:
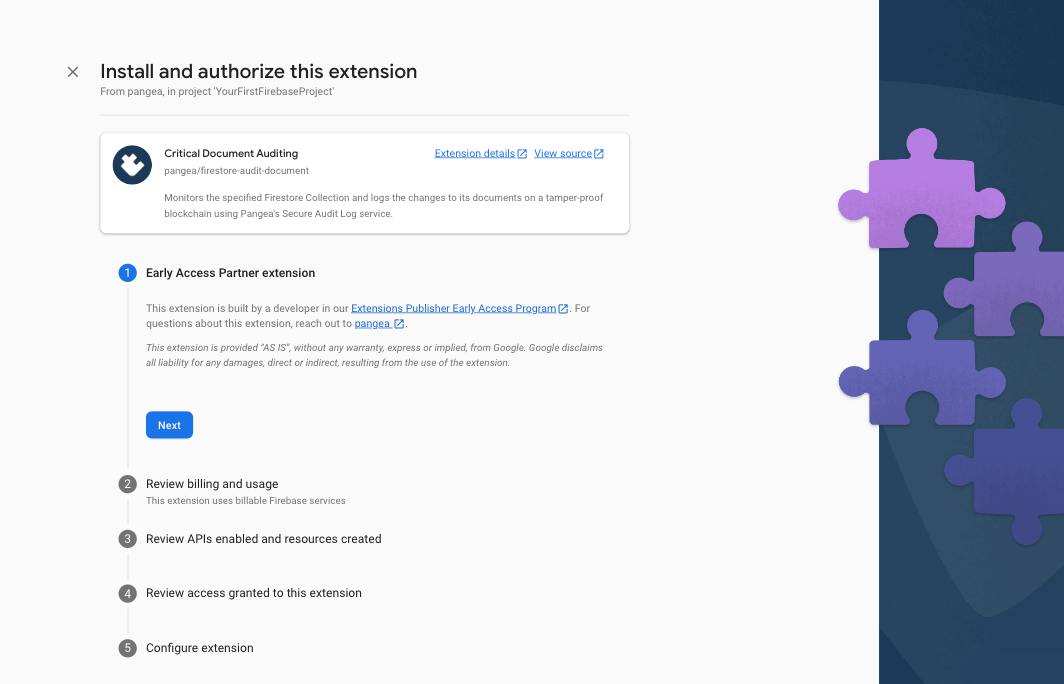
Step 2: Accept the Early Access acknowledgement by clicking the Next button:
Step 3: Review the billing and usage details, and tap the Next button. If you have not done so already, you'll be presented with the option to upgrade your Firebase account to a pay-as-you-go plan, and you can do so by clicking the Upgrade project to continue button and following the instructions:
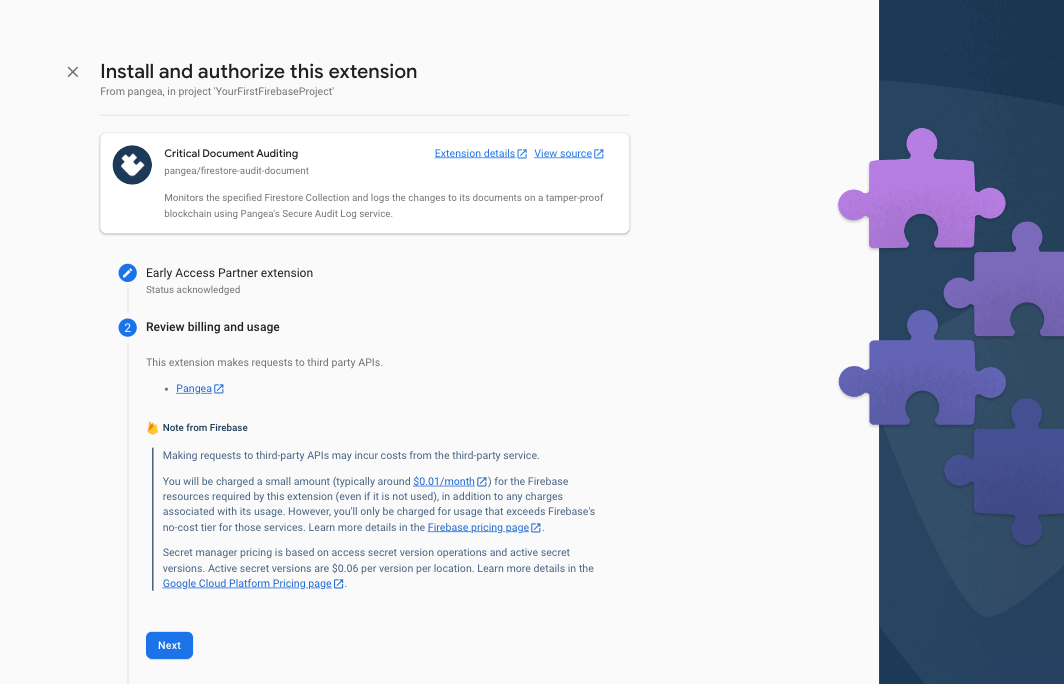
If upgrading your billing plan, you will be redirected to the Set up your billing profile section of Google Cloud Platform (GCP). After setting up your billing profile, you may need to restart the Extension install by clicking the install and repeating Step 1 and Step 2.
Step 4: Review the APIs and the resources that this extension will create. If any required Firebase services are not yet enabled, tap the Enable button next to each required service and then click the Next button.
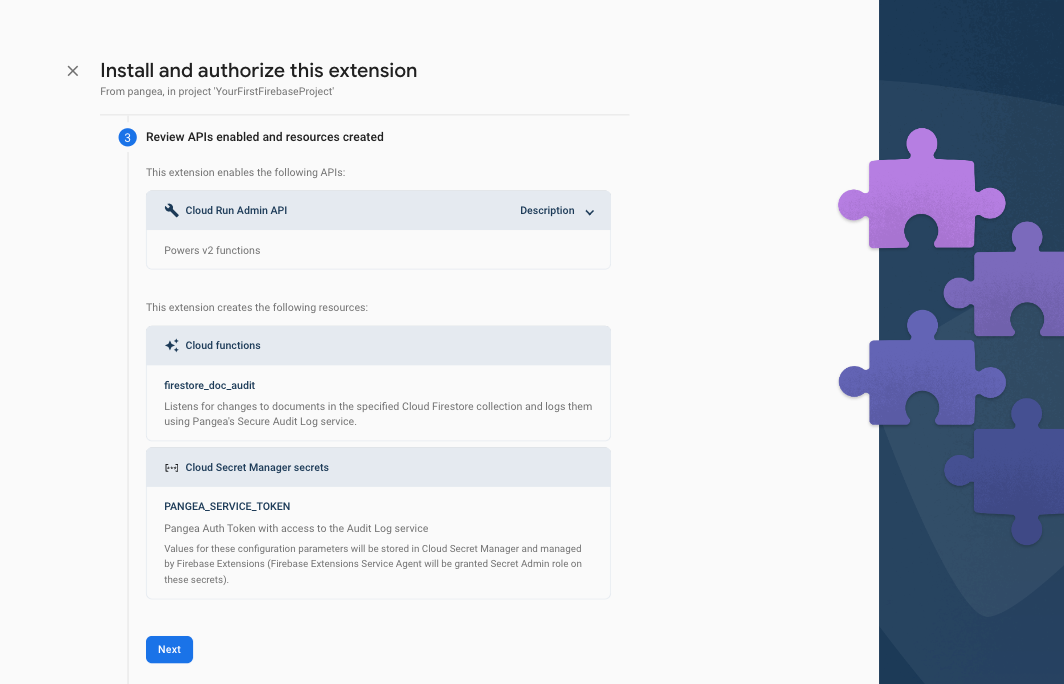
The extension declares a single function to invoke the Secure Audit Log service:
firestore_doc_audit - listens for changes made to a Firestore Collection and records when each Document is either created, updated, or deleted.
Step 5: In the Review access granted to this extension section, grant the extension permission to Firestore and Secrets Manager by clicking the Next button.
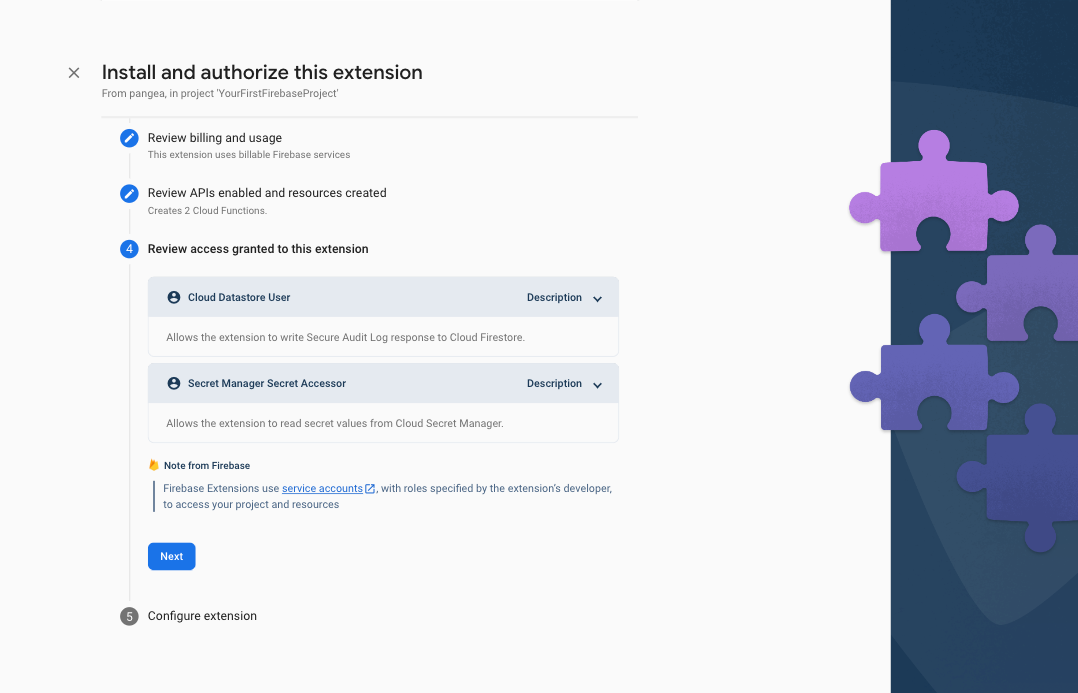
The Cloud datastore User permission will be used to read and write the responses of the Pangea Secure Audit Log service to a Firestore document. The Secret Manager Secret Accessor permission is required to store your Pangea Auth Token.
Step 5: In the final step, Configure extension, of the install process, you'll be asked to provide a few parameters, some of which are optional. The first two and what region you want to deploy the Extension and where your Pangea services are deployed, respectively. The Extension should be deployed as close to your Firebase Cloud Firestore, so ideally, the same region you used when you configured it. The Pangea service base Domain and Auth Token can be copied from Secure Audit Log Overview page of the Pangea Console. The Pangea Auth Token should be stored in Google Secret Manager. To do so, click the Create secret button next to its input field after entering the token value.
The Collection path is the name of the Collection you would like the extension to monitor for changes. The Fields to audit is an optional comma-separated list of the fields of each Document in the Collection that should trigger an audit record. To record all updates to the Document, leave this parameter.
Set the Collection path parameter to 'patients' and Fields to audit to 'email'. Doing so will configure the extension to log when the email address field of any document in the patients Collection is updated.
You can use these values for now and reconfigure the extension and update these values later.
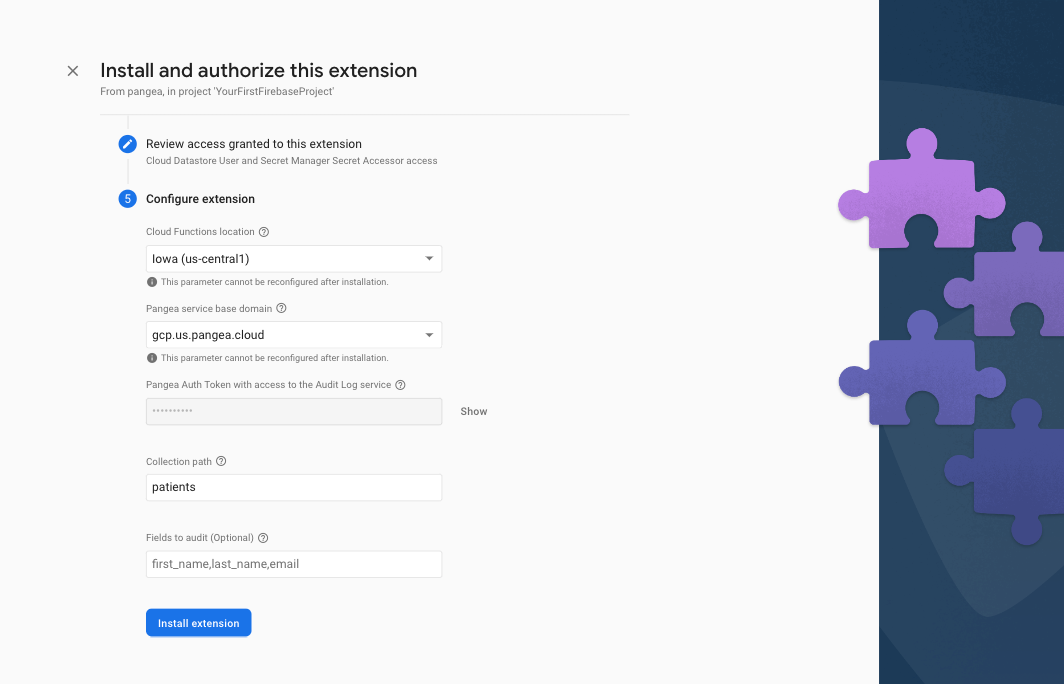
To complete the installation, click the Install extension button.
It may take Firebase 3-5 minutes to deploy your extension. When it completes, you should see it listed under the Extensions section of your Firebase Console .
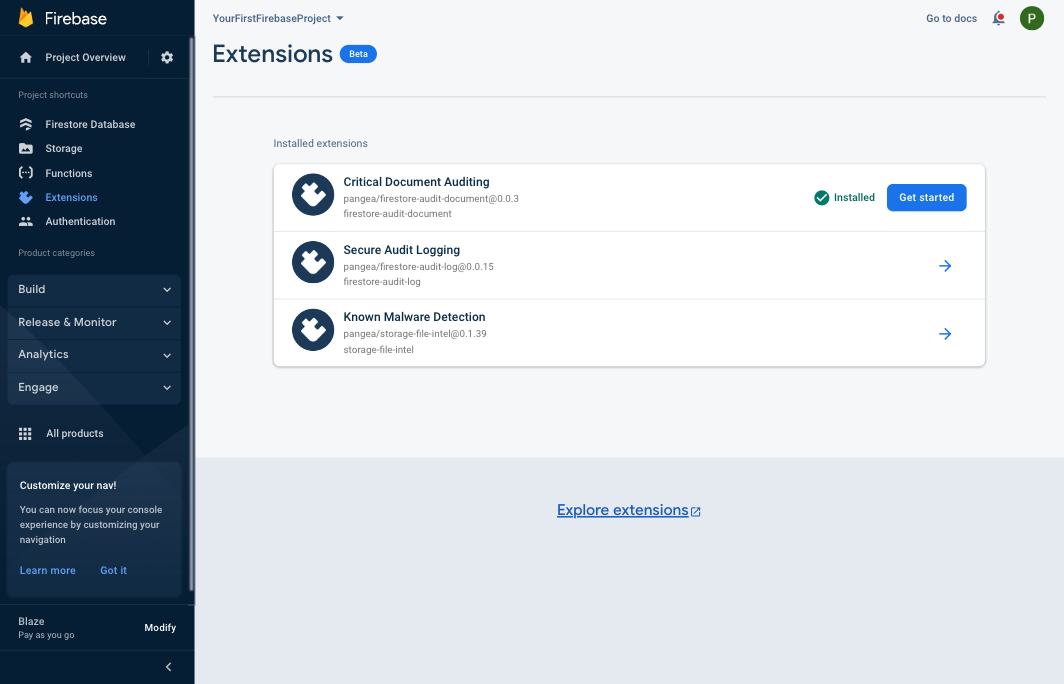
That's it! You now have Secure Audit Log that automatically logs when Firestore Documents are updated.
Test the extension by writing to Firestore
The Critical Document Auditing Extension will be invoked by any write operation to a Document in the Collection it is configured to observe. You can test this functionality using the Firebase Console user interface. To do so, perform the following steps:
Step 1: From Firebase Console , expand the Build category and select Firestore Database from the left-hand menu.
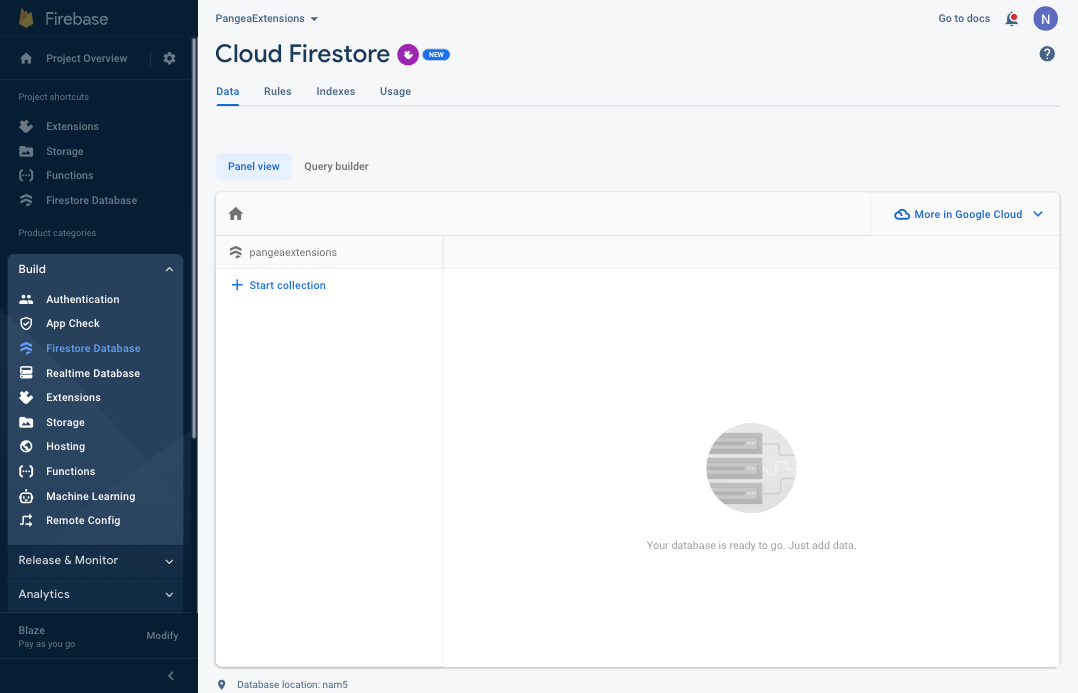
Step 2: Select the Start collection option from the Panel View, if you used the example Collection name when installing the extension, enter 'patients' as the Collection ID and click the Next button.
The collection names are case-sensitive. Use all lowercase letters in the Collection ID field.
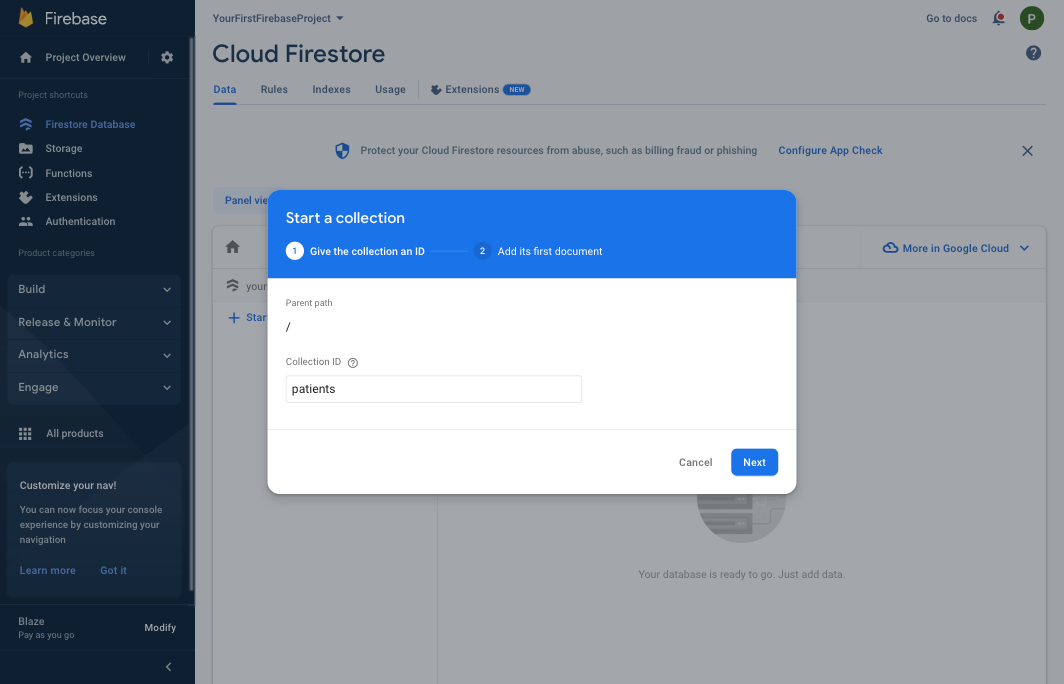
Step 3: To add the Document to the Collection, click the Auto-ID button to generate an ID for the Document; then again, if you used the example Field parameter when you installed the extension, enter 'email' as the Field value, set the Type to string, and enter an email address as the value. Optionally, add a few other fields, first_name and last_name, for example, but note that the extension was only configured to log when the email field is modified.
A document with an auto-generated Document ID and single Field of type map should look similar to this:
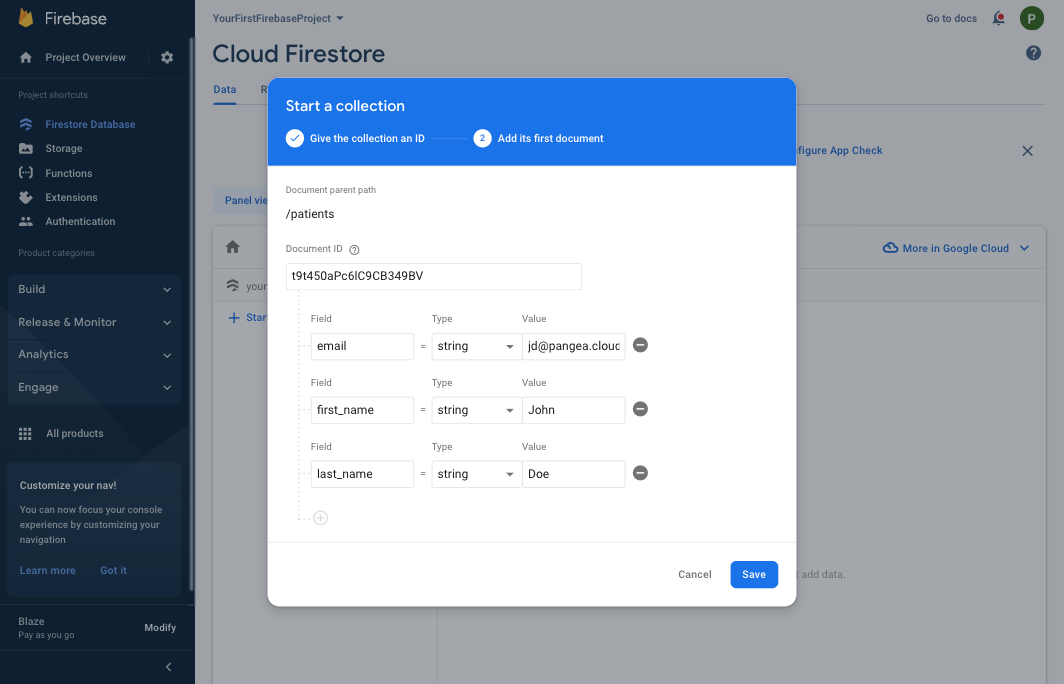
Then, to create the Document and trigger Secure Audit Log Service, click the Save button.
To view the audited event, navigate to the Pangea Console Log Viewer of the Pangea Console. You can expand the log entry by clicking on it to reveal the custom metadata fields. You should see an entry similar to the one below:
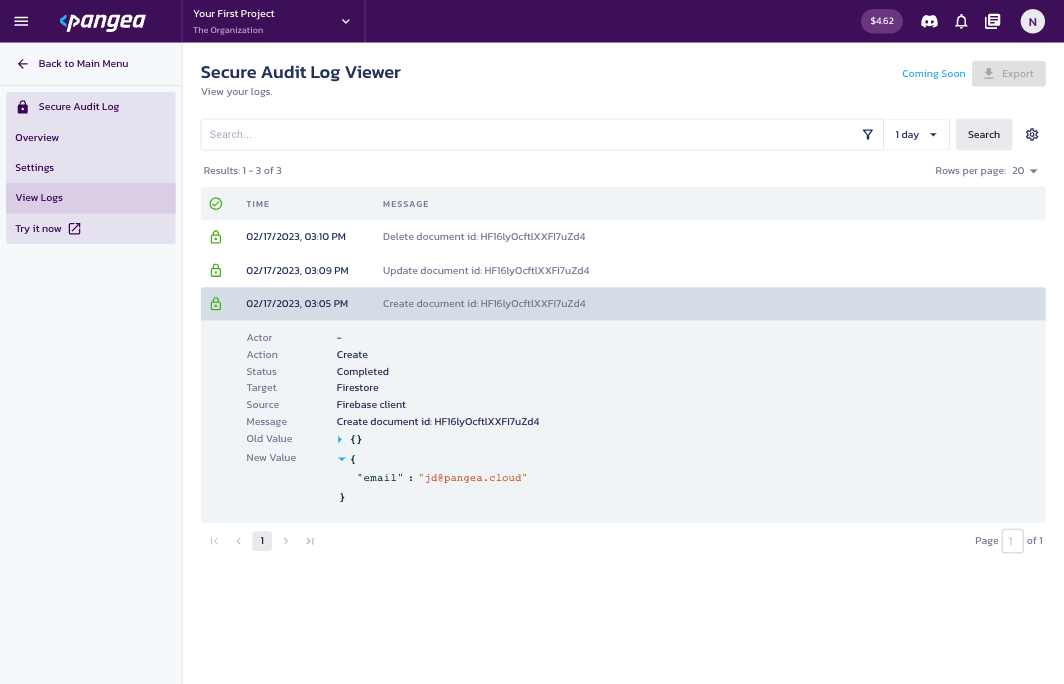
The screenshot above also shows the Update and Delete audit events. To generate those events, update the email value and then delete the Document.