2. Install the Known Malware Detection Extension
Overview
Firebase
Cloud Storage is designed to store and serve user-generated content with ease as you prototype and scale your application. But what happens when a user uploads a malicious file? The Pangea Known Malware Detection Extension can be configured to automatically check files uploaded by users against a database of 25 million known malicious files, and if deemed dangerous, it can be naturalized by packaging it into a password protected gzip container.In this section, you will learn how to install, configure, and test the Extension and leverage the Pangea File Intel Service without writing a single line of code.
Prerequisites
- A free Firebase account with the Pay as you go billing plan enabled.
- A free Pangea account.
- Completed part 1. Configure a Starter Application of this multi-part tutorial OR a Firebase project with the Cloud Functions and Cloud Storage services enabled.
- A Pangea Domain and Access Token with access rights to the File Intel service. To learn how to create an account and configure each service, visit the Getting Started guide.
Install and configure the Extension
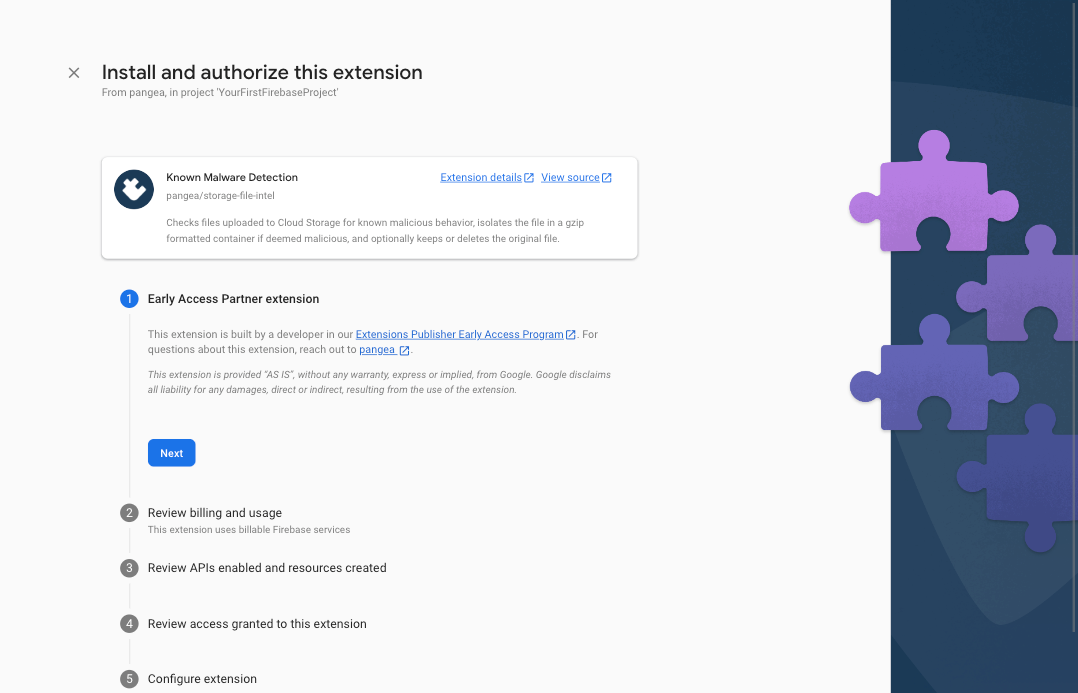
Step 1: Click the Known Malware Detection install link, and select the Firebase project you'd like to deploy the Extension to:
Step 2: Accept the Early Access acknowledgement by clicking the Next button:
Step 3: Review the billing and usage details, and tap the Next button. If you have not done so already, you'll be presented with the option to upgrade your Firebase account to a pay-as-you-go plan, you can do so by clicking the Upgrade project to continue button and following the instructions:
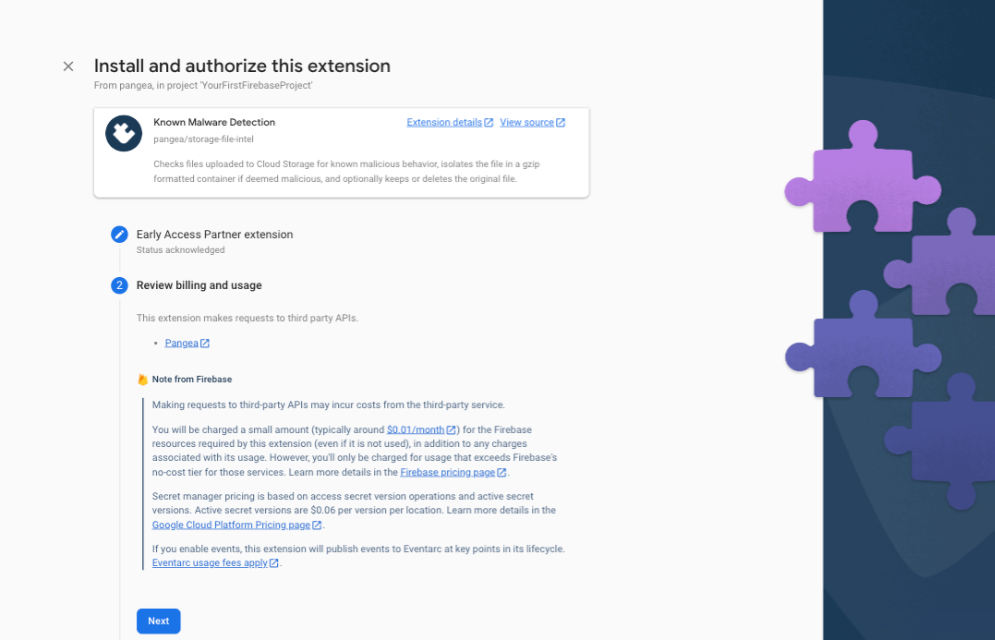
If you upgrade your billing plan, you will be redirected to the Set up your billing profile section of Google Cloud Platform (GCP). After setting up your billing profile, you may need to restart the Extension install by clicking the install and repeating Step 1 and Step 2.
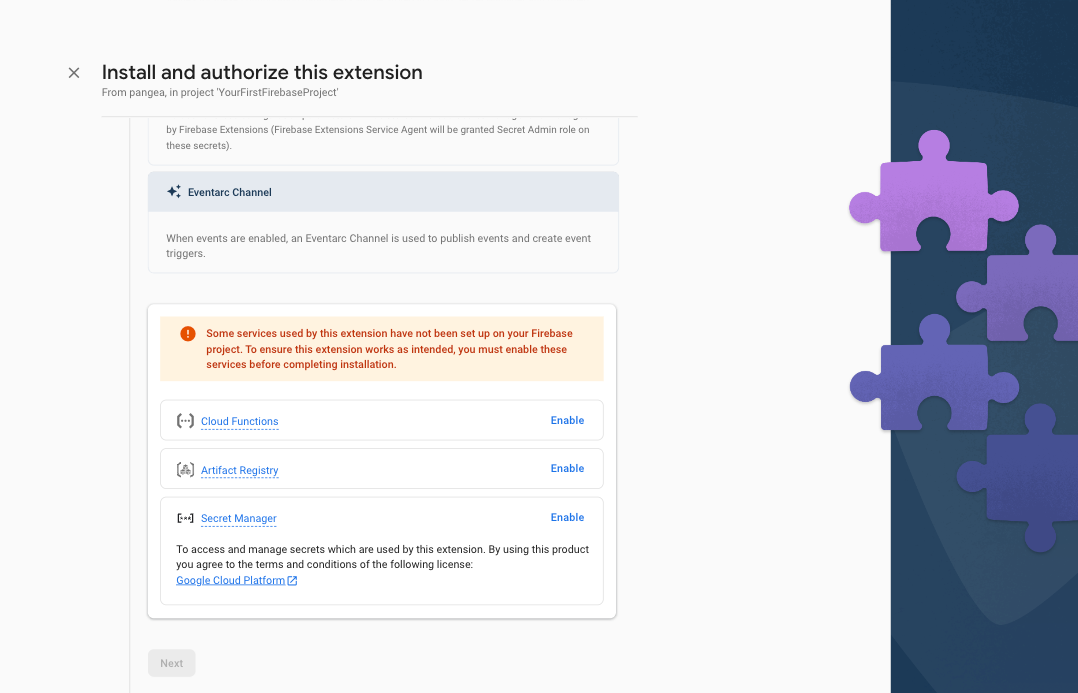
Step 4: Review the APIs and the resources that will be created by this Extension. If any required Firebase services are not yet enabled, tap the Enable button next to each required service and then click the Next button.
Step 5: In the Review access granted to this extension section, grant the extension permission to Storage and Secrets Manager by clicking the Next button.
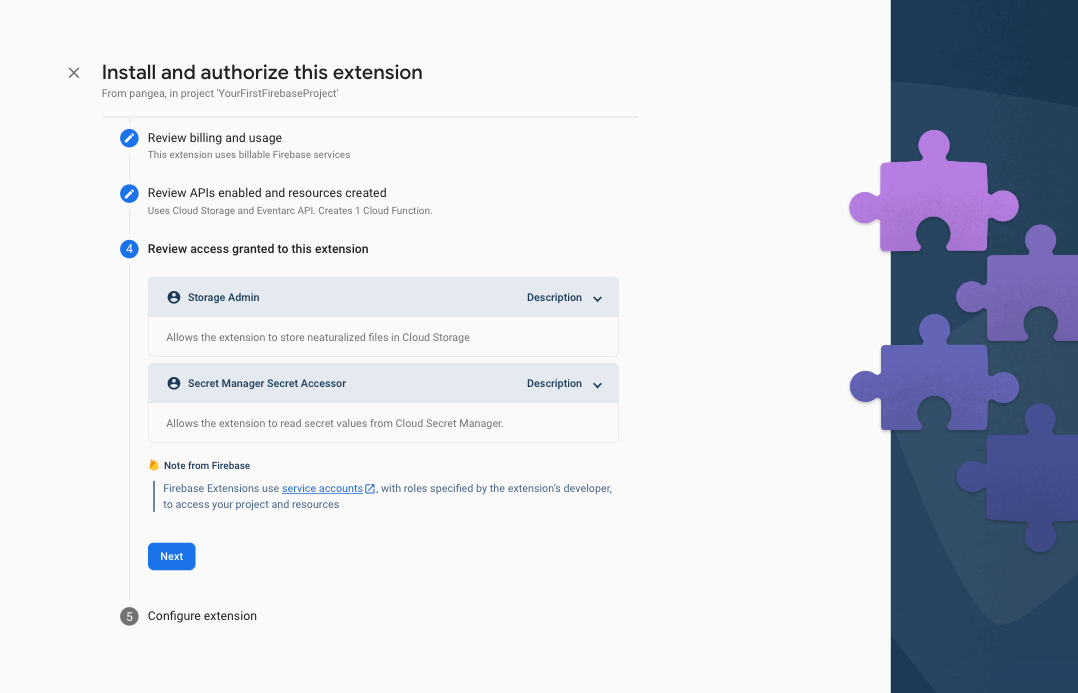
The Storage Admin permission will be used to store gzip formatted files that contain and neutralize malicious files uploaded to your bucket, and the Secret Manager Secret Accessor permission is required to store your Pangea Auth Token, and optional password for any gzip files created.
Step 5: In the final step, Configure extension, of the install process, you'll be asked to provide a few parameters, some of which are optional. The first two are what region you want to deploy the Extension and where your Pangea services are deployed, respectively. The Extension should be deployed as close to your Firebase Cloud Storage, so ideally, the same region you used when you configured it. The Pangea service base Domain and Auth Token can be copied from the Pangea Console > File Intel Overview page. The Pangea Auth Token and optional password to protect the gzip container should be stored in Google Secret Manager. To do so, just click the Create secret button next to each input field after entering their respective value.
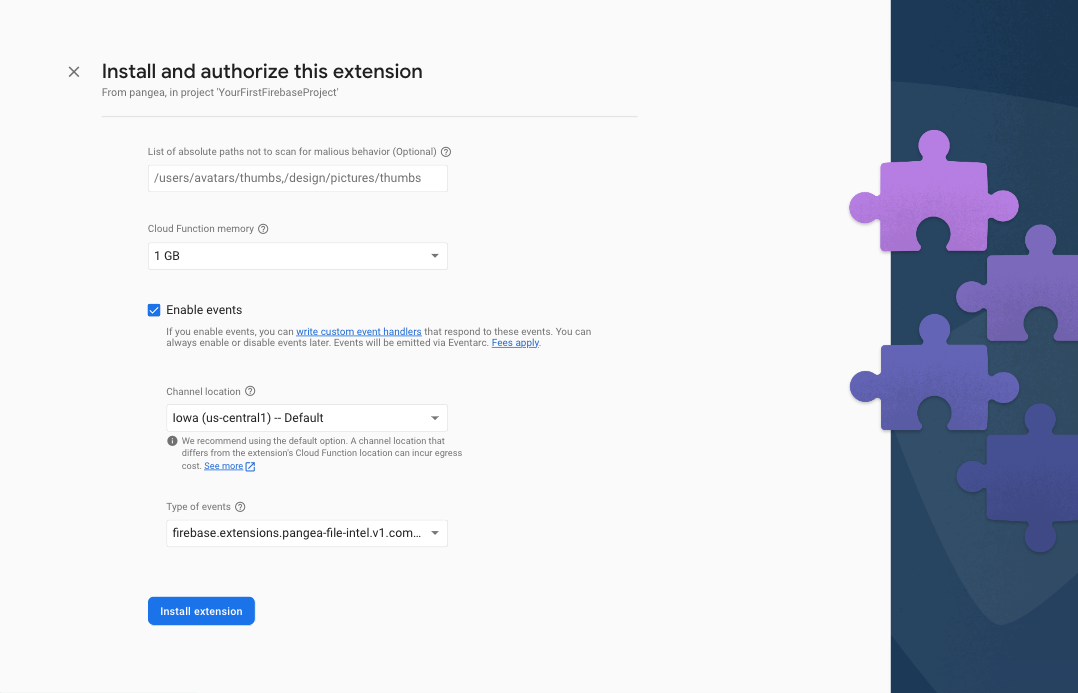
The rest of the parameters are either optional or have default values to dictate which buckets you want to monitor, which paths to include or ignore, and whether to delete or keep a malicious file when it is detected.
You can use the default values for now and reconfigure your Extension later.
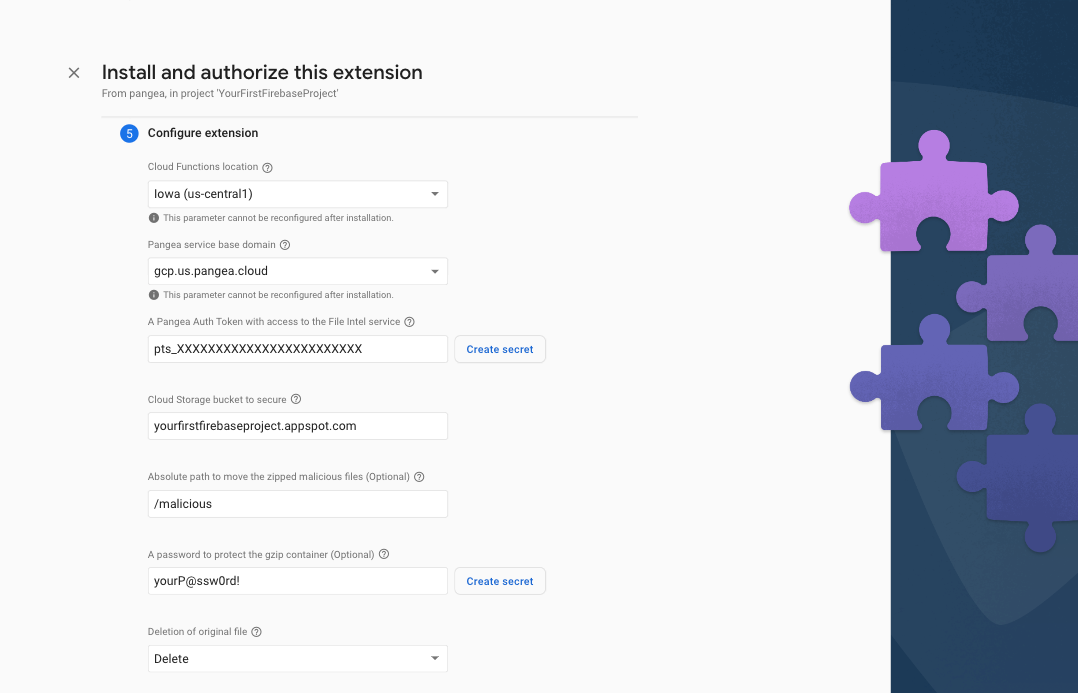
You can also configure how much memory to allocate to your function; neutralizing large files may require more memory.
Check the Enable events box and select the completed event. This will allow your Firebase application to listen to and react when malicious files are uploaded.
In this tutorial's next section, Add Secure Audit Logging, you will configure the Pangea Secure Audit Log Extension to log events emitted from this Known Malware Detection Extension.
To complete the installation, click the Install extension button.
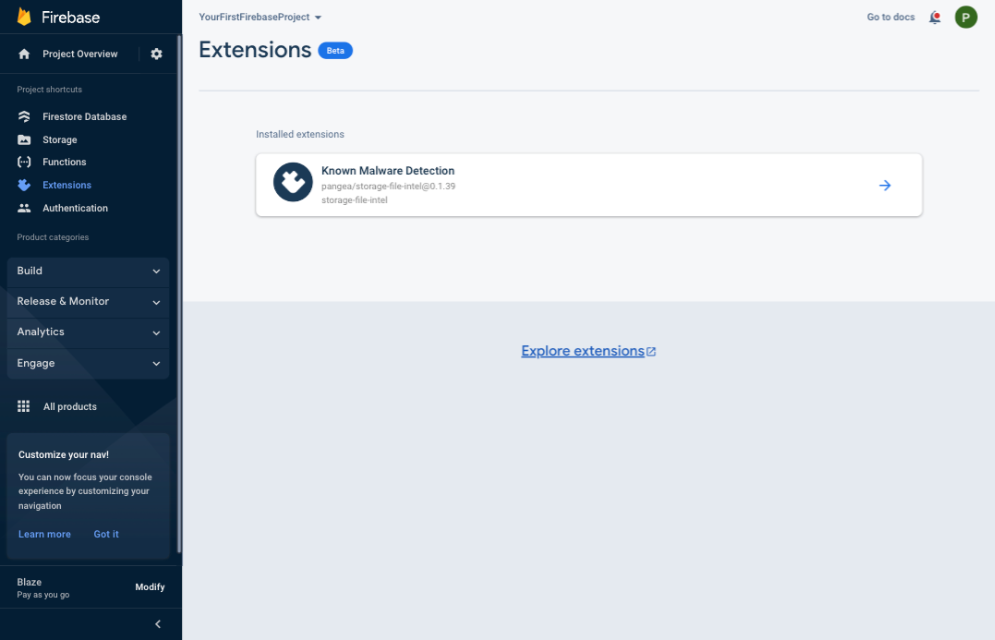
It may take Firebase 3-5 minutes to deploy your Extension. When it completes, you should see it listed under the Extensions section of your Firebase Console .
Test the Extension
Instead of testing the Known Malware Detection Extensions with a real malicious file or virus, you can use a file developed by the European Institute for Computer Antivirus Research (EICAR) known as the EICAR Anti-Virus test file . It was developed to test the response of computer anti-virus (AV) programs. Instead of using real malware, which could cause real damage, this test file allows you to test anti-virus software without having to use a real computer virus. To do so, do the following:
Step 1: To create the EICAR antivirus test file, create a file with this string:
5O!P%@AP[4\PZX54(P^)7CC)7}$EICAR-STANDARD-ANTIVIRUS-TEST-FILE!$H+H*
You can also download the test file directly from: eicar.com
Step 2: Using the Firebase Project Overview left-hand menu, expand the Build section, and select Storage.
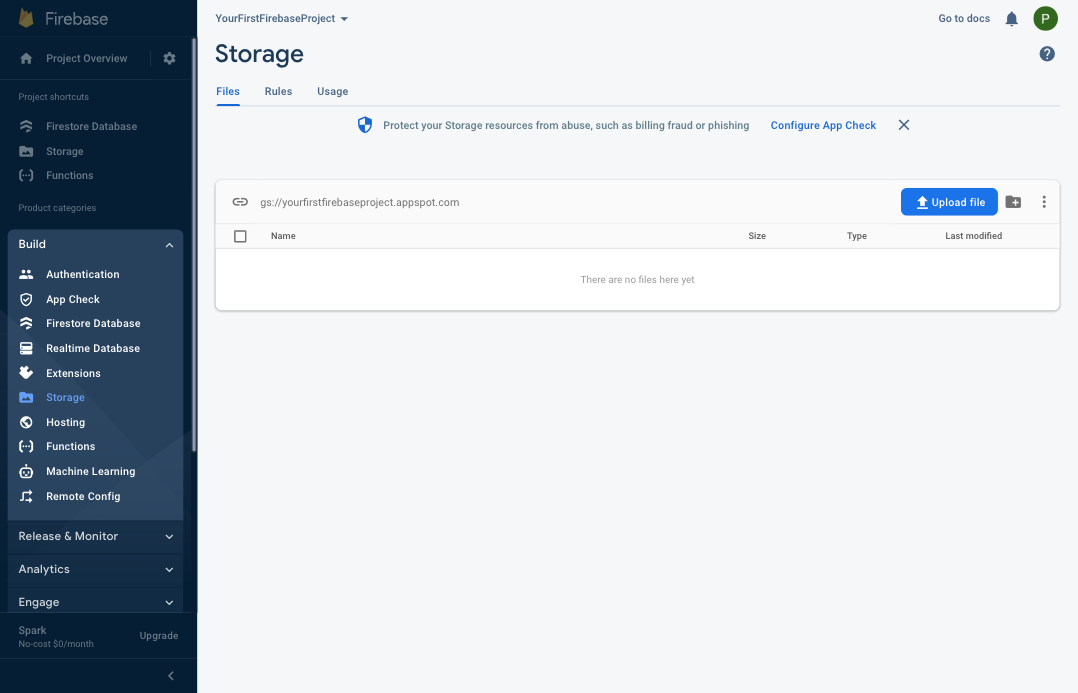
Step 3: Click the Upload file button, and select the eicar-test-file.com file you downloaded in the previous step. After a few seconds, you will notice that the file was moved into a .zip file under the path you configured; we used /malicious as the default. If you also chose the default extension configuration, the complete path will be /malicious/eicar-test-file_com.zip. You can download this file, inspect its contents, or send it to an incident response team for analysis.
You may need to refresh the browser to load the updated paths.

You can also try to upload a non-malicious file and note that the Extension does not process it.