Embargo Lists
Learn about Embargo Lists
Existing international Embargo lists
List Details
Embargo Lists can be viewed by clicking the Embargo Lists menu item in the Embargo service and then clicking a specific list title. Doing so will bring up the following information.
- List Name - The name of any Pangea provided list will use the following naming convention:
\<country\> - \<sanction/embargo/regulation name\>The country will indicate the country or governing body from which the list originates. The sanction name will indicate the name of the regulation, sanction, or embargo to which the list refers. - Description - The description of the list will provide any additional information about the list that may be required to understand its context. If the list name uses an acronym or abbreviation, the description will provide the complete text.
- List Items - Each item in the list will be comprised of the four components:
- Country Code - The two-character ISO code representing the sanctioned country.
- Country Name - The full name of the sanctioned country.
- Restricting Country - The two-character ISO code representing the sanctioned country.
- Annotation - This is a JSON formatted text field that allows for additional information to be provided. In some cases, this may be used to point to specific regulations. For example, in the US - ITAR list, annotations point to the US Code of Federal Relations section and paragraph where the listed country is referenced.
Creating custom Embargo lists
The
Pangea Console supports custom embargo lists. You can create your own list of countries to check against from your application based on your unique use case. For example, if your app wanted to check a specific country due to business regulations, then you can do so using custom embargo lists.
To create a custom list:
- Go to Embargo in the left-hand navigation menu and then click Embargo Lists
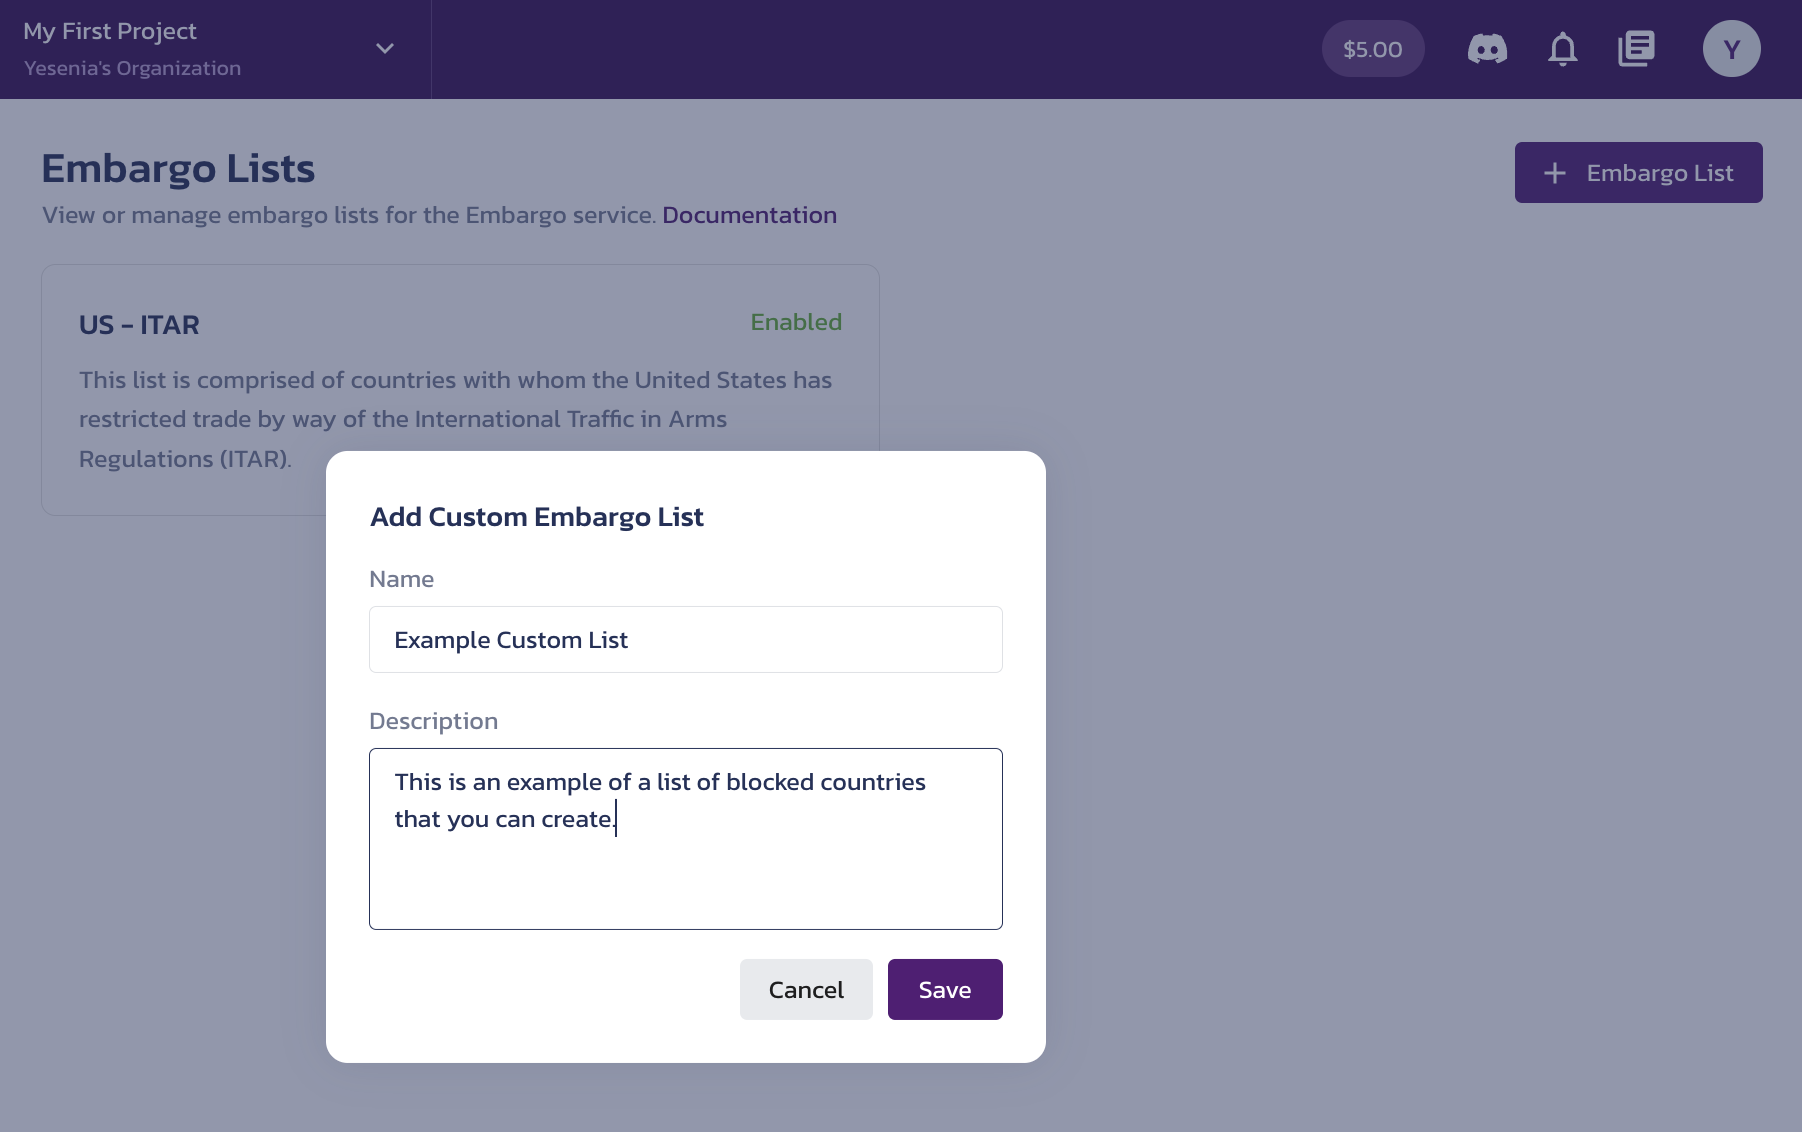
- Click the + Embargo List button to create a list

- An "Add Custom Embargo List" dialog will appear. Enter a Name and Description for your custom list. Once created, the list will appear on the Embargo Lists page.

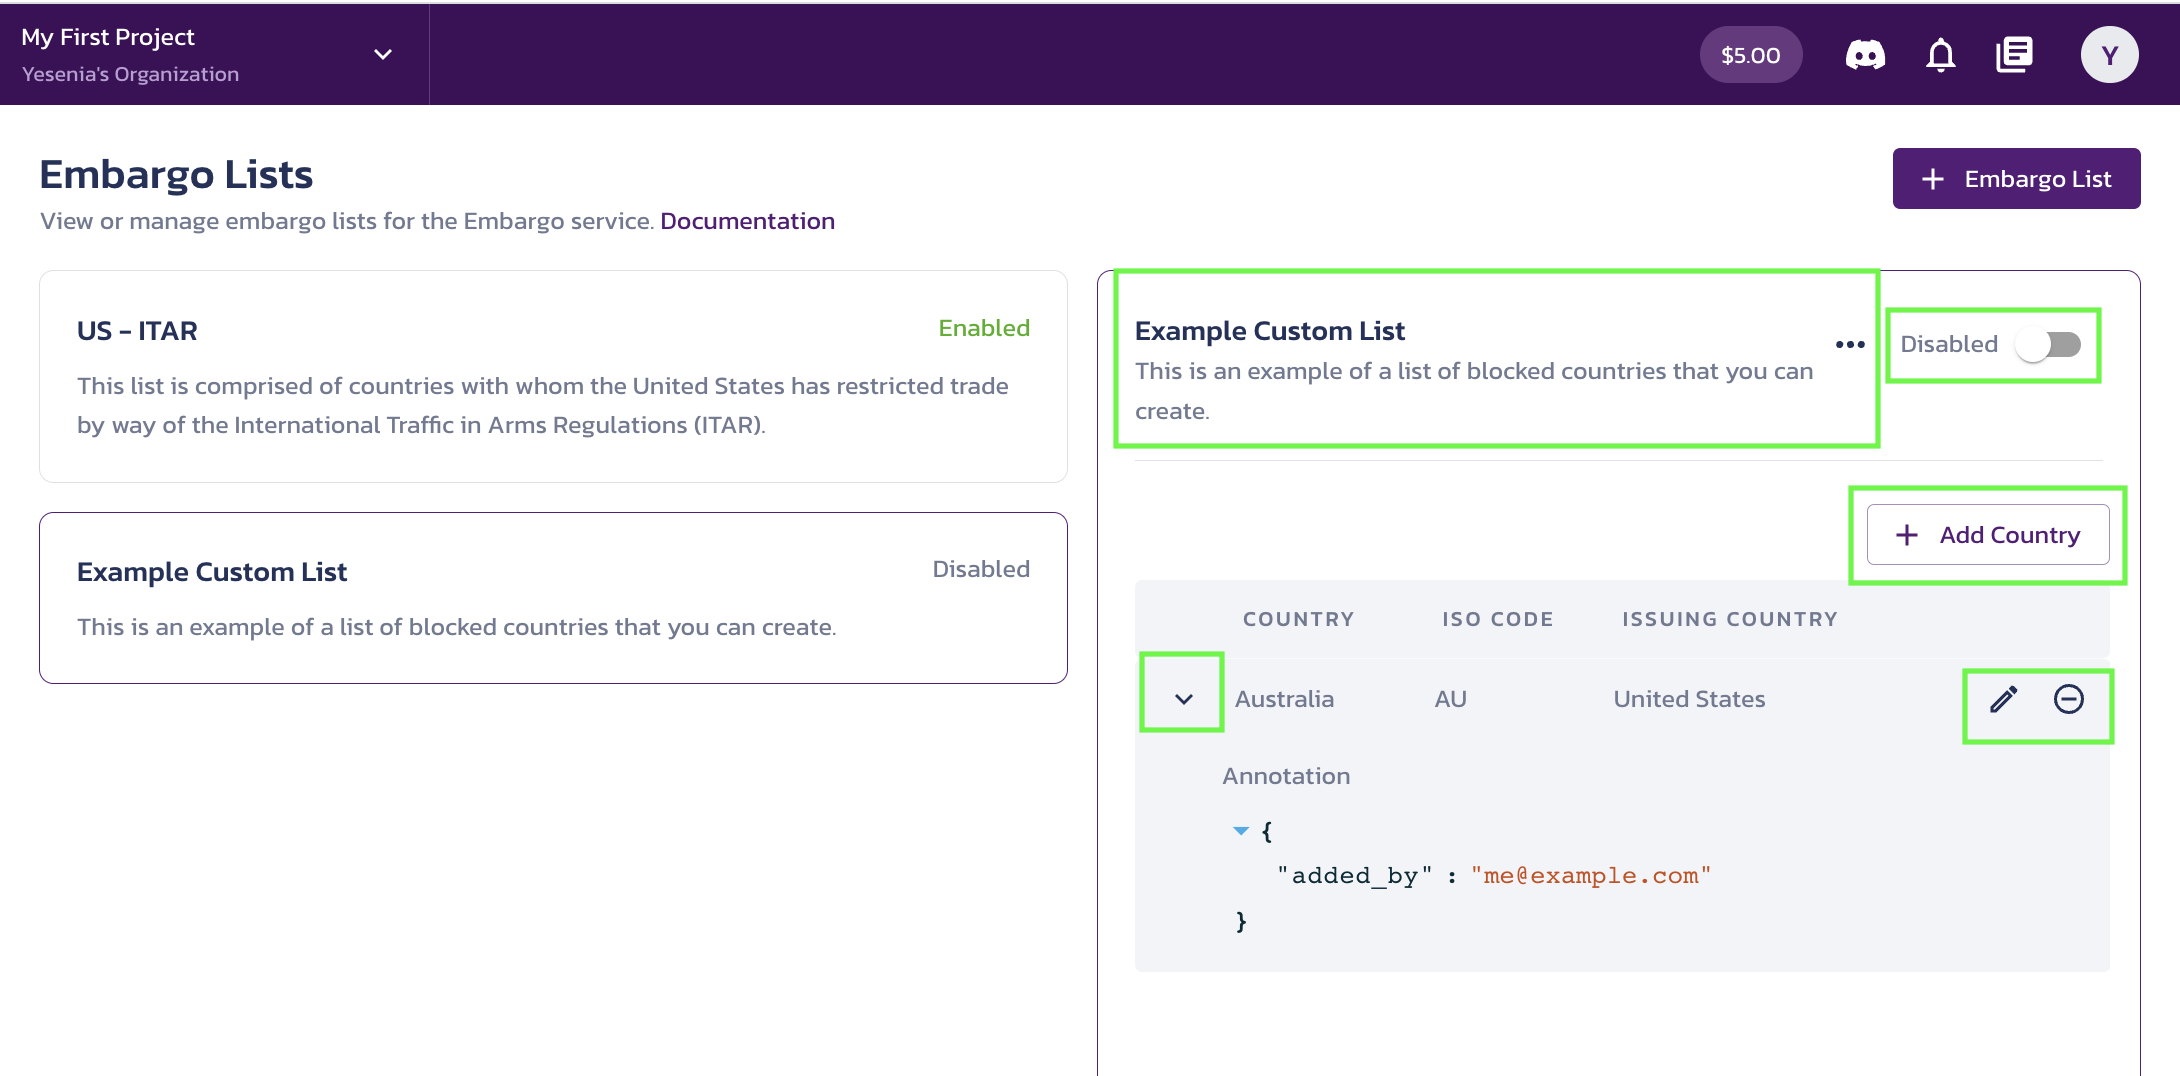
- Click the new custom list. A dialog with various configuration options will appear.
- Enable your custom list: Switch the list from Disabled to Enabled so your app can call the embargo APIs and check these countries against your newly created custom list
- Add a country: Add a country by clicking the + Add Country button. In the dialog that appears, select the country, add an optional issuing country, and include any JSON annotations that you think might be helpful for context. Click the expand icon next to a country to see JSON annotations.
- Edit or delete a country from your list: Click the editing icon (pen) to edit the country details or the delete icon to delete the country from your list.
- Edit or delete a custom list: Click the three dots next to the list name and choose either Edit or Delete.

- Click Save
Was this article helpful?