Inherited Permissions
Introduction
Inherited permissions are designed to manage and enforce permissions hierarchically across resources. They define that permissions assigned to a parent resource are inherited by its child resources, maintaining a consistent and secure permission structure across the system.
There are many use cases where inherited permissions can simplify your authorization process:
-
Healthcare - This is the use case that we use as an example in our Authorization Schema list. Patients can be assigned to rooms, doctors, nurses, units in a hospital, and so on.
Example permissions:
- A hospital facility numerous units (Emergency Room, Intensive Care Unit, etc), and each unit has rooms.
- A patient is assigned to a room and has numerous medical records.
- A nurse is assigned a unit and therefore inherits access to patients and their records through the room assignment.
-
Software Development - In this use case, the personnel working on software projects can change based on their level, oversight, department, etc.
Example permissions:
- A project manager would have permissions on an team, such as Online Payments. The team has projects, such as Mobile Payments and Credit Card Payments. The project manager would inherit permissions on projects within his team.
- Developers working on a specific project would inherit permissions to the repos that are in that project.
- A CTO would have permissions to all teams, and would inherit permissions to all projects and repos.
The example used in this guide is a simple folder/file structure to give an easy-to-follow process. If a user has edit access to the folder that a file is in, the user should also have edit access to the file. In order to simplify the process and to make sure that a user receives the correct access permissions in AuthZ, we created Inherited permissions for resources. We will be using the folder/file access inheritance to show how to implement this feature for your app using the Pangea User Console, but this can also be completed using API calls.
For this example implementation of inherited permissions, we started with a fresh schema with no resource types other than the default user resource type.
Key features
Permission Inheritance: Automatically apply parent resource permissions to child resources.
Granular Control: Assign and manage specific permissions at any level of the hierarchy.
Efficient Management: Simplify permission updates by automatically updating changes down the hierarchy.
Define inheritable permissions
In order to define the inheritable permissions, you need to have parent/child relationships for resource types. The first task then is to define the resource types and the relationships for them.
We will use user, file, and folder resource types in this example and define permissions for the parent. The folder will be the parent resource type, the file will be the child resource type, and user resource type will use the permissions.
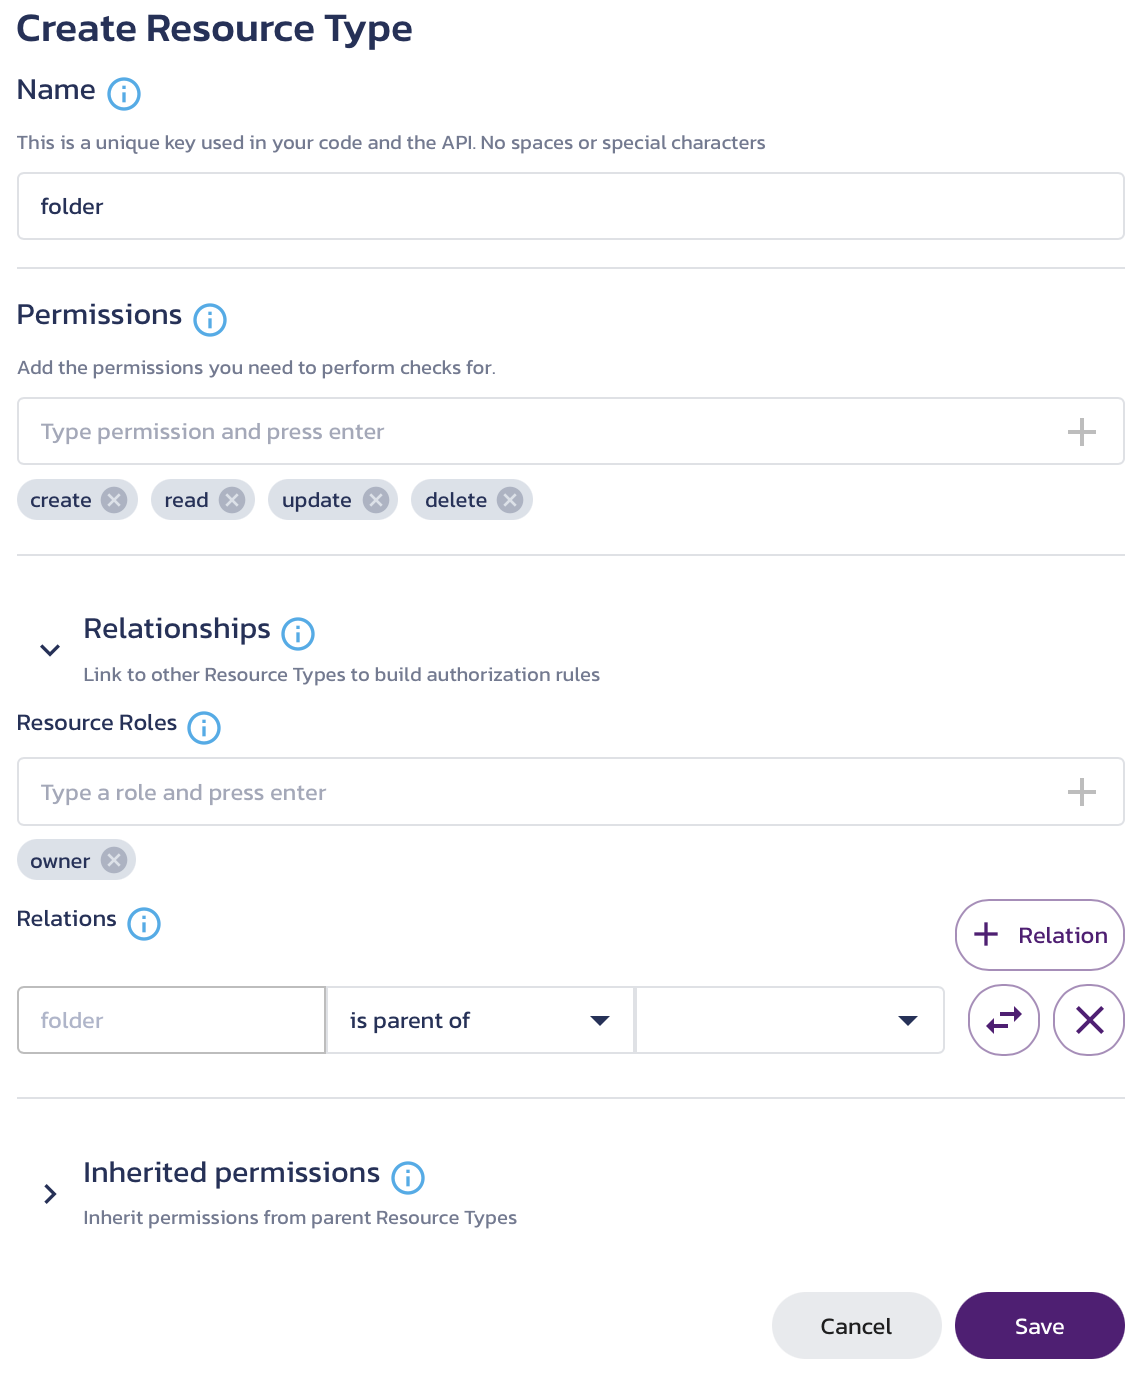
Define the folder resource type
Since user is a pre-defined resource type, we only need to define file and folder resource types. In the Resource Types page of the AuthZ service:
- Click + Resource Type to add a new resource type. If this is your first resource type, the page displays the resource type creation modal automatically.
- In the Create Resource Type modal that displays, type
folderfor the Name. - Permissions is automatically populated with CRUD (Create, Read, Update, and Delete) permissions, which are all that we will need for this exercise, so it can be skipped.
- Click Relationships to expand the category.
- In Resource Roles, type
ownerand click the plus (+) sign to add it to the roles.

- Click Save.
Define the roles and access controls
Now that the folder resource type is defined, we need to define the permissions that each role will have on this resource type. We have created a very simple structure for this example, but you can also define more granular roles and permissions to fit your app's needs.
- Click Roles & Access in the left-hand navigation menu.
- The role "folder owner" displays.
- Since there is a single resource type, only one row displays for Resources: "folder".
- For simplicity, we are going to add a single permission for "folder". Check the read permission in the "folder" row and click Save.

- Now we can create the file resource type and add inherited permissions.
Define the file resource type
- To create the file resource type, click the Resource Types page in the left-hand menu and click + Resource Type on that page.
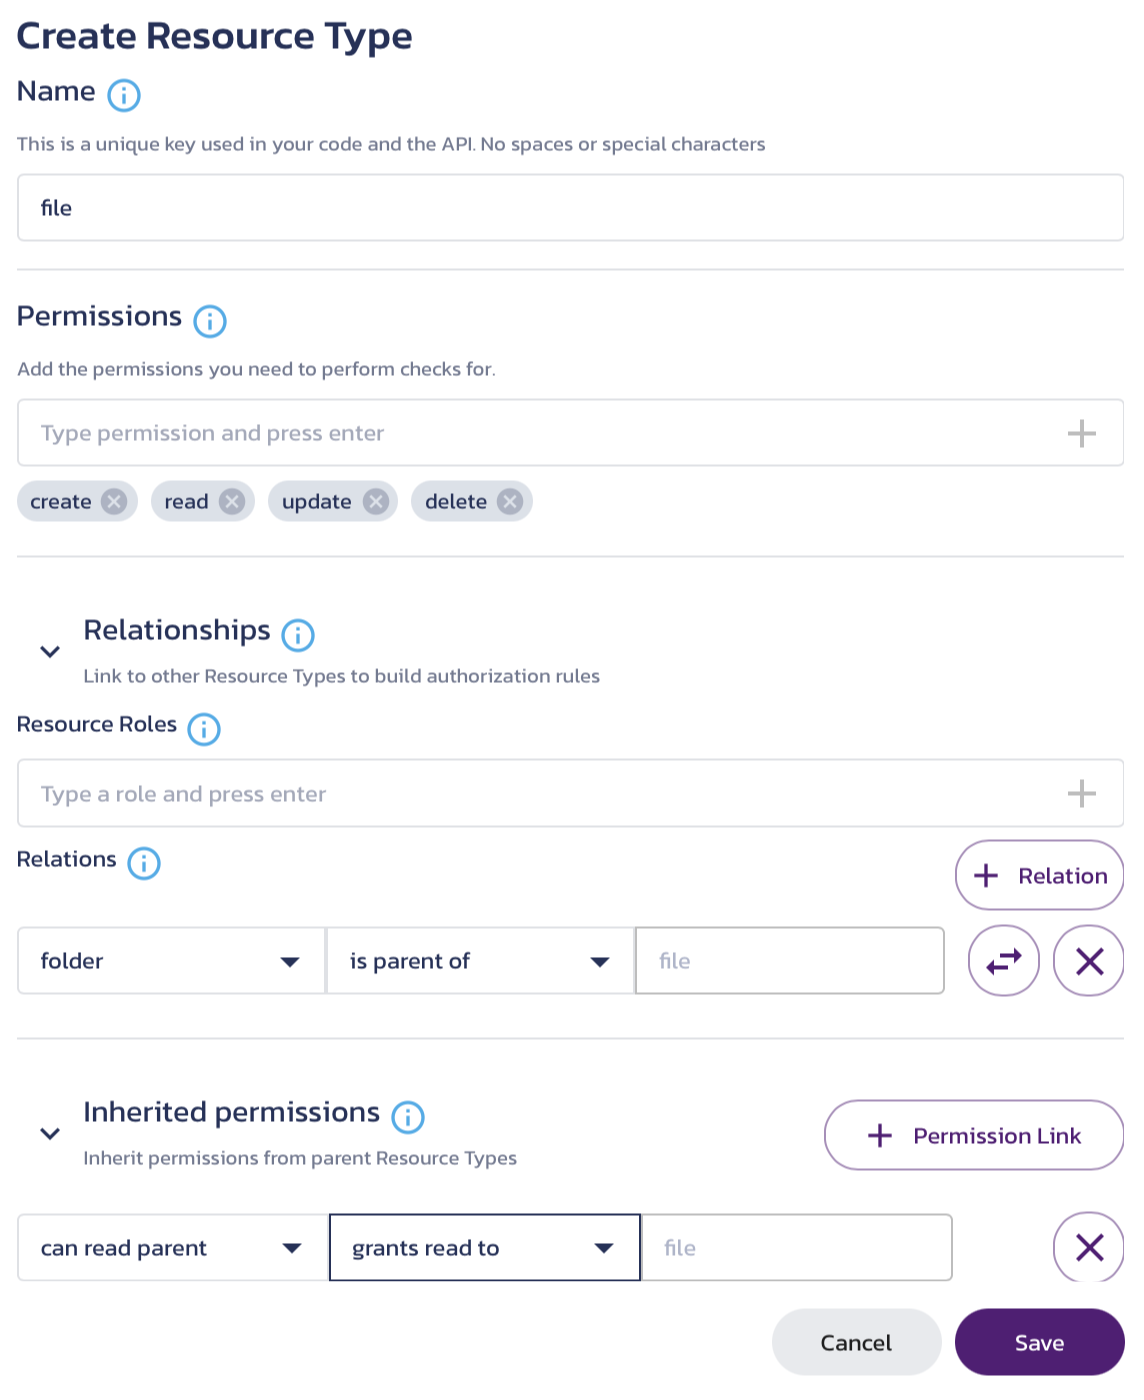
- In the Create Resource Type modal that displays, type
filefor the Name. - Permissions is again automatically populated with CRUD (Create, Read, Update, and Delete) permissions, so it can be skipped.
- Click Relationships to expand the category.
- In Resource Roles, type
ownerand click the plus (+) sign to add it to the roles. - Click + Relation.
- Click the double arrows to swap the
fileresource type position to the second slot. Selectfolderfor the first slot andis parent offor the second slot. This will allow owners of folders to inherit permissions for files that are in their folders. - Next, we will define the inherited permissions. Click
Inherited Permissionsto expand the menu. - Click
+ Permission Linkto add an inherited permission. - In the first slot, select
can read parent. - In the second slot, select
grants read to. - Now, when a user has read access to the parent folder of a file, the user will automatically be given read access to the file as well. Inherited permissions can be created for any of the permissions that you define in
Permissions.
Permissions can be inherited as far into the hierarchy as you want. For example, you can create a folder to be the parent of another folder for as many levels as desired, and inherit permissions all the way down the folder structure.

- Click Save to save the file resource type.
Assign roles and relations
After defining the roles and relations, we need to create individual IDs of the roles and resources. We will then use those roles and relations in the Playground page to verify that they were set up correctly.
-
Click Assigned Roles & Relations in the left-hand navigation menu.
-
A prompt displays for assigning your first role and relation. Create the following statement: user "dad" is a "owner" for folder "photos"
- Select
userfrom the first drop-down menu. - Type
dadfor the user in the second box. - Select
is owner for folderfor the second drop-down menu. - Type
photosfor the last box.
- Select
-
Click + Assign to create the assignment.
-
To create the second assignment, click + Assign in the upper right-hand side of the page.
-
Create the following statement: folder "photos" is a "parent" for file "babypicture"
- Select
folderfrom the first drop-down menu. - Type
photosfor the user in the second box. - Select
is parent for filefor the second drop-down menu. - Type
babypicturefor the last box.
- Select
-
Click Save to save the assignment.
Now we can verify that everything is set up correctly and that permissions have been inherited in the Playground page.
Verify permissions were inherited
After we define the roles, relationships, and created IDs, we can use the IDs in the Playground page to test that everything works as we intended.
- Click Playground in the left-hand navigation menu.
- Type the permission check in the textbox provided:
user:dad read file:babypicture. - Click Check.
- If everything was defined correctly, the check should say "Permission Allowed". Even though "dad" was not directly provided access to the "babypicture" file, "dad" inherited
readaccess to "babypicture" through the relationship with the parent resource: the "photos" folder. - Now we should verify that "dad" only has
readaccess. Type the permission check in the textbox provided:user:dad delete file:babypictureand click Check. - The check should say "Permission Denied".
Congratulations, you have created your first inherited permission! If you want to dive deeper in understanding, the next step of this guide is to create a little more complexity to the inherited permissions.
Add complex inherited permissions
The next step in creating inherited permissions is to define more depth to the inheritance. One example of this is folder structure. Many organizations have files that are nested several folders deep, and want to make sure that users are only able to view certain files and folders. This is where inherited permissions saves the most time.
For our example, let's imagine that the family has backup copies of personal documents (such as social security information, tax returns, tax documentation, medical information, will, deeds, etc.). The parents need to have access to all of this information, but do not want the kids to be able to access it. However, they do want the kids to be able to access their own records so that they can use them to fill out online government forms, file for taxes, etc.
This can be set up with the following steps.
- In Resource Types, click the edit button beside folder.
- Click + Relation to add another relationship.
- Create the following statement:
folder is a parent of folderand then click Save. We need to save it before we can set up inherited permissions. - Next, we need to define inherited permissions. Click the edit button beside folder* again.
- Click Inherited permissions to expand the section, and then click + Permission Link.
- Create the following statement:
can read parent grants read to folder. - Click Save.
- Click Assigned Roles & Relations in the left-hand menu. Here, we are going to define several folders and another user.
You will need to add the following relationships by creating the following statements:
- folder
familyis a parent for folderphotos - folder
familyis a parent for foldergov_docs - folder
gov_docsis a parent for folderbrother_gov_docs - user
dadis a owner for folderfamily - user
brotheris a owner for folderbrother_gov_docs
We will also delete "user dad is a owner for folder family" to show file permission inheritance. Click the - button and confirm that you want to delete it.
The above statements should give dad and brother permissions to brother_gov_docs, but only dad permissions to gov_docs.
Test the inherited permissions
Now we should check the permissions to make sure everything is set up and works as we designed it in the Playground page.
- Click Playground in the left-hand navigation menu.
- Let's check if the dad user can read the brother_gov_docs folder. Create the following statement:
user:dad read folder:brother_gov_docs
- Click Check to check the permissions. It should say "Permission Allowed".
Next, we should check if the brother user can view his brother_gov_docs folder.
- Create the following statement:
user:bother read folder:brother_gov_docs
- Click Check to check the permissions. It should also say "Permission Allowed".
- Now we should create a statement that shouldn't be allowed to make sure only the proper permissions are being inherited. Create the following statement:
user:bother read folder:gov_docs
- The result should say "Permission Denied".
Because the brother user was given permissions to his own brother_gov_docs folder, but not any parent folders, he was unable to read the gov_docs folder. However, the dad user was able to read all of them because of his relationship with the parent folder family.
- Now let's make sure that
dadinherits permission on files inside the folders. Create the following statement:
user:dad read file:babypicture
- Click Check to check the permissions. It should also say "Permission Allowed".
Was this article helpful?