Getting Started
Learn how to enable AuthN and integrate it into your application
Enable AuthN and create a token
Before you can start using AuthN, you need to enable it. When you enable the AuthN service, you will also create a default token that you can use with AuthN APIs.
If you haven't enabled AuthN when you created your Pangea project, do so by following these steps:
- Click AuthN on the left-hand navigation sidebar in the Pangea User Console . A dialog with details about the service will appear. Click Next.
- In the Create a token dialog you can accept defaults and click Next. You also have the following options:
- (Recommended) Save the AuthN token in Vault, which will give an option to retrieve the token using Vault APIs. If Vault is not enabled, click Enable Vault, and a modal displays describing Vault features. Click Done to close the modal and return to the AuthN modal.
- Provide a token name to make it easier to recognize in your Pangea project token list.
- Specify an expiration date.
- Grant access to other services with the AuthN token, if you plan to use these services and AuthN at the same time.
- Create a new token or extend an existing one for use with AuthN.
- In the Getting started dialog, accept the defaults or make your selection of authentication methods to use in your Log in / Sign up Flow. Click Done.
- In the next dialog, you can create a user by sending an example request to the AuthN APIs. Click Send to try it out.
- Click Finish to complete the wizard. This should take you to the AuthN Overview page.
Test the service
From the AuthN page, click Explore the API link in the left-hand navigation bar. Accessing the interactive AuthN API Reference from the Pangea User Console automatically authorizes the requests with the default AuthN service token in the current Pangea project, and allows you to easily test the API endpoints and see what they return.
Configure the authentication experience for your users
For non-production environments, Pangea recommends you use the Developer Environment Settings to get started with AuthN.
Find additional details on setting up AuthN in other CONFIGURATION topics.
Customize your hosted pages with your brand visuals
On the AuthN Overview page, go to Customization in the left-hand navigation menu and play around with different styles so your hosted pages match your app’s look and feel. For more details, check out Branding & Customization.
Configure your app for communication with AuthN APIs
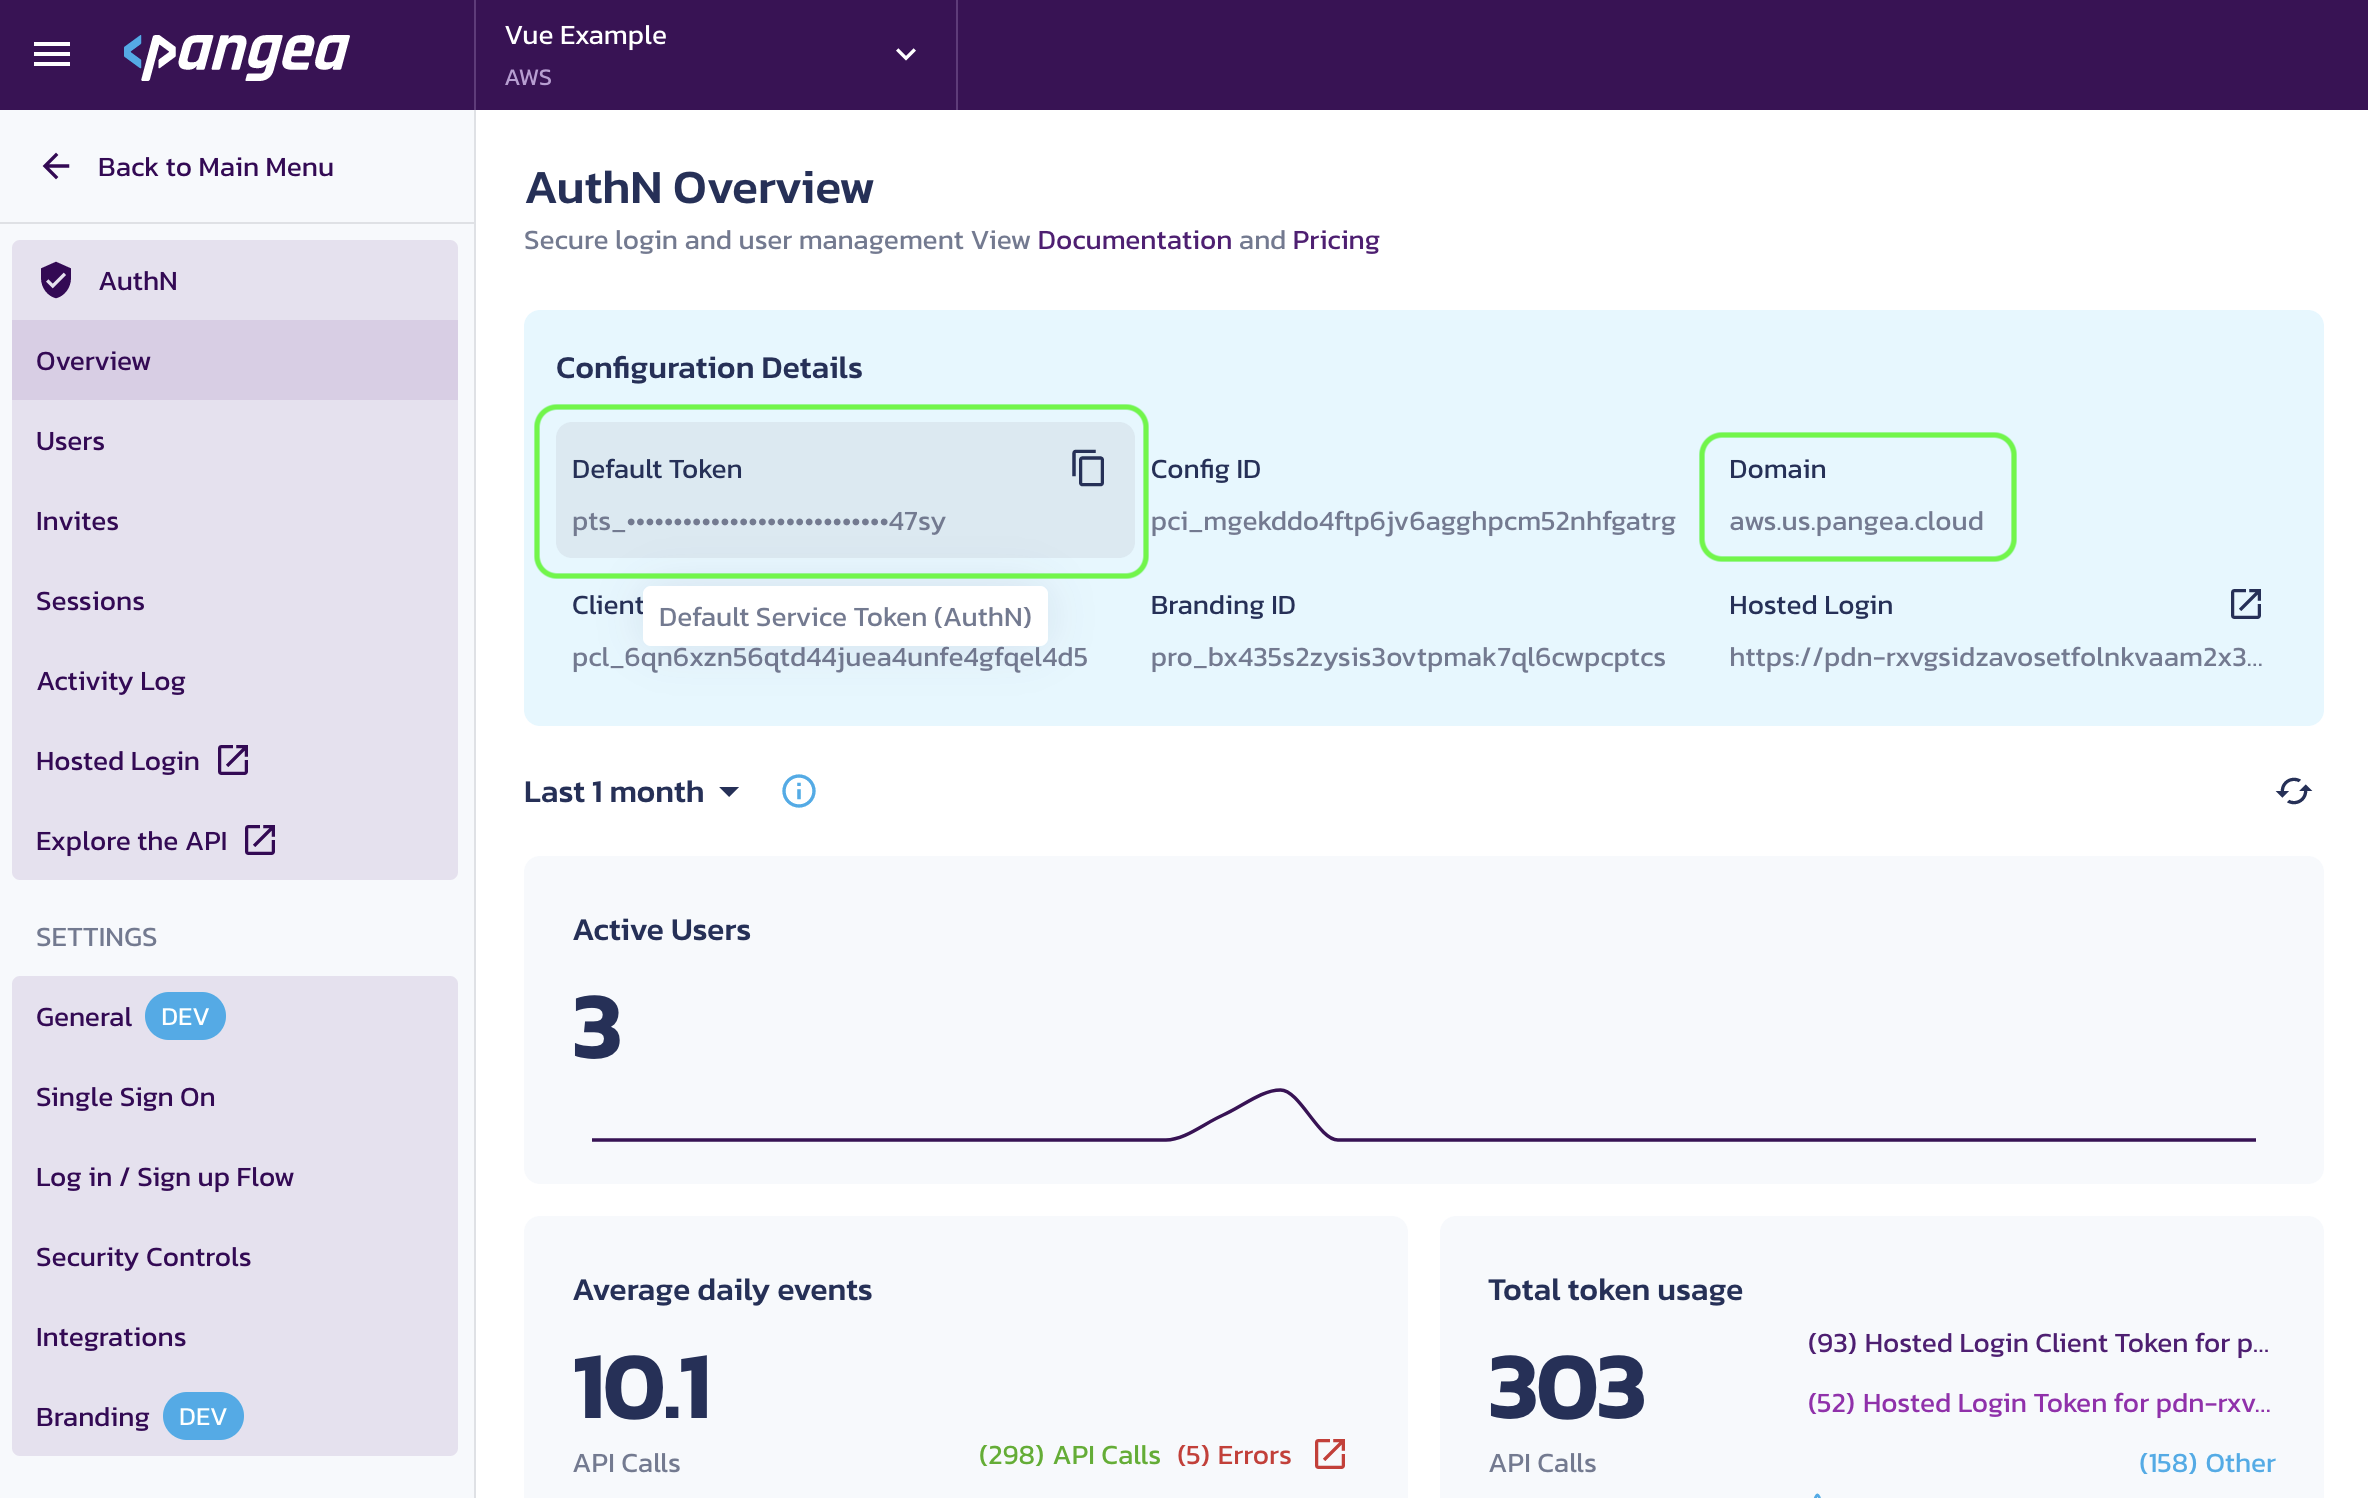
For your app to communicate with the AuthN APIs, it needs to have access to the following settings:
- AuthN service token
- AuthN service domain
These values are created when you enable AuthN and can be found on the AuthN Overview page in the Pangea User Console.

AuthN Overview page in the Pangea User Console
You can provide the token and the domain values to your application via environment variables:
export PANGEA_DOMAIN="<domain>"
export PANGEA_AUTHN_TOKEN="<token>"
Add login to your application
Use hosted pages
Use the Pangea Hosted Login page, which you can style with your brand and use with your domain to seamlessly integrate into your application.
- Once you configure the authentication experience for your users, you can start using the Pangea-hosted login page associated with your Pangea project.
- You can add a login to your app by providing a link to the Pangea-hosted login page and handling redirects from it.
- When a user attempts to sign in to your application using the hosted login link, Pangea will authenticate them and redirect them to your app with a confirmation code.
- Your app will use the code to get the user profile and session tokens using the AuthN APIs.
Embed AuthN directly into your app
Perform a native, custom integration by using the AuthN API endpoints.
Once you configure the AuthN service in your Pangea project, you can use the AuthN flow APIs or one of the Pangea SDKs to build your custom authentication flow.
Choose one of these options based on the comparison provided in the Integration Options doc.
Was this article helpful?