Integrations
Manage your configuration settings for integrations
Captcha Settings
Configure the Captcha API settings to be used on your custom domain.
- Click Captcha Settings. This opens a menu for configuring the Captcha settings.
- Click on a Captcha provider. This will open a new website for you to enable and configure your account to use the selected provider.
- Type the username of your email provider in the Username field.
- After completing the Captcha setup on the provider, you will be given a Site Key. Type the Site Key into the provided field.
- Click Store Site Secret. A dialog displays to create a new secret in the Pangea Vault.
- Click Save to save the captcha settings.
- Captcha Settings is automatically enabled and you can use captchas to verify users on your custom domain.
Email SMTP Settings
Configure the Email SMTP Settings to be able to send emails from your custom domain.
For some providers such as Gmail and Outlook, you may need to create an app password for authentication. If so, we have provided the setup steps below.
-
Click Email SMTP Settings. This opens a menu for configuring the SMTP settings.
-
Select your email provider. If your email provider is not listed, select Other Providers.
- If you selected one of the listed providers, the server and port number are filled in automatically.
- If you selected Other Providers, you will be required to type the server and port settings manually.
-
Type the username of your email provider in the Username field.
-
Click Store SMTP Password. A dialog displays to create a new secret in the Pangea Vault.
-
Click Save to save the SMTP settings. You can now send emails from your custom domain.
App passwords for SMTP providers
In order to enable some providers (e.g., Gmail, Outlook, etc.) for SMTP with your application, you will first need to create a dedicated app password instead of attempting to authenticate with regular user credentials, which can cause errors. While creating app passwords requires some configuration, the following steps are a straightforward method of ensuring the integration between Pangea and your mail provider will function smoothly, regardless of the user account.
App password - Google/Gmail
- Sign into Google.
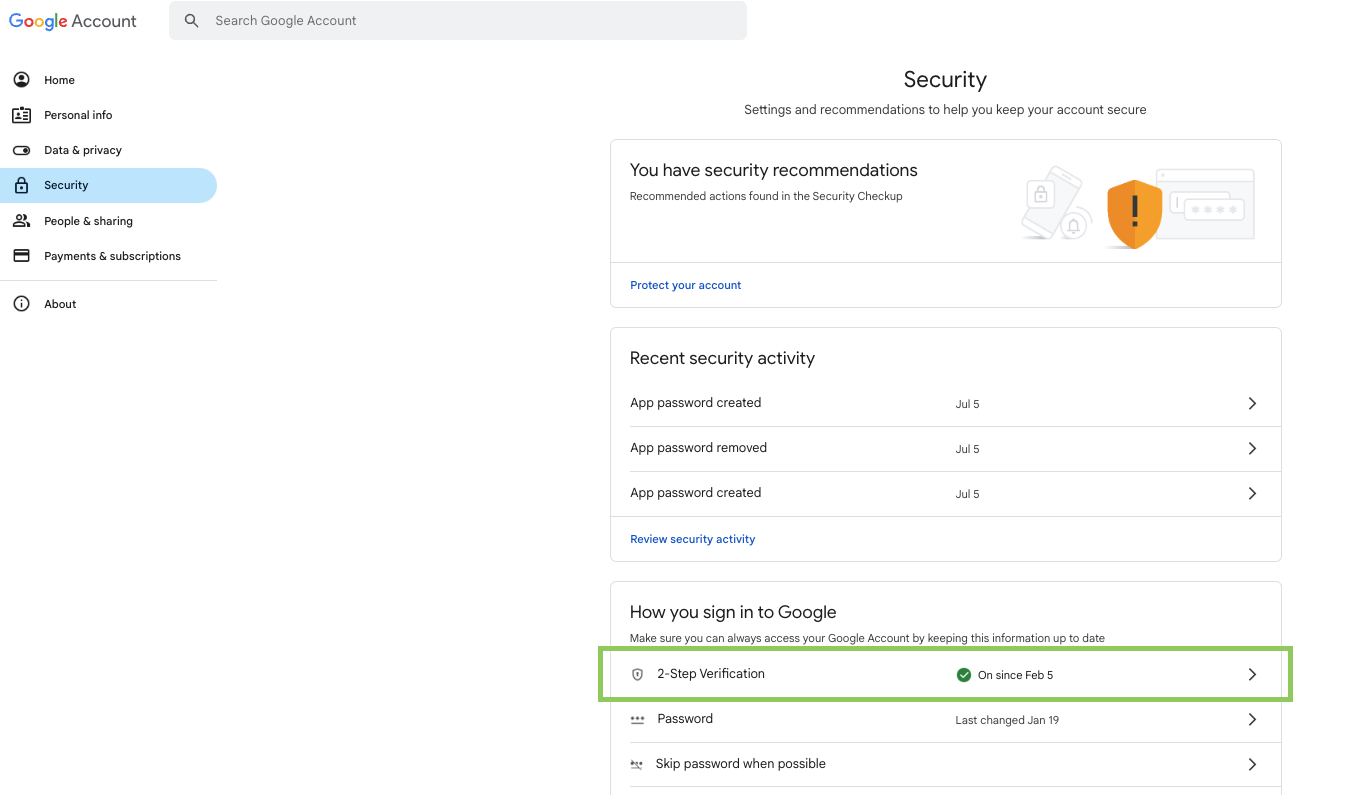
- From any Google page, select your user icon in the top right corner and select “Manage your Google Account”.
- Click the Security tab on the left.
- Scroll to the “How you sign into Google” section and verify that 2-Step Verification is enabled. If enabled, it will have a green checkmark icon and say "On since [date enabled]". If not enabled, click the 2-Step Verification button and follow the steps on the next page to enable it as this is required for SMTP setup. For more information on the subject or for help with enabled 2-step Verification, visit the relevant Google help page . Once enabled, click the 2-Step Verification button.

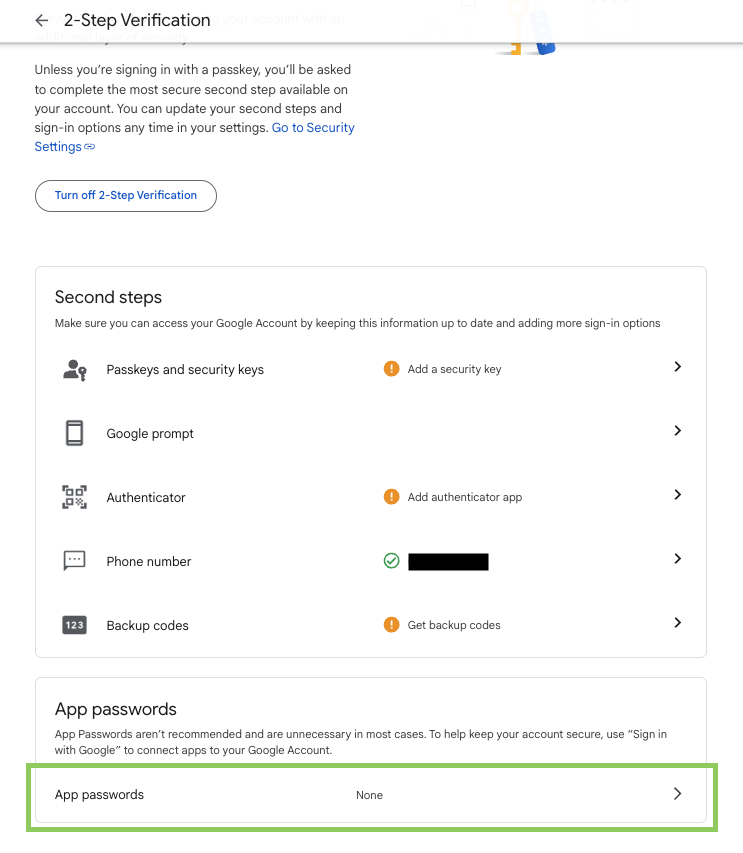
- At the bottom of the 2-Step Verification page, locate and click on the arrow to the right of “App passwords”.

- In the input box for creating a new App Password, type Pangea and select the Create button.
- A pop-up will appear with an automatically-generated password. Copy this for future use with Pangea to authenticate your Google/Gmail credentials.
For further assistance or issues with setting up app passwords, be sure to explore the topic in
Google's documentation on two-step verification.
App password - Microsoft Outlook/Office 365
- Sign into your Microsoft account.
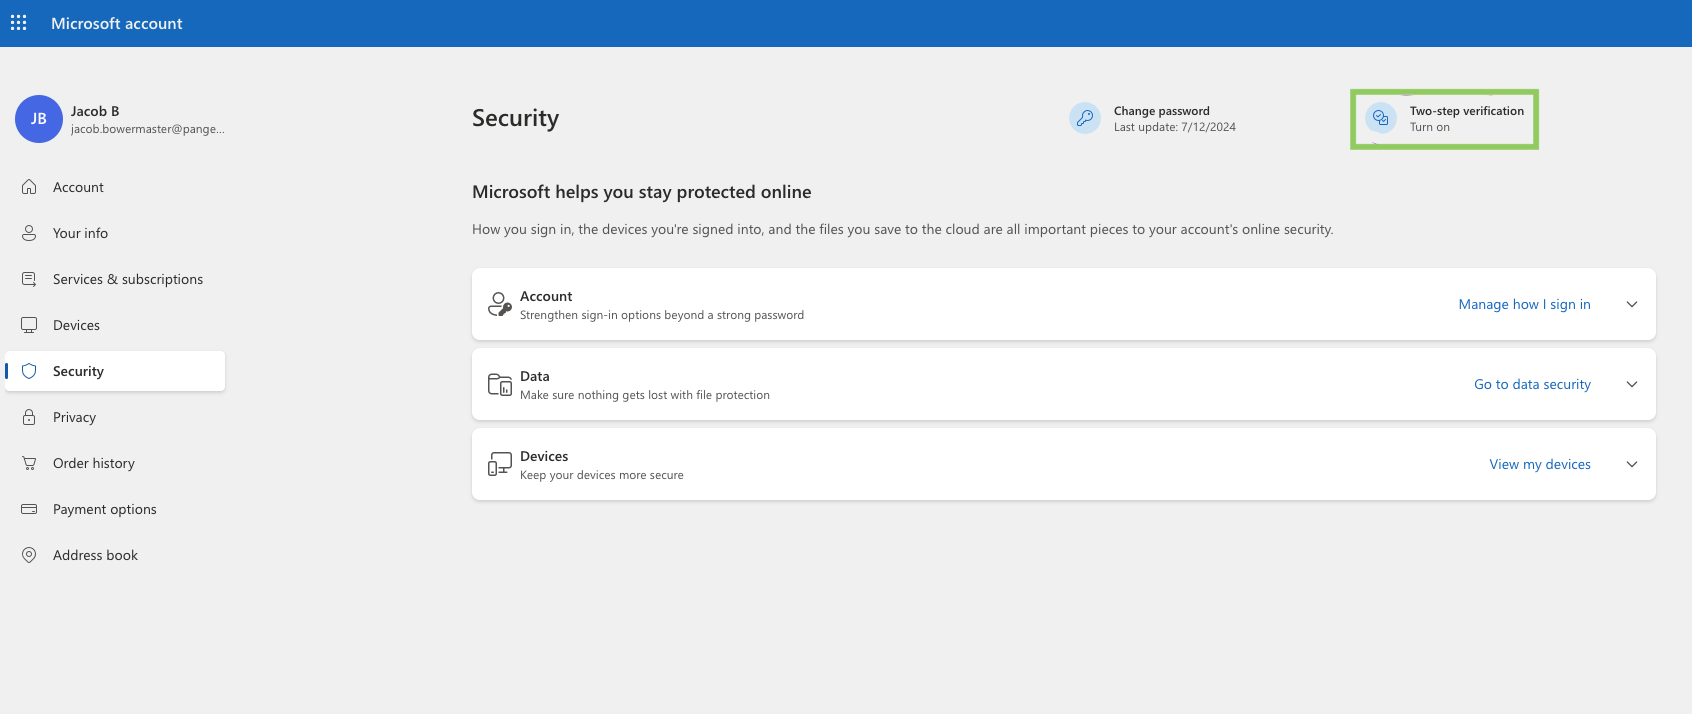
- Navigate to your Advanced Security settings . by either following the link or navigating from within your Microsoft dashboard to the Security tab at the top, then clicking Advanced security options.
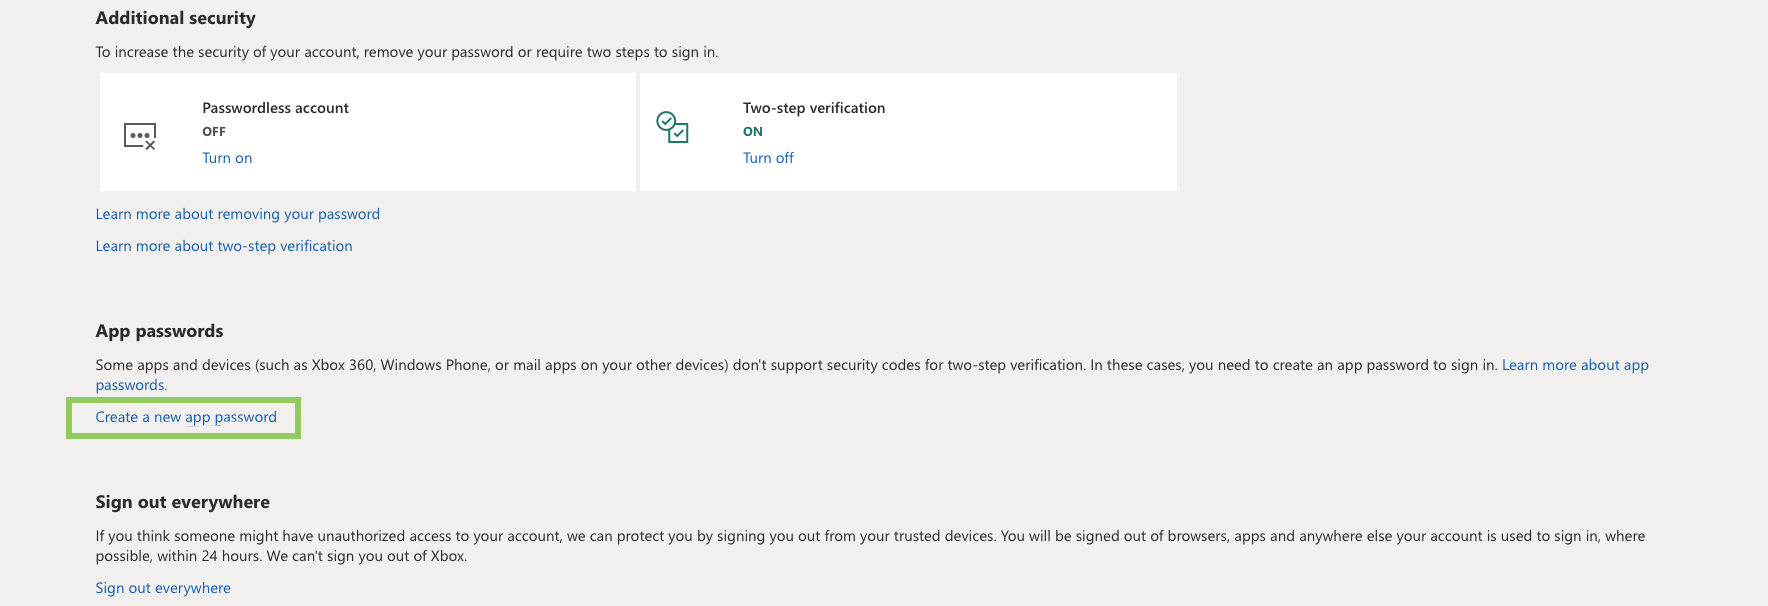
- Scroll to the Additional Security section and check if Two-step verification is On.

- If it is currently off, click the Turn on button and follow the prompts to verify your identity with your email address.
- This is required to set up an app password. For more information, please visit Microsoft's documentation on two-step verification .
- Once Two-step verification is on for your account, navigate to the App passwords section beneath Additional security, and click the Create a new app password button.

- A new page will appear with an automatically-generated password. Copy this for future use with Pangea to authenticate your Microsoft credentials.
For further assistance or issues with setting up app passwords, be sure to explore the topic in Microsoft’s help center .
Store AuthN secrets in Pangea Vault
Vault is Pangea's secure storage solution for secrets, keys, and Pangea tokens.
- When the dialog box displays, type a name for the secret in the Name field.
- Select a Vault folder where the secret will be stored for the Folder field.
- Set the expiration date for the secret.
- Type the required information in the Secret field.
- Click Done to save the new secret.
Advanced Settings has options for adding tags and metadata for the secret.
Twilio SMS Settings
Your Twilio phone number can be set up as your multi-factor authentication method for Pangea. You will need the following information from your account in order to successfully configure Twilio:
-
Account SID
-
Twilio Auth Token
-
At least one phone number on Twilio
note:By default, only phone numbers from the US and Canada can be used with Twilio, but you can modify your Twilio Geo Permissions to work with other countries.
Complete the following to setup your Twilio account with Pangea:
-
Navigate to AuthN >> Integrations in the Pangea User Console.
-
Click Twilio SMS Settings.
-
Click the toggle switch to enable Twilio.
-
Type your Twilio Account SID into the provided form.
-
Click Store Twilio Auth Token to store the token on AuthN.
-
In the dialog box that displays, click the calendar icon and then select an expiration date for the token.
-
Paste the Twilio Auth secret into the Secret form and click Done to save.
-
Click Fetch Twilio Numbers to import your Twilio phone numbers into AuthN.
-
Select a number to use with Pangea.
- In order to successfully send messages through Twilio, your selected phone number must be part of a registered A2P 10DLC Campaign. Visit Twilio for additional information.
-
Click Save to save your settings.
You can now use your Twilio phone number with Pangea.
Was this article helpful?